Sunday, November 17, 2013

Cinnamon Raisin Bread

You know that craving that sometimes takes over your whole brain and no matter what you try to do to get rid of it, it just nags and nags at your taste buds until you find yourself drooling?  That has been me with the thought of cinnamon raisin bread for several weeks now.  I tried satisfying this craving by purchasing a loaf of the stuff at the store, but it failed miserably.  It was scrawny and flavorless and basically tasted like cardboard...with raisins.  No umpf.  No pizazz.  No...love. 

I've been messing around with yeast products lately and making lots of homemade breads and other carb'y yummy things, so why can't *I* make a loaf of cinnamon raisin bread? 

I can make this, right?!

Do you want to know why?  Because I'm lazy!  And, every time the thought entered my mind (basically as often as when 16 year boys when they think about sex), I either was in the middle of something, or didn't have enough eggs, or not enough milk, or I needed to clean my kitchen, or....name any other excuse here.

But, the craving was too great.

Let's break out the labor this recipe will generate.  Rising times of 1 hour, 40 minutes and 30 minutes.  Baking time of 45 minutes.  That's close to 3 hours, and doesn't even factor in mixing, kneading and cooling.

Was it worth it?

Fuck yeah. 

Cinnamon Raisin Bread
(makes 2 loaves)

For the dough:
2 1/4 tsp of dry, active yeast (or one envelope)
2 cups milk, warmed
6 1/2 cups of flour, plus more for dusting
1 stick of butter, plus more to lubricate pans
1/2 cup sugar
2 large eggs, plus 1 large egg, lightly beaten
2 1/2 tsp salt
1 cup of raisins
1 tbsp ground cinnamon

For the filling:
1 1/2 cups sugar
2 tbsp ground cinnamon
2 tbsp water

In the large bowl sprinkle yeast over warmed milk and whisk slightly until combined.  Set aside.

Take dried raisins and place in a small bowl covered with hot water.  Set aside.

In the bowl of an electric mixer with a dough hook attachment, add flour, sugar, 2 eggs and salt. Start mixer on low speed and slowly pour in milk mixture.  Once combined, raise the speed to medium and continue to mix until the dough is smooth and pulls away from the sides of the bowl. 


Turn dough onto a lightly floured surface. Pat dough into a 9 inch round, approximately 1'' thick.  Drain raisins from water and pat dry with paper towel.  Place in the middle of the dough round.  Sprinkle raisins with ground cinnamon.  Knead entire mixture until raisins and cinnamon are incorporated.  Place dough ball in a lightly oiled bowl and cover with plastic wrap.  Let rise 1 hour.  (Dough will be doubled in bulk.)


After first rise, return dough to lightly floured work surface and pat into a round.  Fold dough upon itself like a present, and return dough to the bowl with the seam sides down.  Let rise another 40 minutes. 

Near the end of the second rise, combine all of the ingredients for the filling in a small bowl.  Prepare your 2 loaf pans with butter.


Return the dough to a lightly floured surface and divide in half.  Roll one half into a 10 x 12 inch rectangle.  Brush with beaten egg and sprinkle with half of the filling mixture evenly, all the way to the ends.  Fold 3 sides of your rectangle in about an inch or two and tightly roll down from the top, creating a log.  Place log seam side down in the prepared loaf pan.

Roll from the top, down.

Repeat with second half of dough and filling. 

Cover pans loosely with plastic wrap and let rise for the third and final time, for approximately 30 minutes. 

Preheat oven to 425 degrees.

Brush the tops of the loaves with remaining beaten egg and place loaf pans on a lined baking sheet.*  Bake for 45 minutes, rotating half way through baking time.  Remember to use a foil tent if the tops start to brown faster than you'd like. 

Turn bread out onto a wire rack to cool completely before slicing...if you can.  I couldn't.  I waited about 10 minutes in misery before deciding that a burnt mouth wouldn't be too bad.

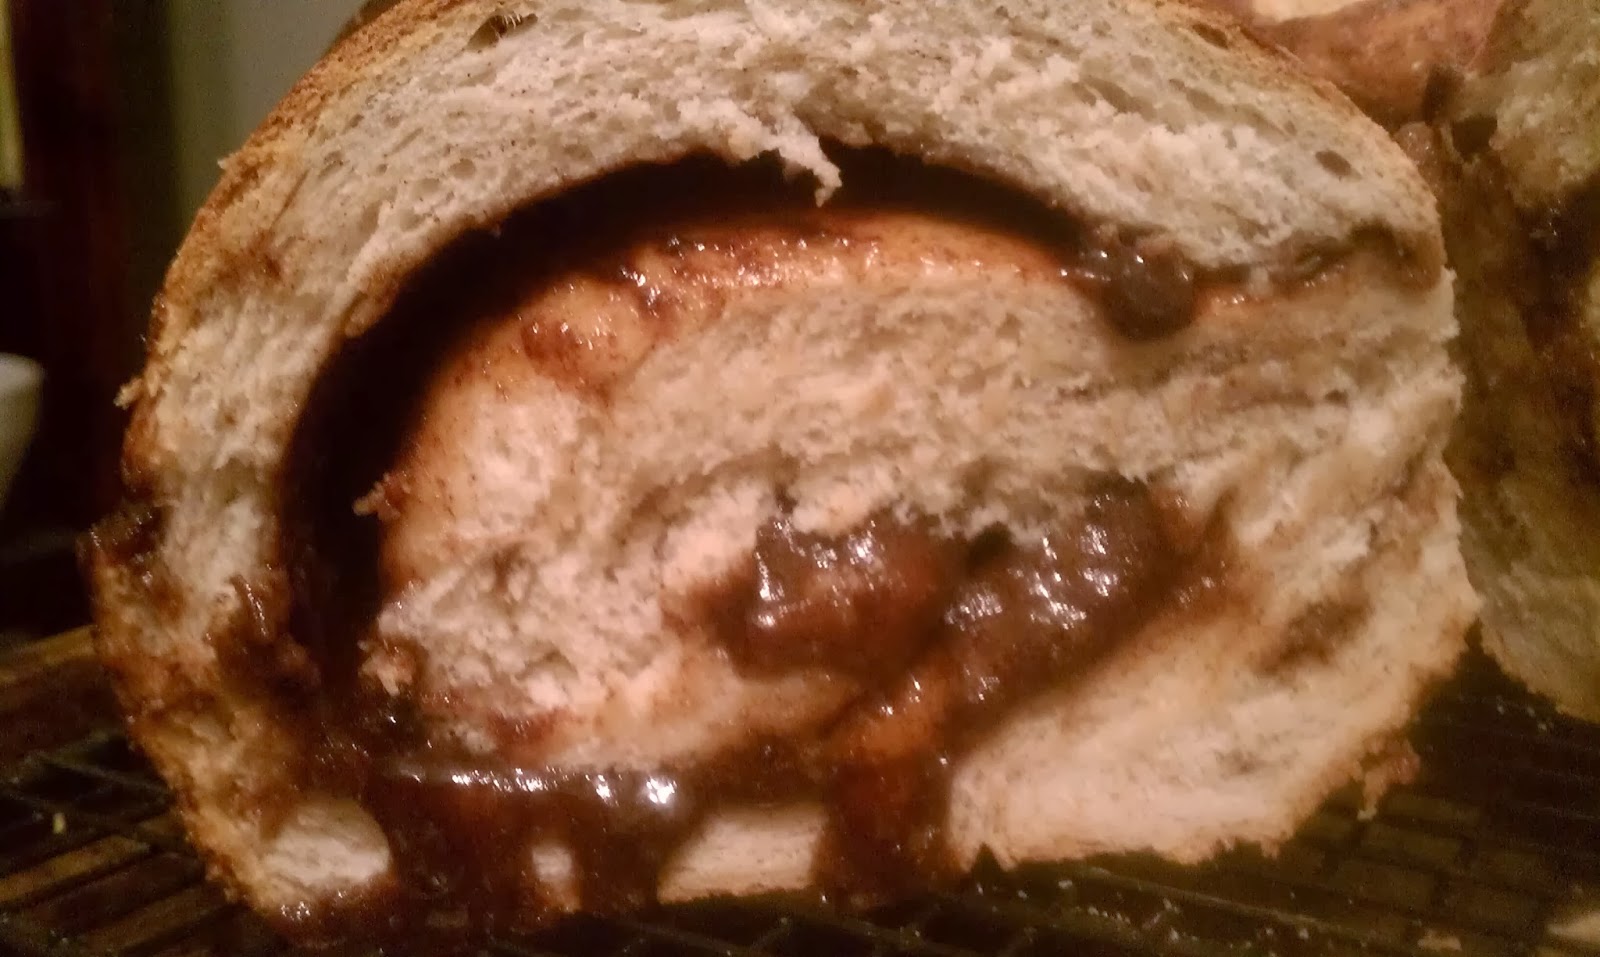
That's a whole lotta goodness right there!

How best to describe the taste?  Hmmmmm....soft, soft bread, juicy raisins and gooey cinnamon sugar filling.  It tastes like heaven.  Like, when I think of relaxing on the cloudy surface of heaven looking down at mere mortals while they are showering, I can see myself feasting on this bread.  It's that good.
 
*I don't know why I didn't do this.  My loaves split slightly and I had a hot sugar eruption.  If I used a baking sheet, it would've caught the mess so that I wouldn't have to clean my oven.  Grrrr....

Friday, July 26, 2013

Bagels!

I like bagels.  I buy them at the grocery store on every "big" shopping day.  In between, I fill my bagel need by spending the additional $2.99 when I grab my morning "Medium Carmel Mocha Iced Coffee with Cream and Sugar please" at Dunkin Donuts.  Bagels are tasty.  They scream comfort. 

I can totally make bagels that taste as good at home, right?  RIGHT???

Yes.  Yes, I can.  And, I did.  And you can too!

The first thing you will need are muscles.  Make a fist and bring it up to your ear.  Feel your bicep?  Good.  You have the necessary muscles needed to make great homemade bagels.  Time to get down to it....

Homemade Bagels

2 teaspoons of active dry yeast
1 ½ tablespoons of granulated sugar
1 ¼ cups of warm water (you may need up to a 1/2 cup more, depending on climate)
3 ½ cups of bread flour
1 ½ teaspoons of salt
¼ cup cornmeal (for dusting)

Directions:
In ½ cup of the warm water, pour in the sugar and yeast. Do not stir. Let it sit for 5 minutes.  Stir the yeast and sugar mixture until it all dissolves in the water.

Mix the flour and salt in the bowl of stand up mixer.  Pour in the warm yeast/water. Mix and stir in additional water as needed. Depending on where you live, you may need to add anywhere from a couple tablespoons to about ¼ cup of water. Your dough should be moist and firm after you have mixed it.

From here, you can keep the dough in the mixer with a dough hook and have the machine knead it, but I feel it's better to hand-knead the dough.  Playing with your food makes the end result more rewarding.  On a well floured countertop, knead the dough for about 10 minutes until it is smooth and elastic. Work in as much flour as possible to form a firm and stiff dough.

Large, raw well-kneaded dough ball.

Lightly brush a large bowl with oil and turn the dough to coat. Cover the bowl with a damp dish towel, or piece of plastic wrap. Let the dough rise in a warm place for about an hour, until the dough has doubled in size. Punch the dough down, and let it rest for another 10 minutes.

Divide your dough into 8 pieces, using a sharp knife.  (For GIANT bagels, cut into 6 pieces, or smaller bagels, 10 pieces.  I recommend being consistant with the size for more thorough baking.)  Shape each piece into a ball.  Take your dough ball and knead it gently against the countertop by moving your hand and the ball in a circular motion until a perfect little dough ball forms.  Repeat with each piece.

Gently press your finger into the center of each dough ball to form a ring. Stretch the ring to about ⅓ the diameter of the bagel and place on a lightly oiled cookie sheet, or a cookie sheet lined with parchment or a silpat. Repeat with each remaining dough ball.  Cover with a damp kitchen towel and allow for a 3rd and final rise, approximately 10 minutes.

Post boil, pre bake.  Like large dumplings!

Preheat your oven to 425 degrees, and start a large stock pot of water to a low boil.  Use a slotted spoon or lower the bagels into the water. Do not overcrowd!  The bagels will float to the top either immediately, or in a couple of seconds.  Let them boil for a minute on each side, for lighter bagels...2 minutes for chewier bagels.  (I went with the 2 minutes!)  Remove from water and place on a baking sheet dusted with 1/4 cup'ish of cornmeal.  If you would like to top your bagels, do it now!  Optional toppings include: caraway seeds, coarse salt, minced fresh/dried garlic, minced fresh/dried onion, poppy seeds, sesame seeds, or all of the above. Or none. It's your call.

Bake in the oven for 20 minutes, until golden brown.  Cool on a wire rack, then enjoy! 


Smother those bad boys with sweet cream butter, or tangy cream cheese, or peanut butter, or jam. 

I ate my first homemade bagel, split, toasted and smeared with regular full-fat cream cheese.  And, I loved every second of it.  I also paired it with Banana Bread Muffins, using this recipe.  But seriously, the bagel would've been enough.  At this point, I was so gosh-darn hungry that I went a little overboard.  :-)


If you are afraid of yeast...don't be.  I use the dry active yeast jars located near the flour in the supermarket.  You can also purchase packets.  Something of note...there is about 2 1/4 tsp of yeast in a single packet.  I've googled that about 30 times over the years because I always forget. 

Monday, January 21, 2013

Pizza Crust

Yesterday I had the biggest craving for pizza.  After spending an hour trying to call my local pizza joint (I kid you not) and not getting through, I gave up and ate a peanut butter and jelly sandwich, which did NOTHING in satisfying my craving.  Today, I took matters in my own hands and decided that if I was going to eat pizza, I was going to have to make it myself, since obviously no one wants to answer my cry for help.

Enter one of my favorite Martha Stewart cookbooks - Favorite Comfort Food, which was printed in 1999. Like most of Martha's recipes, nothing is very basic or easy.  "Proper" pizza dough was going to take about 2 hours to prepare!  I thought to myself..."Self?  You have the day off.  Just do it so you can go to bed with a smile on your face.  Feed to your belly and move on!"

Things you don't need, which are included in the recipe:
  • A pizza wheel - just use a knife
  • A pizza stone - a cookie sheet works just fine
  • A pizza peel - where the FUCK to you store THAT thing?!  Come on Martha!!!
So, although this is Martha's recipe...I have simplified it for the average home cook.  You still will need 2 hours though, so be prepared.

PIZZA DOUGH

(This recipe makes dough for two 12 inch round pizzas or one large square pizza.)

1/4 tsp sugar
1 package of dry yeast, or 2 1/4 tsp
1 cup warm water (about 110 degrees)
2 3/4 cups all-purpose flour
1 tsp salt
1 1/2 tsp olive oil, plus more for oiling your bowl
cornmeal
pizza toppings of your choice

Pour water into a small bowl.  Sprinkle in sugar and yeast and whisk with a fork to dissolve.  Set aside for 5 minutes while yeast activates or "blooms."  Mixture will become slightly foamy.

Meanwhile, mix together flour and salt in a large bowl.  Add olive oil and yeast mixture and combine with your hands, adding more flour if needed, until dough is smooth when squeezed.  Transfer to a clean surface and knead for about a minute, then shape into a ball. 

Oil a large bowl and place your dough ball, smooth side up.  Cover tightly with plastic wrap and place in a warm spot for about 40 minutes, until dough doubles in size.  Remove wrap and punch down with your fist.  Knead for another minute and once again, place dough ball smooth side up and return to let rise a second time, for about 30 minutes until it again doubles in size.

This is when my stomach started to growl.  Preheat your oven to 450 degrees.

Punch down the dough for the second time in preparation for the third rise.  Place dough on a clean, flat surface and let rest for about 10 minutes.  Meanwhile, sprinkle your cooking surface with cornmeal in preparation for your crust!  If making two pizzas, divide your dough in half.*

Using your fists, knuckles and fingers, gently stretch your dough to the size of your cooking surface.  Top your pizza as you wish - I used leftover boneless hot chicken wings, onions, peppers and pepperoni.  And, maybe extra cheese as well.  Bake for 12-18 minutes, let cool and enjoy.

*If you plan on baking only one 12 inch round pizza, wrap up your remaining dough and freeze.  Thaw completely before using. 


This dough had a great chewy crust and baked evenly in my oven, without turning - - but if you have hot spots, you may want to turn once during baking.  This crust has sparked an interest in having a homemade pizza party with my friends and the next time I have a couple hours of free time, I'm making a couple of batches of this dough and freezing it for future uses!