Showing posts with label Breakfast. Show all posts

Monday, July 25, 2022

To zucchini...and beyond!

It's funny how sometimes life throws these head-shaking curve balls at you that don't really make any kind of lasting impact, but can be annoying as all get out.

Last year, we spent a lot of time prepping an overgrown area to become a 50' x 100' vegetable garden. We overturned ground, pulled weeds, added bagged compost, and struggled to maintain water distribution (with a well) and proper harvesting. 

We successfully grew sugar snap peas, tomatoes, potatoes, summer squash, zucchini, cucumbers, onions, pumpkins, and butternut squash. We were less than successful growing peppers and corn - so it became a mission to address the sandy soil which we thought was a corn-growing hindrance.

We hedged our corny bets for this year by creating our own kitchen/yard waste compost area, so that we could reuse our own organic material as fertilizer for the garden and then meticulously maintained and turned that material so that it became rich black gold for the soil. (The addition of chicken poop from the barn also assisted with the compost's nutrient capabilities!) Last Fall we purchased bags of cow shit from a local farmer in our town to enrich our soil even more as we turned over the ground one last time at the end of the growing season. The soil looked (and smelled) like real farm dirt - not sand, or clay which really does have a different aroma. 

We planted with one notation...DO NOT PLANT TOO MANY ZUCCHINI AND SQUASH. Even by only planting a few seeds, we still over-planted.

Every home gardener I know jokes about the productivity of zucchini and summer squash in their gardens on good years, without disease or bugs ravaging your plants. I'm not the first to use "Zucchini Apocalypse" by any means, but I do enjoy conjuring up the images of zombie zucchini, en masse, marching their way into our kitchens, multiplying as they slink along.

I imagine it looks kind of like this:

Fuck. And you should see what is *still* waiting for us in the garden. We just started harvesting, and there are still flowers budding.

I was NOT happy when my husband (yes, husband - as of 7/16/22!) came in loaded to the gills, with vegetables twice the size of my forearms! I knew right there that I was going to have to get creative with the cooking, so that none of this produce goes to waste. Zucchini Bread, which I think is gross, was NOT going to be the end-all to use all of this up. In fact, two cups of grated zucchini was a 1/3 of one of these monsters, and that was after seeding it.

I've been scouring the internets searching for recipes to rid us of the onslaught of zucchini and summer squash. 

Last year I discovered the beauty of Zucchini Relish - it's a simple substitution from your regular cucumber/pickle relish, but with more color. I can pints and half pints using a water bath, and it is delicious. Better yet, no one knows it's not traditional pickled relish until we tell them. Same crunch and bite.

I also make Zucchini and Summer Squash pickles, which are amazing on grilled chicken and burgers. Freezing cubes, rounds, and grated veg is also a go-to, but honestly we are still trying to knock off last year's harvest, so I don't want to go too far in that direction. 

So, as we delve further into the Zucchini Apocalypse, I'll be testing more zucchini and squash recipes and sharing them here. Starting....now.

Cheesy Zucchini Smash Cakes 

Baked zucchini pancakes.

Ingredients:
2 cups grated zucchini
1 cup panko breadcrumbs
1 cup shredded sharp cheddar cheese
2 eggs
1 small shallot, minced
1 clove of garlic, minced
Salt and pepper, to taste

Additions: Substitute summer squash for zucchini; add fresh herbs of your choosing; add crumbled bacon; substitute shallot/garlic for onion and/or garlic powder.

Preheat oven to 400 degrees. 

Grate zucchini, and place in the center of a clean kitchen towel. Gather up the towel, and squeeze out the liquid from the zucchini. (I use this technique with frozen spinach dishes, as well as some jam preparations that I want to reduce liquid for before cooking.) 

 You want a semi-dry ball of zucchini to add to your bowl. In the same bowl, add all ingredients and mix with your hands to incorporate thoroughly.

Once fully incorporated, take 1/4 cup of the mixture and shape it into a mini pancake, pressing hard. Gently place on a silpat-lined baking sheet. Bake at 400 degrees for 25 minutes, or until golden brown.


Serve any way you'd like, but I used them as the English Muffin base for an eggs benedict'like dish that blew us away. (And yes, that is indeed a broken Hollandaise! I froze the last batch I made to see if it would stand up...it doesn't, but it still had all the flavor.) The Zucchini Smash Cakes can also be used as an appetizer with a little sour cream and chive, or crème fraîche and smoked salmon if you want to be fancy. I'm sure a topping of caviar would be lovely for people who like that.


This is most definitely a recipe I am keeping in my zucchini arsenal for the rest of the summer! 

Now I am off to find a zucchini ice cream recipe because if I have to eat the stuff, I might as well find interesting ways to incorporate it.

Sunday, November 17, 2013

Cinnamon Raisin Bread

You know that craving that sometimes takes over your whole brain and no matter what you try to do to get rid of it, it just nags and nags at your taste buds until you find yourself drooling?  That has been me with the thought of cinnamon raisin bread for several weeks now.  I tried satisfying this craving by purchasing a loaf of the stuff at the store, but it failed miserably.  It was scrawny and flavorless and basically tasted like cardboard...with raisins.  No umpf.  No pizazz.  No...love. 

I've been messing around with yeast products lately and making lots of homemade breads and other carb'y yummy things, so why can't *I* make a loaf of cinnamon raisin bread? 

I can make this, right?!

Do you want to know why?  Because I'm lazy!  And, every time the thought entered my mind (basically as often as when 16 year boys when they think about sex), I either was in the middle of something, or didn't have enough eggs, or not enough milk, or I needed to clean my kitchen, or....name any other excuse here.

But, the craving was too great.

Let's break out the labor this recipe will generate.  Rising times of 1 hour, 40 minutes and 30 minutes.  Baking time of 45 minutes.  That's close to 3 hours, and doesn't even factor in mixing, kneading and cooling.

Was it worth it?

Fuck yeah. 

Cinnamon Raisin Bread
(makes 2 loaves)

For the dough:
2 1/4 tsp of dry, active yeast (or one envelope)
2 cups milk, warmed
6 1/2 cups of flour, plus more for dusting
1 stick of butter, plus more to lubricate pans
1/2 cup sugar
2 large eggs, plus 1 large egg, lightly beaten
2 1/2 tsp salt
1 cup of raisins
1 tbsp ground cinnamon

For the filling:
1 1/2 cups sugar
2 tbsp ground cinnamon
2 tbsp water

In the large bowl sprinkle yeast over warmed milk and whisk slightly until combined.  Set aside.

Take dried raisins and place in a small bowl covered with hot water.  Set aside.

In the bowl of an electric mixer with a dough hook attachment, add flour, sugar, 2 eggs and salt. Start mixer on low speed and slowly pour in milk mixture.  Once combined, raise the speed to medium and continue to mix until the dough is smooth and pulls away from the sides of the bowl. 


Turn dough onto a lightly floured surface. Pat dough into a 9 inch round, approximately 1'' thick.  Drain raisins from water and pat dry with paper towel.  Place in the middle of the dough round.  Sprinkle raisins with ground cinnamon.  Knead entire mixture until raisins and cinnamon are incorporated.  Place dough ball in a lightly oiled bowl and cover with plastic wrap.  Let rise 1 hour.  (Dough will be doubled in bulk.)


After first rise, return dough to lightly floured work surface and pat into a round.  Fold dough upon itself like a present, and return dough to the bowl with the seam sides down.  Let rise another 40 minutes. 

Near the end of the second rise, combine all of the ingredients for the filling in a small bowl.  Prepare your 2 loaf pans with butter.


Return the dough to a lightly floured surface and divide in half.  Roll one half into a 10 x 12 inch rectangle.  Brush with beaten egg and sprinkle with half of the filling mixture evenly, all the way to the ends.  Fold 3 sides of your rectangle in about an inch or two and tightly roll down from the top, creating a log.  Place log seam side down in the prepared loaf pan.

Roll from the top, down.

Repeat with second half of dough and filling. 

Cover pans loosely with plastic wrap and let rise for the third and final time, for approximately 30 minutes. 

Preheat oven to 425 degrees.

Brush the tops of the loaves with remaining beaten egg and place loaf pans on a lined baking sheet.*  Bake for 45 minutes, rotating half way through baking time.  Remember to use a foil tent if the tops start to brown faster than you'd like. 

Turn bread out onto a wire rack to cool completely before slicing...if you can.  I couldn't.  I waited about 10 minutes in misery before deciding that a burnt mouth wouldn't be too bad.

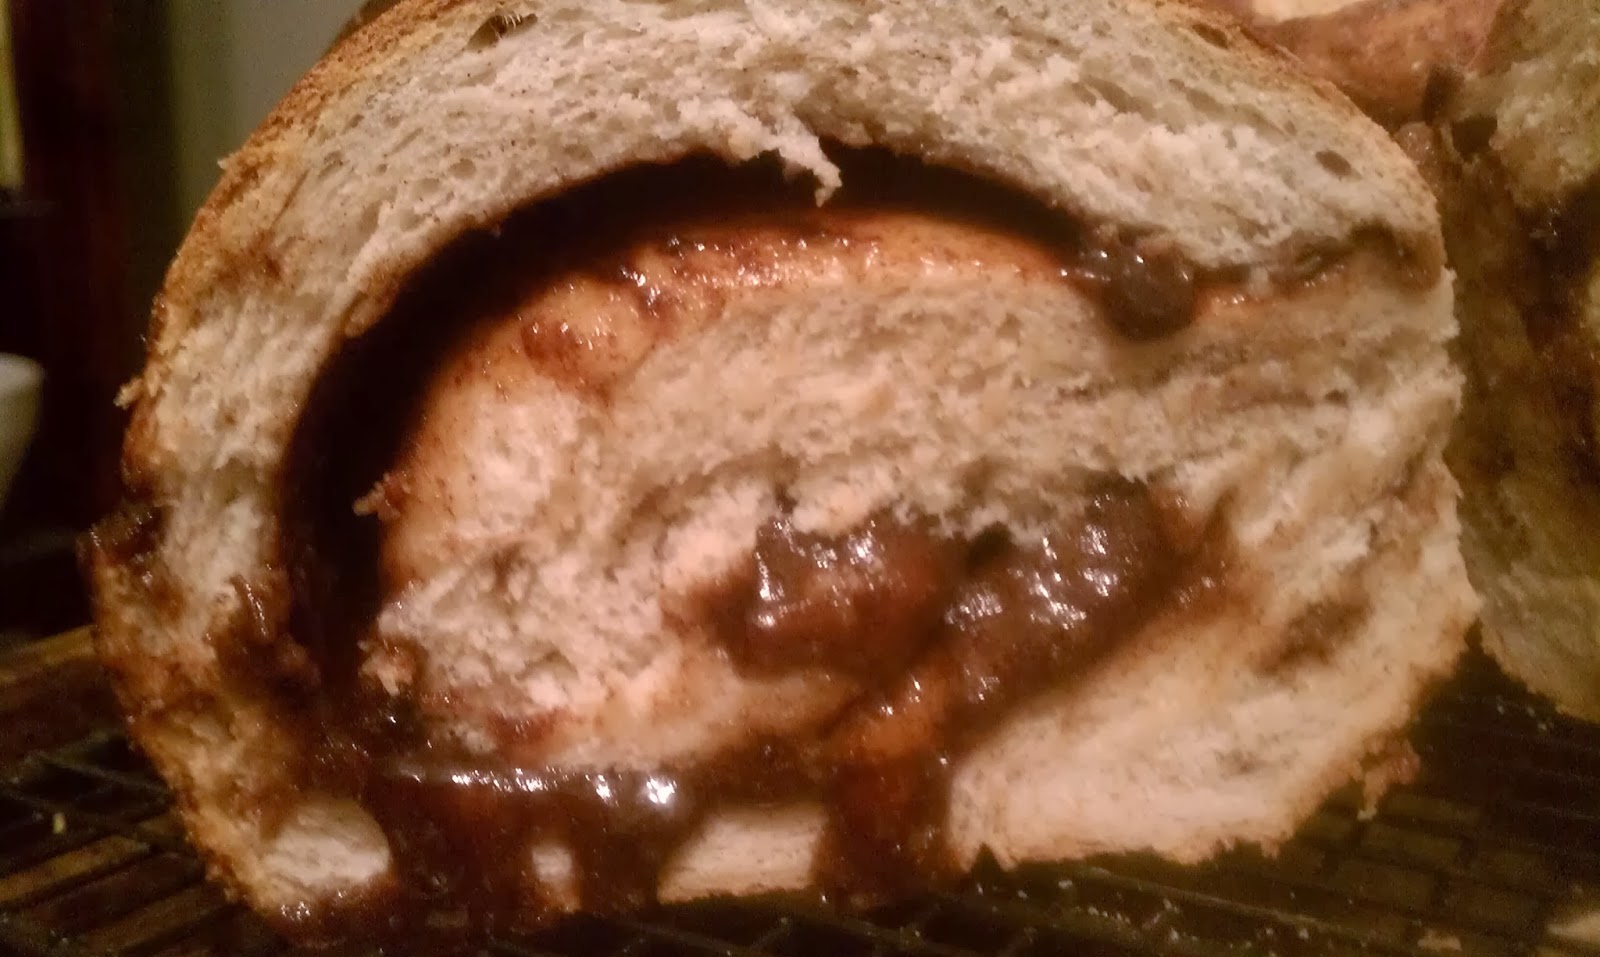
That's a whole lotta goodness right there!

How best to describe the taste?  Hmmmmm....soft, soft bread, juicy raisins and gooey cinnamon sugar filling.  It tastes like heaven.  Like, when I think of relaxing on the cloudy surface of heaven looking down at mere mortals while they are showering, I can see myself feasting on this bread.  It's that good.
 
*I don't know why I didn't do this.  My loaves split slightly and I had a hot sugar eruption.  If I used a baking sheet, it would've caught the mess so that I wouldn't have to clean my oven.  Grrrr....

Friday, July 26, 2013

Bagels!

I like bagels.  I buy them at the grocery store on every "big" shopping day.  In between, I fill my bagel need by spending the additional $2.99 when I grab my morning "Medium Carmel Mocha Iced Coffee with Cream and Sugar please" at Dunkin Donuts.  Bagels are tasty.  They scream comfort. 

I can totally make bagels that taste as good at home, right?  RIGHT???

Yes.  Yes, I can.  And, I did.  And you can too!

The first thing you will need are muscles.  Make a fist and bring it up to your ear.  Feel your bicep?  Good.  You have the necessary muscles needed to make great homemade bagels.  Time to get down to it....

Homemade Bagels

2 teaspoons of active dry yeast
1 ½ tablespoons of granulated sugar
1 ¼ cups of warm water (you may need up to a 1/2 cup more, depending on climate)
3 ½ cups of bread flour
1 ½ teaspoons of salt
¼ cup cornmeal (for dusting)

Directions:
In ½ cup of the warm water, pour in the sugar and yeast. Do not stir. Let it sit for 5 minutes.  Stir the yeast and sugar mixture until it all dissolves in the water.

Mix the flour and salt in the bowl of stand up mixer.  Pour in the warm yeast/water. Mix and stir in additional water as needed. Depending on where you live, you may need to add anywhere from a couple tablespoons to about ¼ cup of water. Your dough should be moist and firm after you have mixed it.

From here, you can keep the dough in the mixer with a dough hook and have the machine knead it, but I feel it's better to hand-knead the dough.  Playing with your food makes the end result more rewarding.  On a well floured countertop, knead the dough for about 10 minutes until it is smooth and elastic. Work in as much flour as possible to form a firm and stiff dough.

Large, raw well-kneaded dough ball.

Lightly brush a large bowl with oil and turn the dough to coat. Cover the bowl with a damp dish towel, or piece of plastic wrap. Let the dough rise in a warm place for about an hour, until the dough has doubled in size. Punch the dough down, and let it rest for another 10 minutes.

Divide your dough into 8 pieces, using a sharp knife.  (For GIANT bagels, cut into 6 pieces, or smaller bagels, 10 pieces.  I recommend being consistant with the size for more thorough baking.)  Shape each piece into a ball.  Take your dough ball and knead it gently against the countertop by moving your hand and the ball in a circular motion until a perfect little dough ball forms.  Repeat with each piece.

Gently press your finger into the center of each dough ball to form a ring. Stretch the ring to about ⅓ the diameter of the bagel and place on a lightly oiled cookie sheet, or a cookie sheet lined with parchment or a silpat. Repeat with each remaining dough ball.  Cover with a damp kitchen towel and allow for a 3rd and final rise, approximately 10 minutes.

Post boil, pre bake.  Like large dumplings!

Preheat your oven to 425 degrees, and start a large stock pot of water to a low boil.  Use a slotted spoon or lower the bagels into the water. Do not overcrowd!  The bagels will float to the top either immediately, or in a couple of seconds.  Let them boil for a minute on each side, for lighter bagels...2 minutes for chewier bagels.  (I went with the 2 minutes!)  Remove from water and place on a baking sheet dusted with 1/4 cup'ish of cornmeal.  If you would like to top your bagels, do it now!  Optional toppings include: caraway seeds, coarse salt, minced fresh/dried garlic, minced fresh/dried onion, poppy seeds, sesame seeds, or all of the above. Or none. It's your call.

Bake in the oven for 20 minutes, until golden brown.  Cool on a wire rack, then enjoy! 


Smother those bad boys with sweet cream butter, or tangy cream cheese, or peanut butter, or jam. 

I ate my first homemade bagel, split, toasted and smeared with regular full-fat cream cheese.  And, I loved every second of it.  I also paired it with Banana Bread Muffins, using this recipe.  But seriously, the bagel would've been enough.  At this point, I was so gosh-darn hungry that I went a little overboard.  :-)


If you are afraid of yeast...don't be.  I use the dry active yeast jars located near the flour in the supermarket.  You can also purchase packets.  Something of note...there is about 2 1/4 tsp of yeast in a single packet.  I've googled that about 30 times over the years because I always forget. 

Sunday, January 25, 2009

Coffee Cake

This coffee cake recipe is so good, and so easy, that I have already made it 5 times! It's moist and light, and the crumb topping is to die for.


(BLUEBERRY) COFFEE CAKE

1 stick butter, softened
2 cups flour
1 tsp baking soda
1 tsp baking powder
1 tsp salt
1 cup sugar
2 large eggs
1 tsp vanilla extract
1 cup sour cream
1 cup frozen or fresh blueberries (thawed and drained, if frozen)
1 cup streusel (recipe below)
powdered sugar glaze (recipe below)

Preheat oven to 350 degrees. Butter an 8 or 9 inch tube pan, set aside.

In the bowl of an electric mixer fitted with a paddle attachment, cream butter, sugar, eggs and vanilla until light and fluffy. Add 1 cup of flour, salt, baking powder and baking soda and beat until combined. Add 1/2 cup of sour cream, mixing well. Repeat process with the remaining flour and sour cream.

Spoon half of the batter into the prepared pan. Arrange the blueberries in a single layer on top of the batter - making sure to keep them away from the sides of the pan so they don't burn. Top with remaining batter, making sure it is evenly distributed. Sprinkle the streusel over the top.


Bake for 60 minutes, or until cake is golden and center is completely set. Transfer pan to a wire rack and let cool for 15 minutes. Remove cake from pan, and let cool completely. Before service, spoon the glaze over the cake, letting it drip down the sides. Dig in!


STREUSEL

2 1/4 cups flour
3/4 cup packed light brown sugar
2 1/4 tsp ground cinnamon
1 tsp coarse salt
1 1/2 sticks butter, room temperature

In a medium bowl, combine the flour, sugar, cinnamon and salt. Cut in butter using a pastry fork until large, moist clumps form. Makes 4 cups.


GLAZE

1 cup confectioner's sugar
2 tbsp milk

Whisk sugar and milk together until completely smooth. Immediately drizzle over cake.

Monday, December 24, 2007

English Muffin Bread

I'm not sure where this recipe originated, but my family has been preparing and eating it for as long as I can remember. If you like to nosh on traditional English Muffins, then you will love the nooks and cranies that you can bake up yourself with very little effort. Plus, chances are - you will have most ingredients already in your pantry.

Each batch makes two loafs...eat the first, and wrap the second tightly in foil, the freeze.

ENGLISH MUFFIN BREAD

2 pkg. yeast
6 cups flour
1 tbsp sugar
2 tsp salt
2 cups milk
1/4 tsp baking soda
1/2 cup water
cornmeal

Grease bread pans and sprinkle with cornmeal. Set aside.

In a microwave-safe bowl, heat water and milk until just warmed in a microwave - about 90 seconds. In a mixer, combine 3 cups of flour, yeast, sugar, salt and baking soda. Add warmed liquids to dry ingredients, and beat well to combine. Stir in remaining 3 cups of flour. (Dough will be sticky.)

Transfer dough to prepared bread pans and let rise for 45 minutes - covered with a damp tea towel and left in a semi-warm spot. Meanwhile, preheat oven to 400 degrees. Bake for 25 minutes. While still hot, sprinkle top of bread with cornmeal. Once cooled to the touch, remove from bread pan and cool completely on wire rack.

To serve: Slice bread and toast until browned. Spread with real butter or jam!


It really is a little slice of heaven.

Wednesday, October 03, 2007

Mixed Berry Bundt Cake

Wow, it's been a long time since I posted last! I'm totally slapping myself on the wrist! Truth of the matter is, I have been cooking - just not anything that's picture worthy...or recipe posting worthy. I'm hoping that this weekend I will be able to get my "cooking mojo" working again.

Until then, here is a fantastic recipe for a cake I made which was mostly gobbled up by the puppies only about an hour afterwards, while I thought it was safely cooling. They allowed me some of the crumbs. Note to self...Sparky can now reach the table with his grubby little paws.


The little that I was able to taste was moist (OMG, so moist) and sweet and simply delicious. It was also incredibly easy to make! I used frozen strawberries and raspberries because the fresh ones at the market looked terrible, and I really wanted to try the recipe. It was a successful substitute!

MIXED BERRY BUNDT CAKE

5 eggs
1 2/3 cups granulated sugar
20 Tbs. (2 1/2 sticks) unsalted butter, at room temperature, cut into small pieces
2 Tbs. kirsch or other fruit liqueur
2 1/2 cups all-purpose flour
1 tsp. baking powderPinch of salt
3 1/2 cups raspberries
1 1/2 cups blueberries or blackberries
Confectioners’ sugar for dusting (optional)

Preheat an oven to 325°F. Butter and flour a bundt cake pan.

In a large bowl, blend the eggs and granulated sugar. Using an electric mixer, beat in the butter and liqueur until fluffy. Add all but 2 Tbs. of the flour and the baking powder and salt, and beat until well incorporated and no lumps remain. In another bowl, combine 1 1/2 cups of the raspberries and the blueberries with the remaining 2 Tbs. flour. Toss to coat the berries evenly with the flour. Using a rubber spatula, gently fold the berries into the batter. Pour the batter into the prepared pan. Bake until a wooden skewer inserted into the center of the cake comes out clean, about 1 hour.

Transfer the pan to a wire rack and let the cake cool in the pan for 20 to 25 minutes. Unmold the cake onto the rack and let cool completely. Fill the center of the cake with the remaining 2 cups raspberries. Dust the cake with confectioners' sugar. Serves 10 to 12.


Yum, yum!