Wednesday, December 27, 2006

Tirami-kat...no...su

Tiramisu is often described as "a cool, refreshing Italian dessert that once tasted, leaves an indelible impression." It's so true! I'm not a coffee fan (I know, I know - I just don't drink the stuff), but I love this dessert. It is light, yet satisfying, and so delicious with just a hint of liquor in the background. I made mine in the traditional way, with strong coffee, chocolate shavings, landyfingers, and mascarpone cheese. The recipe literally takes 10 minutes to put together, making it perfect for your next party. Plus, you don't need to heat your oven!

CLASSIC TIRAMISU

2 packages of
ladyfingers
16 oz. macarpone cheese
1 1/4 cups heavy cream
2/3 cup confectioner's sugar
1/4 tsp vanilla extract
1 cup strong coffee, or espresso
6 tbsp kahlua liquor
1 bittersweet chocolate bar*

Beat heavy cream until soft peaks form. In another bowl, mix together mascarpone cheese, confectioner's sugar, vanilla extract and 3 tbsp of the Kahlua liquor. Carefully fold in the heavy cream, until well combined. Set aside.

In a small, shallow bowl, combine kahlua and coffee.

Place a layer of ladyfingers into the serving dish (I used a triffle dish). Spoon 1/2 of the coffee mixture over the ladyfingers. Then, place 1/2 of your cheese mixture over the drunken ladyfingers. Grate some chocolate over the first layer. Begin your second layer with the ladyfingers yet again - spooning the rest of the coffee mixture over then, then covering with the rest of the cheese mixture. Finally, grate the rest of the chocolate on top.

Cover well with plastic and chill for at least 2 hours, or overnight - for best results.


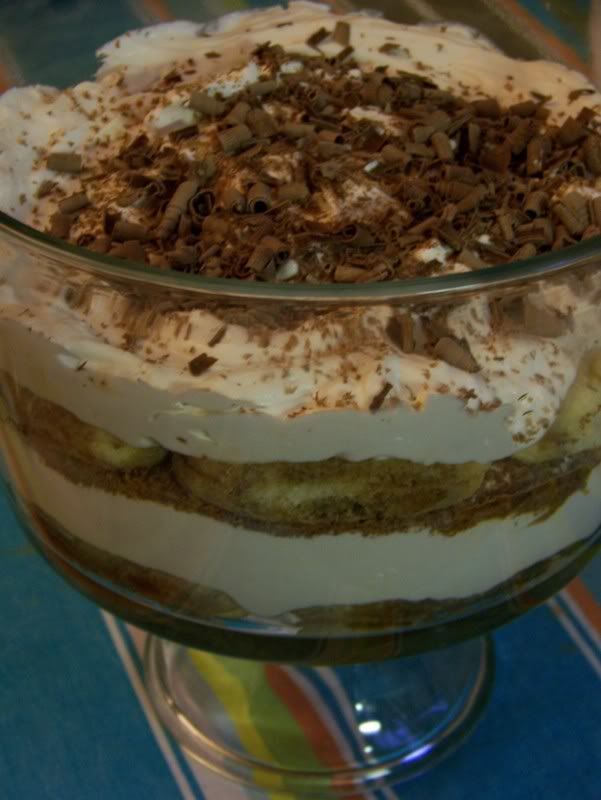
The ladyfingers will become moist from the coffee, and the whole dessert will just bloom with flavor. Once you know the process, you can change up the recipe by using berries, instead of chocolate, and by replacing the kahlua liquor with a raspberry liquor! Or, you can mix in a little cocoa powder into the cheese mixture and make a chocolate tiramisu. The possibilities are as endless as your imagination.

*I used two devices to grate the chocolate bar...my microplane for small shavings, and a regular old vegetable peeler for the small curls. The curls made the presentation a little fancier.


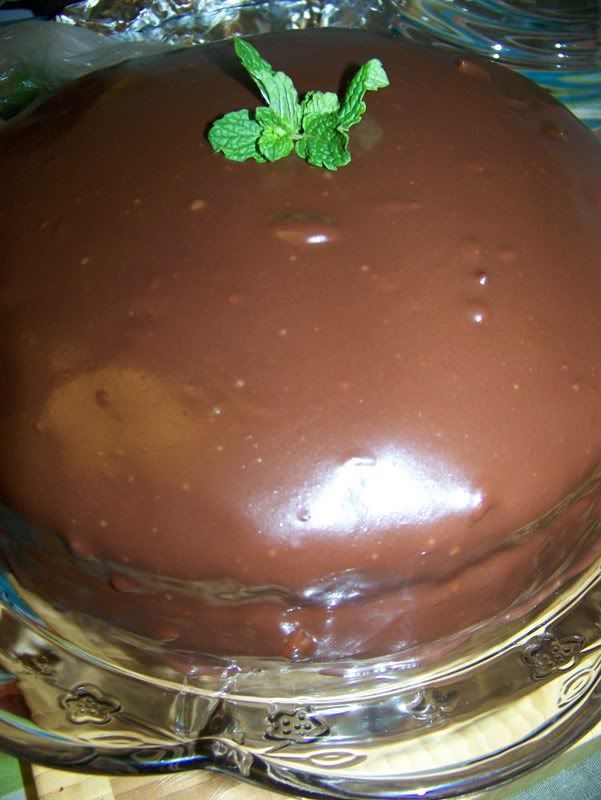
(Close up of the top layer)

Tuesday, December 26, 2006

Brunch


I have to tell you, the highlight of Christmas brunch was the most unappitizing item on the table. It had this browned, dry look that everyone seemed to be afraid of. (Not at all like what the picture was supposed to look like!) I was the first to dig in and try - and the dish was absolutely amazing. Really tasty! And, very moist and succulent on the inside.

HAM AND BROCCOLI STRATA (I cut the recipe in half, and used a 8x8 inch glass baking dish.)

12 slices white bread
12 ounces sharp cheddar cheese, grated
1 (10 oz) package frozen chopped broccoli, thawed and drained
2 cups cooked ham, cubed
3 cups Half & Half
6 eggs
2 tbsp finely chopped onion

Tear bread into pieces, and place in the bottom of a greased 13x9 inch baking pan. Layer with cheese, broccoli and ham. Place remaining bread on top, so that everything is covered.

Beat together all remaining ingredients in a medium bowl. Pour mixture evenly over bread. Cover with plastic wrap, and chill for 8 hours or overnight.

Preheat oven to 350 degrees. Uncover; bake for 60-75 minutes or until set and golden brown. If browning too quickly, loosely cover with foil. Let stand 15 minutes.
(looks yuck, tastes yum!)

I like dishes that I can prepare in advance, so that I am not running around the day of the gathering...this one is perfect - very simple, with great flavor as your reward. It might be kind of cool (and will probably look a little better!) if you use cookie cutters to cut the top layer of bread - then you'll have little hearts or stars staring back at you and your guests. LOL

Talk about "ta-da!"

My family had Christmas Eve dinner over at an uncle's house. This uncle happens to be a fantastic cook, and had everything planned to perfection...but, because I like to cook myself - I had to bring something.

I made and brought the most ridiculous thing I could come up with.


RAINBOW JELL-O MOLD

5-6 different flavors of jell-o (I used cranberry, orange, lemon, lime, blueberry, grape and strawberry - in that order from first to last)
1 container of sour cream
boiling water

Prepare first packet of jell-o, using 1 1/4 cups of boiling water. Stir completely to dissolve jell-o crystals. Pour 1/2 of the mixture into a bundt cake pan, and chill. Meanwhile, stir to dissolve 1 tbsp sour cream in leftover jell-o mixture. (This will create the cloudy layer.) Once first layer is set, spoon in second layer. Repeat this step until the bundt pan is filled, or you are finished with your packets of jell-o.

Chill in the refridgerator, covered with plastic, for 1-2 days before service, so that the jell-o mold holds it's shape.

To unmold, dip bundt pan in hot water for approximately 30 seconds, then invert onto a dish.

Everyone will be wow'ed. Garranteed.

Thursday, December 21, 2006

Holiday meal planning

On Christmas Eve, I will be heading up to the Boondocks to celebrate with my extended family. One of my uncles will be preparing a huge meal (that I have heard rumblings about since last year!) and requested that we all bring dessert. I have something completely audacious planned...which I am keeping a secret, in case it bombs. Plus, I don't want the cat out of the bag for those family members who read this blog!

My immediate family celebrates twice on Christmas Day. We do a huge brunch, and a huge dinner. Fasting happens on December 26!

This is what is planned...with my offerings marked with a *.

Christmas Day Brunch

*Dutch Pancakes (they are a little special, because they have a layer of apples in them!)
*Ham and Broccoli Strata
*English Muffin Bread
Eggs
Sausage and Bacon
French Toast
Fruit Salad
*Leek and Turkey Phyllo Pie, minus the turkey
*Mimosas

Christmas Day Dinner

*Walnut Cranberry Stuffed Brie (appetizer)

Pork Crown Roast
*Dried Cranberry and Apple Stuffing
*Mashed Potatoes
*9 Grain Rolls
Steamed Broccoli and Baby Carrots
Coleslaw
*Chunky Cinnamon Apple Sauce

*Traditional Tiramisu (dessert!)

...I'm off to find some lady fingers...

Monday, December 18, 2006

Christmas Cookies!


Here is the spread of Christmas Cookies I made this year...it was quite an undertaking, to say the least. My feet and back hurt like a mofo, but my heart is warm and full - so it is all worth it!

Kelsey and Shakeer did indeed come over to "help." They were very excited to be assisting in this task. They took turns being in charge of the wet and dry ingredients, and turning the knob on the KitchenAid. They washed their hands about 40 times each, and got to sample each of their creations. Both now know what a silpat is, and both can now crack an egg with ease. (We did sacrifice a couple of eggs as testers. RIP)


I guess the best place to start is from the first tier.

From clockwise, starting at 12:00 - Delux Sugar Cookies, Gingerbread People (let's be politically correct here!), Thumprints, Cream Cheese Cookies, Chocolate-Mint Snow-Top Cookies and finally Peanut Butter Cookies with Reese's Peanut Butter Cups.

DELUX SUGAR COOKIES

1 cup butter, softened
1 1/2 cups confectioner's sugar
1 egg
1 tsp vanilla
1/2 tsp almond extract
2 1/2 cups flour
1 tsp baking soda
1 tsp cream of tartar
Icing (recipe to follow)

In a large bowl, mix together butter, confectioner's sugar, egg, vanilla and almond extracts. Blend in flour, soda and cream of tartar. Form dough into a ball, cover and chill for 2-3 hours.

Preheat oven to 375 degrees. Divide dough into half. Roll each portion of dough 1/4 inch thick on a lightly floured surface. Cut into desired shapes. (We used trees, stars and bells) Place on a greased cookie sheet. Bake 7-8 minutes. Cool on a wire rack.

SUGAR ICING

1 cup confectioner's sugar
2-3 tbsp milk
2-3 drops of edible food coloring

In a small bowl, combine sugar with 1 tbsp of milk. Grandually increase milk by the tbsp until you achieved the desired consistancy. Add food coloring of choice.

TIP: We grew up "painting" these cookies with brand new dollar store paint brushes, so this is how we decorated these as well. I made the icing a little thicker (didn't use as much milk), so that it was easier to transfer from the bowl to the cookie - without the mess in-between. I let the kids decide which colors they wanted to use, and also let them further their decorating power by offering sprinkles and colored sugar.

*********************************************

GINGERBREAD

1/2 cup shortening
1/2 cup sugar
1/2 cup dark molasses
1/4 cup water
2 1/2 cups flour
3/4 tsp salt
1/2 tsp soda
3/4 tsp ginger
1/4 tsp nutmeg
1/8 tsp allspice

Cream shortening and sugar. Blend in molasses, water, flour, salt, soda, ginger, nutmeg and allspice. Form dough into a ball, cover and chill for 2-3 hours.

Preheat oven to 375 degrees. Roll dough out onto a lightly floured surface. Cut shapes with desire cookie cutters, and place on an ungreased cookie sheet.

Decorate for baking (unless you are decorating with icing - then wait!). Bake for 10-12 minutes. Immediately remove from cookie sheet, and cool on a wire rack. Decorate with icing, if desired.

**********************************************

THUMBPRINTS - one of my family's favorites (I always double the recipe)

1/4 cup butter, softened
1/4 cup shortening
1/4 cup packed brown sugar
1 egg, separated
1/2 tsp vanilla
1 cup flour
1/4 tsp salt
3/4 cup finely chopped walnuts
your choice of jam, jelly or preserves

Preheat oven to 350 degrees.

Mix butter, shortening, sugar, egg yolk and vanilla in a large bowl. Work in flour and salt until dough holds together. In a small bowl, please egg white, and beat slightly. In a slightly larger bowl, place walnuts. Shape dough into 1 inch balls. Dip each ball into egg white, then roll in nuts. Place balls 1 inch apart on an ungreased cookie sheet. Press your thumb deeply into the center of each ball. Bake for 10 minutes. Remove and cool on a wire rack. Fill thumb holes with your jam/jelly/preserve of choice.


*******************************************

CREAM CHEESE COOKIES (my personal favorite of all time!!!!!!)

1/4 cup butter, softened
1 pakage (8 oz) cream cheese, softened
1 egg
1/4 tsp vanilla
1 package yellow cake mix
1 jar cherries (without stems)

Cream butter and cheese in a bowl. Blend in egg and vanilla. Add the dry cake mix, 1/3 at a time, mixing well in between. Gather dough into a ball, cover and chill for 30 minutes. (If you are a fan of raw cookie dough - you must take a taste of this...it is incredible!) Meanwhile, slice each cherry in half, and set aside.

Preheat oven to 375 degrees. Form dough into 1/2 inch balls. Drop on an ungreased cookie sheet. Bake 8-10 minutes, until dough become tan. Immediately, place cherry in the center. Cool on a wire rack.


************************************

CHOCOLATE-MINT SNOW-TOP COOKIES

1 1/2 cups flour
1 1/2 tsp baking powder
1 1/2 cups semisweet chocolate chips
6 tbsp butter, softened
1 cup sugar
2 eggs
1 1/2 tsp vanilla
1/4 tsp salt
1/4 tsp peppermint extract
Powdered sugar

Combine flour, baking powder and 1/4 tsp salt. Set aside. In a saucepan heat 1 cup of chocolate chips over low heat until melted, stirring constantly. Beat butter with a mixer on medium speed for 30 seconds. Beat in granulated sugar until combined. Beat in melted chocolate, eggs, vanilla and mint flavoring. Stir in flour mixture and remaining chocolate pieces. Wrap dough in plastic, freeze for 30 minutes or until firm enough to shape.

Preheat oven to 350 degrees. Shape dough into 1 inch balls. Roll balls in powdered sugar. Place balls about 2 inches apart on an ungreased cookie sheet. Bake for 10-12 minutes, or until tops are crackled. Transfer cookies to wire rack and cool completely.

*********************************

PEANUT BUTTER COOKIES with REESE'S PEANUT BUTTER CUP CENTERS

1/2 cup shortening
1/2 cup smooth peanut butter (plus, 1 tbsp)
1/2 cup sugar
1/2 cup packed brown sugar
1 egg
1 cup flour
3/4 tsp soda
1/2 tsp baking powder
1/4 tsp salt
Mini Reese's Peanut Butter cups, unwrapped

Mix shortening, peanut butter, sugars and egg. Blend in flour, soda, powder and salt. Cover and chill for 1 hour.

Preheat oven to 350 degrees. Prepare a mini muffin tray, by spraying cups with non-stick butter spray. Shape dough into 1 inch balls. Place each ball into the cup of the muffin tray. Bake 10-12 minutes. Immediately press one unwrapped Reese's Peanut Butter Cup in the center of each cookie. Let cool, then carefully remove each cookie to a wire rack to cool completely.

In between each batch, the kids got to shake all their wiggles out to some rockin' Christmas music (there*is* such a thing!).


Friday, December 15, 2006

C is for COOKIE


My niece and nephew, Kelsey (6) and Shakeer (9) are coming over this weekend for some quality cookie baking time! As I told a co-worker, I am so excited. No, really! I am! I think it is so important to cook with (your) kids, and since I don't have any of my own - it's nice that I can borrow a couple of someone elses. Kelsey, in particular, loves to help out in the kitchen. She will wash or dry dishes, put things away that she can reach and help clear the table.

I've also found that children will try more things if they assist with either picking something out, or helping to cook the item. Like, Shakeer ate all of his brussel sprouts the last time he was over, because *he* picked them out to go with our meal. I don't think the kid would have ever touched a brussel sprout if he didn't take some kind of responsibility with the meal planning. Ownership is a good thing!

Anyway, back to the cookies...here is our list for tomorrow. Hopefully, we make a good dent in it:
Strawberry Cheesecake Bars
Chocolate Truffles (some rolled in cocoa, and others dipped in chocolate)
Marble Peanut Clusters
Russian Teacakes
Delux Sugar Cookies with a confectioner's sugar icing
Cream Cheese Cookies (my personal favorite)
Thumprint Cookies
Macaroons
Lemon Drops
Chocolate Mint Snow-Top Cookies
Patridge-In-A-Pear Tree Cookies (depending on if I can find the correct cookie cutters)
No-Bake Buckeyes
Ginerbread People
Rasberry-Almond Ribbons
Mint Chocolate Chip Cookie Bars

I'm sure there will be some finger dips - - but there will also be a lot of hand washing, so don't fret. Besides, the heat should kill any kiddie germs that linger. I'll make sure the kids know the rules of nose and wedgie picking.

I'll report back with our progress, with recipes and pictures.

Thursday, December 14, 2006

Hey, Garlic Breath!

Be forwarned - this recipe contains raw eggs.

GRILLED CHICHEN CAESAR SALAD (for 2)

1 garlic clove
4 anchovy filets (packed in olive oil)
2 fresh egg yolks
1 tbsp dijon mustard
juice of 2 lemons
salt and pepper, to taste
1/2 cup olive oil
1/4 cup freshly grated parmesan cheese, plus extra for garnish
2 tbsp water, if necessary

2 boneless, skinless chicken breasts - butterflied
2 heads of romaine lettuce
Italian croutons - bought or homemade*

Season chicken with salt and pepper. Grill until chicken is fully cooked through, turning once. "Tent" with foil, and set aside.

In a food processor, place the anchovies, garlic, lemon juice, egg yolks, and mustard and process until mixture is smooth. With the food processor on, stream in olive oil slowly to emulsify. Stir in parmesan cheese, and add water if needed to achieve the consistancy you'd like. Season with salt and pepper. (Taste the dressing before you season though - the anchovies are salty, and you don't want to over-season!)

To assemble the salad, wash, dry and tear your lettuce into a large bowl. Add enough dressing to coat to your liking. Plate with grilled chicken and croutons, then grate a little extra parmesan cheese for garnish.


*If you are making your own croutons: Preheat oven to 350 degrees. Cube up some day old Italian bread. On a small cookie sheet, pile bread, drizzle with olive oil, and season with salt, pepper, garlic powder, dried oregano and dried parsley. Toss to coat. Bake in oven approximately 7-10 minutes, or until bread dries out and turns golden.

Remember...2 garlics cancel each other out. Even though there is only 1 garlic clove in the dressing, it is still *wicked* garlic'y!

Please don't be afraid of the anchovy!!! You would never know that it was in there. And, there is no fishy smell when you open the little tin they come in. Honestly, I was afraid - - and it was FINE. Seriously the best caesar salad I've ever had. I am so patting myself on the back with this one.

Gagets and Gizmos

What I could not live without...

My KitchenAid stand mixer. I have to admit, I admired from afar for a very long time! I caressed the silky smooth coating on the body, manipulated the handle of the joint that pulls the bowl to the mixer, gazed at the many attachments - holding them up to the light to get a good bird's eye view. The mixer itself is one sexy piece of equipment.

Then, one day - the opportunity to purchase one fell right in my lap. Like a good infomercial, the ad said "you will not pay $299, or even $199. Not even $150 - we'll sell it to you for the low, low price of only $99.99! Free shipping! Act now, or forever wonder what could've been!" And, I did. It was a refurbished model. I was a little worried about how it would hold up, being already refurbished, but my fears have been calmed. It's been 3 years, and my KitchenAid Mixer has gone the distance.

It beats egg whites in a jiffy. Kneading bread dough is a snap. Cool whip is no longer a staple, since I can make fresh whipped cream while I pull out the plates for dessert.


Life could not be easier with all the attachments too. Personally, I own the pasta attachment - but they also have a slicer, a juicer, and ice cream making attachment, sausage making and food grinding! It's almost more than one machine can handle!

My mixer will be put to good use this weekend, when my niece and nephew come over to bake some Christmas Cookies! I have quite a list that I would like to accomplish. The KitchenAid is great in this instance, because I don't have to worry about one of the kiddos getting a sore arm for stirring, or them loosing interest in what they are doing because the mixing is taking too long.

Yep...I love it!

Monday, December 11, 2006

Cheese and Chocolate

Two of the most wonderful things in the world!

Yesterday, I asked Nathan what he wanted for dinner. Usually he gives me no kind of imput what-s0-ever, but this time he answered with "that meal with the proscuitto and pasta." Luckily we speak a similar language, and I was able to decipher what the hell he meant!

I never like mac and cheese, until I made it for myself. This recipe was modified a bit from Giada DeLaurentis - - and it is quite a keeper. I pull it out when I need to be blanketed with creaminess, or when I have younger (picky) guests coming over. It's also gourmet enough to satisfy people with more developed palettes.

RIGATONI with CREAMY BACHEMEL SAUCE

1 box dry pasta of choice, (I like rigatoni because it traps all of the goodness!) prepared according to package directions
1 pint of whole milk
1 stick butter
1/2 cup flour
1 cup white cheddar cheese (good quality)
8 slices of proscuitto, thinly sliced
1/4 tsp nutmeg
salt and pepper, to taste
1 tbsp melted butter
1/4 cup bread crumbs

Preheat oven to 350 degrees.

Prepare pasta. Undercook slightly. Meanwhile, melt butter in a large skillet, or stockpot. Once butter is melted, whisk in flour and cook for 2 minutes so that the flour becomes nutty. Slowly whisk in milk until all is incorporated. Bring milk mixture to a boil, and season with salt, pepper and nutmeg.

Shread cheese. Cut proscuitto into strips. Once milk mixture is thick enough to coat the back of a wooden spoon, add cheese and proscuitto. Take off heat. Add drained pasta and gently stir to coat. Pour everything into an ungreased 9x13x2 inch dish. Sprinkle top with bread crumbs, and top bread crumbs with melted butter. Bake for 25-30 minutes, or until dish is bubbly.

Serve as a main or side dish!


What's nice about this recipe is that it is easily interchangeable - you can use any kind of nice melting hard cheese - fontina or smoked gouda is awesome - and you can substitute the proscuitto for ham or bacon, or leave it out completely. The bachemel also works great as a staple for chicken lasagna, or even a simple, yet delicious, fondue.

I served this homemade mac and cheese along side a fresh garden salad.

To make the meal even that more special, I decided to try a recipe that I had been wanting to try out for ages...chocolate lava cakes! I found this very easy looking recipe on www.kraftfoods.com, and was incredibly impressed.

DARK MOLTEN CHOCOLATE CAKES

6 oz dark bittersweet chocolate*
10 tbsp butter
1 1/2 cups powdered sugar
1/2 cup flour
3 whole eggs
3 egg yolks
(You'd think there would be more ingredients, but that's it!)

Preheat oven to 425 degrees,

Grease 6 (6 oz) custard cups or souffle dishes. (I used my large muffin tin!)

Microwave chocolate and butter in a large heat safe bowl for approximately 2 minutes, or until butter is completely melted. Stir with a wire whisk until chocolate is completely melted. Add powdered sugar and flour; mix well. Add whole eggs and egg yolks; beat until well blended. Divide batter evenly emoung prepared custard cups.

Bake 14-15 minutes. Let stand ONLY 1 minute.** Run a small knife around cakes to loosen. Carefully invert cakes onto dessert dishes. Sprinkle lightly with additional powdered sugar. Serve immediately!

Make ahead: Batter can be made in advance; pour into prepared custard cups. Cover with plastic wrap; refridgerate up to 24 hours. When ready to serve, uncover and bake as directed.


SOOOOOOOOOOOOOOOOOOOOOOOO GOOOOOOOOOOD!

*I didn't have any bar chocolate, but I had picked up some hershey's kisses (special dark) to fill our candy bowl. I just took some of those and used them in the recipe!

**Unfortunately, my mother came over just as I was taking the cakes out of the oven (she can't eat rich foods like this) and I didn't get to break into the dessert until 15 minutes passed. Carry-over cooking left the rich pudding-like center into a soft cake-like center. However, it was still excellent. Since it's so easy, I'll probably attempt the recipe again, only this time - - no interruptions!

Weekly menu planning

Monday (tonight!) - Rigatoni with Creamy Bachemel Sauce (aka homemade mac and cheese)
Tuesday - Acorn Squash with Pork
Wednesday - Grilled Chicken Caesar Salad
Thursday - leftovers, or dinner out as I will be attending a holiday recital!
Friday - Pizza
Saturday - Roast Young Turkey (freshly caught by a friend) with Homemade Dressing

I may through in a few cookie doughs, so that I am not running around like a mad woman next week.

Wednesday, December 06, 2006

Holiday "food" gifts

I always find myself intrigued with "gifts in a jar." So much so, that I picked up this instructional/cook book called Jazzy Jars : Glorious Gift Ideas by Marie Browning last year. I actually used some soup recipes in conjuction with other gifts, and it seemed to be a big hit.

This year, I would like to do a cocoa mix and maybe some homemade marshmellows that I saw Tyler Florence (Food Network) whip up while I was changing channels. My mother incidently gave me a whole slew of canning jars while I was at her house the other day - - so I am pretty much all set for this little project. I think it is so nice when you take the time to hand make something for someone!

Oh! And, if you need some help in creating a little label for your food gift - let www.landolakes.com help you out. FREE gift giving labels! You know I will be printing up some of those ditties!

HOT COCOA MIX (with instructions)

3/4 cup powdered milk
1/2 tsp ground cinnamon
3/4 cup sugar
1/2 cup cocoa powder
4 ounces bittersweet chocolate

Combine all the dry ingredients in a large bowl and mix well. Take the bittersweet chocolate and roughly chop it up to give a chunky but consistant size. Mix well with a wooden spoon and then store in a dry airtight container. (Such as a canning jar)

Instructions to include: To make hot chocolate, simply add 1 cup of water per 1/2 cup of hot cocoa mix. Heat in a small saucepan over low heat, stirring with a whisk. Heat until hot, but do not boil, approximately 6-7 minutes. Serve with marshmellows!

HOMEMADE MARSHMALLOWS

1/4 cup powdered gelatin
1 cup cold water
2 cups sugar
2 egg whites
2 cups confectioner's sugar, sifted, plus more for dusting pan and marshmallows

In a medium sized saucepan, soak the gelatin in the water. After the gelatin has softened, approximately 10 minutes, add the regular sugar and then gently dissolve over low heat, approximately 8 minutes. Remove from heat and allow to cool to room temperature.

In a mixer, beat the egg whites until stiff peaks form and then fold in the sifted confectioner's sugar. While the mixer is on low, slowly pour in the cooled gelatin mixture. Increase the speed and beat until white and thick. The volume should double in size.

Line an 8x8 inch baking dish with high sides, with foil, greased slightly with butter. Coat with confectioner's sugar. Pour mixture in and top with more sifted confectioner's sugar. Leave out overnight or for at least 3 hours to set. The marshmallow should be light and spongy when set.

Loosen marshmallow from edges of tray and invert onto a large cutting board. Peel off foil and use a large knife to cut the marshmallows into cubes. Dredge each piece in confectioner's sugar.

I shall call it...Peanut Encrusted Chicken

Because this week is packed full of work events, I really didn't sit down and plan a menu - so when I went to cook something Monday night I was at a loss! I had chicken...I had bread crumbs, and I had...not much else.

Searching through the pantry, I found dry roasted peanuts. The recipe I was craving called for honey roasted peanuts. Hummmmmmm. I can kinda make those right? Right!

I grabbed the peanuts, chopped them up loosely and threw them in a preheated skillet with a little butter, stirring often. Once they started to become fragrant, I added some honey, took them off the heat and mixed them well with about a tbsp of sugar. I'm a rock star!

On with the rest of the recipe!

PEANUT AND HONEY ENCRUSTED CHICKEN

4 Boneless, skinless chicken breasts
1 cup Italian style bread crumbs
1 cup of honey-roasted peanuts, chopped*
1/2 cup of flour
1 egg, beaten with a little water
4 tbsp vegetable oil

Preheat oven to 350 degrees.

Heat oil in a large skillet. *In a food processor, blend together bread crumbs and peanuts and pulse a couple of times, until they are well incorporated. Place bread crumb mixture into a shallow dish.

Form an essembly line, with flour in a dish, egg in a dish and bread crumbs in a dish. Dip each chicken breast in the flour, followed by the egg, then finished with the bread crumbs. Place each breast in the hot oil, and fry until just browned - turning once. Transfer each breast to a baking sheet and cook in the oven until chicken is completely cooked through, approximately 20 additional minutes.


*I prefer the look and texture of a more rustic chop, so some of the peanuts are still whole. I like to identify what I am eating! However, process the mixture to your own tastes.

I served the whole thing with a little cream cheese mashed potatoes and come crinkle-cut carrots. Very simple - but very tasty. The texture of the chicken was extremely satisifying, and the peanut flavor was subtle yet added some marvelous texture. (Plus, leftovers are wonderful , cold, on the top of a salad!)

Friday, December 01, 2006

EGGS-cellent


The incredible, edible egg.

FRITTATA

9 large eggs
2 tbsp butter
1 medium onion, minced
1 cup milk
salt and pepper to taste

Additional ingredients of your choice - bolded is what I used:
Tomatoes - whole, sliced, halved - whatever you like (added at the last minute)
Spinach
Cheese - mozzarella, parmesan, swiss, fontina, goats milk, etc.
Garlic
Asparagus
Mushrooms
Peppers
Sausage, pepperoni, bacon, ham
Anything else you can think of, including the kitchen sink!

Preheat oven to 400 degrees.

Crack your eggs in a vessel, and mix well with milk and parmesan cheese.

In a large, oven safe skillet, melt butter and add garlic and onion. Cook until the onion is translucent. Add spinach and saute until wilted. Add egg mixture, contantly stirring until eggs begin to set. Add cubed mozzarella cheese, and tomato. Transfer to the oven, and cook for 7-10 minutes, until the eggs are just cooked through and the top turns slightly brown.

Wednesday, November 29, 2006

Drum(Stick) Line

Today was new recipe day!

Instead of pouring through countless cookbooks and magazines...I looked towards some culinary compadres from the good ol' internet. I came across Sweet and Sour Chicken Legs from Beautyfall at Everyday Recipes, and knew that I had to try it. So, I did!

BEAUTYFALL'S SWEET AND SOUR CHICKEN LEGS

1 (8 1/4 oz) can of pineapple chucks, with 1/4 cup of juice reserved
2 tbsp cornstarch
3/4 cup of sugar
1/2 cup soy sauce
1 garlic clove, minced
1/4 cup vinegar
pepper, to taste
1/2 tsp ground ginger, or 1 tsp freshly grated ginger
Chicken legs*
1 tbsp vegetable oil

Preheat oven to 350 degrees.

Mix all ingredients together, minus the chicken.

Heat oil in a large skillet, and brown chicken. Remove from heat, and pour sweet and sour mixture over the browned chicken. Cook in the oven for approximately 30 minutes, turning the chicken in the sauce once. Turn oven up to 425 degrees, and cook for an additional 10 minutes, until sauce is thick and chicken is completely cooked through.


Lots and lots of flavor! And really, quite a work of art on the plate...no?


*I used chicken drumsticks, since that was what looked the best that day at the market. The sauce prepared alone would make a fabulous glaze for boneless, skinless chicken breast as well.

I had one minor incident while grating the fresh ginger, which I am so embarrassed to even admit! I turned my head for only a second to glance at the chicken on the stovetop and completely scrapped my knuckle on the microplane. If you don't have one of these, first of all - you need one, but secondly - - they are sharp! It looks much worse than it feels. Just another reason to pay attention when you are in the kitchen.

Beef...it's what's for dinner

One of my most favorite meals in the whole wide world is beef stroganoff. I loved it as a child, and I love it as an adult, still. In fact, I can remember that while my younger sister was requesting Mac and Cheese from the blue box for her birthday meal, I was requesting my mother's homemade stroganoff.

And, way back then onions were the anti-christ. When I found out that my favorite meal had a whole onion in it...I didn't care. That stuff tasted so good!

If you think homemade beef stroganoff is hard - think again. You can also take this same recipe and jazz it up a bit by playing around with the ingredients.

(BEEF) STROGANOFF

1 lb good quality beef (*1)
1 lb mushrooms (*2)
2 cups water
3 tbsp ketchup
1 tbsp butter
2 tbsp olive oil
1 cup sour cream
2 beef boullion cubes (*3)
salt and pepper, to taste
1 tsp garlic powder
1 medium onion, finely chopped
1/4 cup flour

In a large skillet, heat oil and butter. Add onion and mushrooms, and cook until onion is translucent. Remove mixture from heat, and transfer to a bowl.

In the same pan, brown beef. Add garlic powder, ketchup, boullion cubes and 2 cups of water. Bring to a boil and cook for approximately 15 minutes, uncovered. Sprinkle flour into pan, and stir to thicken. (At this point, if you feel that your "gravy" is too thick, add more water; too thin, add more flour.) Once your mixture has come to temperature, add your reserved mushroom mixture and thoroughly combine. Take off heat, and gently stir in the sour cream. Season as needed with salt and pepper. Serve!

In my humble opinion, the only way to serve beef stroganoff is over wide egg noodles.


(*1) I splurge a little and use some filet mignon as my beef. I've tried it with cheaper meats, and because it's not a slow cooking dish, the meat can come out tough. If you don't want to spend the money on the filet mignon, try a nice sirloin...or go vegetarian and omit the meat all together.

(*2) My mother always made this dish with canned sliced mushrooms, but my tastes are a little more adventurous, so I like to use at least two different kinds of fresh mushrooms. Use whatever suits your taste...I like white button mushrooms, portabellos, oyster, shitake - or a mixture of any. If fungus is not your thing, you can omit it - though don't tell me, because I think I may cry!

(*3) Instead of high sodium boullion cubes and water, you can also use beef broth/stock (still 2 cups) or go vegetarian by using vegetable stock and omitting the meat. I've even used chicken stock in a pinch, although the beef stock does have a deeper flavor in the dish.

It's stick to your ribs comfort food, for sure.

Monday, November 27, 2006

Thanksgiving leftovers - that don't taste like Thanksgiving

Thanksgiving = leftovers. It's the way it should be forever and ever. Doing something special with those leftovers can be a little difficult. Last night, we had open faced sandwiches, and finished up the stuffing and gravy we were given. And, tonight I finished up the turkey with Turkey and Phyllo Pie.

Try it. It's so good! Not only does the aroma permeate the entire house - - but the dish has so much flavor, it's mindblowing!

TURKEY AND PHYLLO PIE (recipe adapted from the Better Homes and Gardens 75th Anniversary Cookbook)

2 medium leeks, cut length-ways and thinly sliced
1 garlic clove, minced
1 tbsp butter
3 slightly beaten eggs
1 10 oz bag of frozen chopped spinach, thawed and drained
1 cup shredded mozzarella cheese
2/3 cup milk
2 tbsp grated parmesan cheese, plus 1 tsp
1/4 tsp black pepper
2 cups cooked turkey (you can also use cooked chicken)
4 sheets frozen phyllo dough, thawed
3 tbsp butter, melted

Preheat oven to 375 degrees.

TIP: Wash leeks. Fill a large bowl with cold water. Slice each leek down the center, in half - then thinly slice each half, creating half-moons. Transfer sliced leeks to the bowl of water, and use your fingertips to separate the slices. Using a slotted spoon, transfer the washed leeks to a smaller bowl. (Do not drain the water out with the leeks - all the sand and grit that you washed off will get back onto the vegetables!)

In a medium skillet, cook leeks and garlic in 1 tbsp of butter until the leeks are tender. In a large bowl, combine cooked leek mixture, eggs, spinach, mozzarella cheese, milk, 2 tbsp parmesan cheese and pepper. Stir in turkey; set aside.

Melt remaining butter. Using a 9 inch pie plate, brush some of the butter on the bottom of the plate, and along the sides. Set 1 sheet of phyllo onto the pie plate, letting the sides hang over for the moment. Brush with butter. Repeat until all phyllo sheets are used, and the pie plate is completely covered.

Spoon turkey filling into phyllo crust. Fold ends of the phyllo toward the center. Brush with butter, and sprinkle the edges with remaining 1 tsp parmesan cheese. Bake, uncovered for 45-50 minutes or until a knife inserted near the center comes out clean. Let stand 10 minutes before serving. Cut into wedges for service.


You can also make this into a nice vegetarian option by omitting the turkey/chicken.

All the while we were eating this, I was thinking that it would make a fabulous addition to a brunch!

Devil's Food Cake with Mint-Chocolate Ganache

Thanksgiving is the perfect time to test out lucious desserts! Our family eats the obigatory pumpkin and apple pies...but what is a satisfying dessert without chocolate?

DEVIL'S FOOD CAKE WITH MINT-CHOCOLATE GANACHE (recipe courtesy of Martha Stewart's Baking Handbook)
Makes one 9'' layer cake.

3 sticks butter, room temperature, plus more for pans
3/4 cup Dutch-processed cocoa powder, sifted, plus more for pans
3/4 cup hot water
3/4 cup sour cream
3 cups cake flour (not self-rising), sifted
1 tsp baking soda
1/2 tsp salt
2 1/4 cups sugar
4 large eggs
1 tbsp pure vanilla extract
Mint-chocolate ganache (recipe to follow)

Preheat oven to 350 degrees. Butter two 9x2 inch round cake pans; dust with cocoa butter, taping out excess. In a medium bowl, whick together cocoa and hot water, until smooth. Whisk in sour cream. Set aside and let cool. (It doesn't matter how beatiful the chocolate mixture looks!!!! Do not taste it at this time!!!! You may throw up a bit in your mouth!) Into another medium bowl, sift together flour, baking soda and salt, and set aside.

In the bowl of an electric mixer fitted with the paddle attachment, beat butter and sugar on medium speed until light and fluffy, 3 to 4 minutes. Add eggs, one at a time, beating to combine after each; scrape down the sides of the bowl as needed. Beat in vanilla. With mixer on low speed, add flour mixture in two parts, alternating with the cocoa mixture and beginning and ending with the flour; beat until combined.

Divide batter between prepared pans; smooth with an offset spatula. Bake approximately 45-50 minutes, or until a cake tester comes out clean. Transfer pans to a wire rack to cool. After 15 minutes of cooling, take cakes out of pans, and let cool completely on the wire racks.

MINT CHOCOLATE GANACHE

4 cups of heavy cream
2 lbs of quality semisweet chocolate, finely chopped - if not in chip form
1/4 cup light corn syrup
1/4 tsp salt
1 1/2 tsp pour peppermint extract

Empty chocolate into a large bowl. In a small saucepan over medium-high heat, bring the cream to a full boil. Turn off heat. Pour heated cream onto chocolate, and let melt for approximately 2-3 minutes. Slowly whisk until smooth. Add the corn syrup, salt and peppermint extract, and stir until well combined. Let set.

Using a serrated knife, trim the tops of the cake to make levels even. Transfer one of the layers to a cake serving dish, lined with strips of parchment paper. Use 1/2 of prepared ganache over first layer. Let set. Add second layer to cake, and pour the rest of the ganache over the top - let the ganache fall over the sides. Put cake into the refridgerator to set completely.

Before service, remove the parchment paper to create a clean edge along the cake plate. Garnish with a couple of mint leaves, if desired.

The cake came out so light and fluffy, not at all like the picture in the cookbook...I'm not sure if it was some trickery on the part of the photographer, or if I overbeat the "wet" ingredients. Either way, it didn't matter, because the cake was so great tasting!

I was a little concerned about the mint in the ganache - but again, there was not much to worry about...the mint was so subtle, and not at all "toothpaste tasting" like I dredded. Of course, if you are not a fan of mint, you can omit the flavoring all together!

Wednesday, November 22, 2006

Thanksgiving Week - Tuesday/Wednesday

Tonight is my big cooking and prepping night, and I have been carefully plotting out a gameplan for the past couple of days! Tonight, we will eat the rest of the Chicken Noodle Soup I made on Monday, and snack (or rather, "test") the appetizers I am making for Thanksgiving day.

And, can I just mention how good Chicken Noodle Soup is on a cold evening?! The weather has been rather strange as of late - just last week our daytime temps topped out at 70 degrees! Yet, this morning, is was a chilly 23 degrees, with frost on my windshield. Soup season has officially arrived - although a little later than expected.

KAT'S MORE CHICKEN AND NOODLE THAN SOUP

6 cups of Chicken stock (I make my own, but a 2 large paper containers of store bought can be substituted here.)
2 cups of shredded chicken meat, white or dark or both
2 celery stalks, chopped
2 carrots, peeled and chopped
1 onion, minced
1 garlic clove, minced
1 tbsp each - dried thyme and oregano
1 dried bay leaf
2 tbsp olive oil
1 tbsp butter
2 tbsp fresh parsley
2 cups of dry egg noodles
Water, if needed
Salt and pepper, to taste

Heat oil and butter in a large stock pot. Add onions, garlic, carrots and celery. Let vegetables saute until onions are translucent and carrots become soft. Add the bay leaf, as well as the dried thyme, oregano, salt and pepper. Add chicken stock. Bring to a boil, then add shredded chicken meat. Continue cooking, covered, on medium high for 20 minutes, so that the flavors can develope.

Check your soup...if you need to add water, do so. After the soup is brought up to a boil again, add the pasta of your choice. I chose egg noodles, because they have a great shape and provide wonderful texture. Cook for another 7-8 minutes, until the pasta is al'dente. (You can also add prepared rice for Chicken and Rice Soup!) Serve with some crusty bread for dippin'!


I really like the herbs that are used in this dish...and I like how they add some floating color to the stock when served. Even though it is quick cooking, it looks very authentic - and tastes so much better that soup from a can - no matter how many "ummm, ummm's" they put on the packaging. Plus, it is a great refridgerator clean out!

Monday, November 20, 2006

Thanksgiving week - Monday

There is nothing...nothing!...like make ahead dishes for big events.

I love all things cranberry, but once you try this recipe for Cranberry Fruit Conserve, you will never go back to opening a can of cranberry sauce or jelly again. (Unless you are under 10 years old, and don't have a developed palate.)

I am also the kind of person who has a hard time eating poultry without the red stuff, so anytime I make a batch, it is eaten up quickly. However, it does keep nicely in the fridge for two weeks, if covered properly.

It's hard to believe that something so little can pack a big punch in the health department! Cranberries contain bacteria-blocking compounds that are believed to be helpful in preventing urinary tract infections, and scientists now think this same function may be useful in blocking the bacteria responsible for ulcers and certain oral bacteria that can lead to gum disease. Current research indicates that approximately 10 ounces of cranberry juice cocktail is needed daily to achieve the bacteria-blocking benefits that ward off UTIs, ulcers and gum disease.

CRANBERRY FRUIT CONSERVE

1 (12-ounce) bag of fresh cranberries, cleaned
1 3/4 cups sugar
1 Granny Smith apple, peeled, cored, and chopped
1 orange, zest grated and juiced
1 lemon, zest grated and juiced
3/4 cup raisins (optional)
3/4 cup chopped walnuts or pecans (optional)
1 large banana, sliced into half moons (optional)
1 pint of fresh strawberries, sliced (optional)

Cook the cranberries, sugar, and 1 cup of water in a saucepan over low heat for about 5 minutes, or until the skins pop open. (You will actually hear the popping, which is kind of cool!) Add the apple, zests, and juices and cook for 15 more minutes. Remove from the heat and add the raisins, strawberries, bananas and nuts. Let cool, and serve chilled.

Thanksgiving Menu


I don't know how Thanksgiving creeped up on me this year, but it did...in fact, I didn't even realize that it was so close until last week!

My memories of Thanksgiving are not as fond as some. Especially in the last couple of years, after my grandmother's death. Family just doesn't gather like they did when she was around. It's a bit sad, and a bit frustrating - but life goes on, and people will do as they please.

Anyway, on to cheerier things:

Last night, I sat down with my mom (who is hosting the dinner) and decided on a menu. We are planning on feeding 13 people, in total.

To Start:
Shrimp and Cucumber on toasts*
Risotto Balls*
Japanese Eggplant with mozzarella and roasted tomato*
Cheese Ball and crackers
Veggie Platter

Main Meal:
Roasted turkey
Stuffing
Mashed Potatoes
Gravy (duh)
Cranberry Fruit Compote*
Sweet Potato Casserole*
Green Bean Casserole*
Steamed Vegetables
Fruit Salad with Walnuts
9-Grain Rolls*

Dessert:
Homemade Vanilla Ice Cream*
Chocolate Angel Food Cake with Mint Chocolate Ganache*
Sugar-free Apple Pie
Pumpkin something (pie or squares)

The * is my responsibility. Personally, I'd like to skip the meal and head straight for dessert! (recipes to follow at a later time)

Thursday, November 16, 2006

Chili and the fixin's

I've been craving Chili for the past couple weeks now, but it's been so unseasonably warm that I kept putting it off. I decided I could not wait to satisfy my craving any longer.

Chili is one of those dishes that seems like it would take forever to cook. But, it's really quite easy and not at all time consuming. Basically, you dump all your ingredients into a great big pot, and let it cook! Everyone has their own favorite recipe for Chili - below is mine.

KAT'S CHILI CON CARNE

1 lb ground sirloin (I like the 90/10 fat ratio)
1 large can of red kidney beans, drained
1 green bell pepper, cut into small cubes
1 onion, chopped
1-2 garlic cloves, minced
1 large can crushed tomatoes (or 1 jar of your favorite tomato sauce)
2 cups of water
1 tbsp olive oil
2 tbsp chili powder
1 tsp paprika
salt and pepper, to taste
1 tbsp cayanne pepper (you can add more if you like your chili spicy)

Heat oil in a large pot over medium-high heat. Brown beef. Add onions and garlic, and continue cooking until onion is translucent. Season with chili powder, cayanne and paprika. Add crushed tomatoes, and 2 cups of water. Bring to a boil, cover and cook for 20 minutes, stirring occasionally. After 20 minutes, add kidney beans and green pepper. Cook until heated through - approximately 7-10 minutes more. Serve!


There are so many garnishes that you can add to make your Chili even more special...I like the mixture of sour cream and chives - which is what I added last night to my serving. Nathan likes shredded cheddar cheese. A little minced onion is also a nice accompaniment.

What do you put in your chili?

I'm also patting myself on the back because I finally found a recipe for cornbread that doesn't taste like cardboard!

CORNBREAD (recipe adapted from Martha Stewart's Baking Handbook)

1 cup all purpose flour
1 cup of yellow cornmeal
1/3 cup of shortening, plus more to grease pan
2 tsp baking powder
3/4 tsp salt
1/3 cup sugar, plus 2 tbsp
1 cup of milk
1 egg, slightly beaten
1 tbsp butter
1 cup of frozen or fresh corn

Preheat oven to 425 degrees. Grease 8x8 inch baking pan with shortening, and dust lightly with cornmeal. Melt butter in a small skillet, and add corn. Saute until corn turns slightly brown. Take off heat, and set aside.

In a large bowl, combine flour, sugar, baking powder and salt. Add shortening and cut in until mixture resembles coarse crumbs. Add milk, egg and corn mixture, and mix until just combined. Pour batter into the prepared pan, and cook in oven for 18-20 minutes, or until a toothpick comes out clean from the center. Cut into squares and serve with a little pat of butter.

Tuesday, November 14, 2006

Coq au Vin

I picked up a new cookbook the other night while at the bookstore. Martha Stewart's Favorite Comfort Food - the best of Martha Stewart Living. I poured over it last night, and I must say...I am very excited to start cooking out of it! So excited, in fact, that I started tonight!

Coq au Vin is a traditional French stew, and something that I have been timid in trying. But, this recipe is moderately easy, with traditional ingredients and a big payoff.

Coq au Vin (recipe courtesy of Martha Stewart)

6 large garlic cloves, smashed
4 whole peppercorns
2 sprigs fresh thyme, plus more for garnish
1 dried bay leaf
7 sprigs fresh flat-leaf parsley
3 tbsp olive oil
8 oz pearl onions, peeled*
12 oz white button mushrooms, halved or quartered - if large
2 whole skinless and boneless chicken breasts**
1 tbsp butter
3 tbsp cognac
1 cup dry red wine
3 1/4 cups chicken stock
1 tbsp tomato paste
1 tbsp cornstarch
salt and pepper, to taste

Using a small piece of cheesecloth, make a bouquet garni. (see picture to the left) Wrap 3 garlic cloves, peppercorns, thyme, bay leaf and parsley stems; tie in a bundle with kitchen twine. Set aside.

In a large deep skillet, or Dutch Oven, heat 1 tbsp of oil. Add onions and remaining 3 garlic cloves. Cook, stirring occasionally, until they begin to brown. Add the mushrooms and cook until golden, approximately 4 minutes. Transfer to a bowl.

Cut the chicken into strips about 2 inches long and 3/4 inch wide. Add the butter and remaining 1 tbsp oil to the skillet. Season chicken with salt and pepper. Cook until browned. Add the cognac and wine. Use a wooden spoon to scrape up any brown bits from the bottom of the skillet. Add chicken stock, and stir in tomato paste. Add bouquet garni. Bring to a boil; reduce heat to a simmer and cook, covered for approximately 15 minutes. Add the reserved mushrooms, onion and garlic. Cook 5 minutes more.

Using a slotted spoon, transfer the chicken and vegetables to a bowl. Discard bouquet garni. Over high heat, reduce broth by half. In a small bowl, dissolve cornstarch in 1 tbsp of water. Stir back into broth, and mix until incorporated. Cook 2 minutes. Return chicken mixture to pot. Garnish with thyme, and serve.


*Do yourself a huge favor and purchase those little frozen pearl onions! I swear, it sucks to peel all those little sons-of-bitches yourself.

**I used 1 boneless, skinless chicken breast, and 2 boneless, skinless chicken thighs. The dark meat added more depth to the dish. (And even though I do not like dark meat chicken - I really enjoyed the mixture in this recipe.)

One word...YUM. The mushrooms were my favorite by far - they just sucked up all those juices and were so packed with flavor.

Monday, November 13, 2006

Gluttony in NYC

Nathan and I drove down (again) to NYC this past weekend - which is why I have failed to update my blog for the past couple of days.

It's a good thing we did a lot of walking, because we certainly did a lot of eating!

We arrived in the city after a stressful drive (closed down roads, lots of traffic, and Nathan failed to do his part in finding us a hotel to squat at). We found parking in Chinatown, which is where we started our gluttonous journey.

We chose a buffet to eat lunch at. (Not my first choice, but Nathan has a soft spot in his heart for buffets.) REAL chinese food is so much different than take-out chinese from upstate. The buffet itself was amazing, and very intimidating - especially for someone who does not like seafood all that much.

However, I was able to make myself a pretty awesome plate of food - - all for only $4.00! Sprouts with tofu, sesame chicken, garlic green beans, lo mein and chicken and broccoli. Nathan was a little more adventurous in his choices.


Chinatown is filled with street vendors with lots of interesting food items to look at. Some of the smells might knock you on your ass though!


Then, of course, there are pastry shops. Tons and tons of pastries! I passed on most of them (Nathan did not however - he ate more cake in two days than I have ever seen him eat before), but couldn't pass up with little gem of jello'ish stuff. The texture threw me a little, but the flavor far made up for it.

On Sunday, we ate lunch in Chinatown again - this time at a Vietnamese place, which was devine. I ordered vegetable Summer rolls that came with the most delightful dipping sauce. The sauce was sweet, yet salty - and had a really thick consistancy. I know there were sesame seeds in it, but I am not sure what else. You know I will be googling sauces soon though!

For dinner we ate at Macy's. Hey, it was raining (pouring actually) and convenient. They have a "2 four" menu. After 3 full courses, Nathan decided he needed a bit more...


But, really...how can you pass up a genuine NYC hotdog?