Showing posts with label Cookies. Show all posts

Wednesday, December 09, 2009

mini Cheesecake Cookie Cups

Last year, I posted the original recipe for these awesome Cheesecake Cookie Cups. At the time I thought they were great, but this year I wanted to play around with the size of them. I really like the idea of mini, bite-sized cookies...which allows me to justify eating 2 or 3 of them without feeling *too much* guilt.


Of course, making things minature means that you spend a little more time on baking the buggers. Something to keep in mind if you have a life. Obviously, since I made 250'ish of these little delights...well, we won't go there.

Cheesecake Cookie Cups (the mini version)

1 package Nestle Toll House Refrigerated Mini Chocolate Chip Cookie Bar Dough
2 packages of cream cheese, room temp
1 can sweetened condensed milk
2 large eggs
2 tsp vanilla extract
1 can (21 oz) cherry pie filling

Preheat oven to 325 degrees. Paper-line mini muffin trays. Place 1/2 piece of mini chocolate chip cookie dough in each muffin cup, and press down slightly. Bake for 8-10 minutes of until cookie has spread to the edge of each cup, but is not fully cooked through. (If it doesn't spread to the edge, don't sweat it...they will still be delicious, and I promise no one will notice.) Let cool in mini muffin tray until they collapse slightly.

Meanwhile, beat cream cheese, sweetened condensed milk, eggs and vanilla in a medium bowl until smooth. Pour about 1 tbsp of the mixture over each cookie in cup. Bake for an additional 15 minutes or until set. Cool completely on a wire rack. Top each cheesecake with pie filling. Keep refridgerated.


So cute! You can substitute the chocolate chip dough with sugar cookie dough, or use a traditional graham cracker crust.

Friday, December 26, 2008

The Great Cookie Bake-off of 2008

This Christmas season wrapped up the third annual Great Cookie Bake-off! With just about 5,000 cookies being produced from one KitchenAide stand mixer (with one bowl and handle attachment), 4 silpats, 4 baking sheets and one oven, I say I did A-OK. It took about 3 days, start to finish, and I lost most of my sanity.

On the docket was the usual crop of tasty nuggests: cream cheese cookies, thumbprints, buckeyes, delux sugar cookies, gingerbread men and ladies,
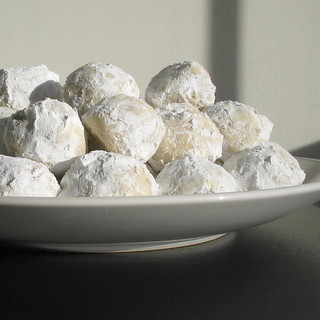
 russian teacakes, cherry snowballs and bourbon balls - this time with actual boudon! This year, as I always do, I tried a couple of new recipes. Some were successful, some were not. I realized that A.) I need a cookie press and B.) I can not make a pinwheel cookie look pretty to save my life!

English Toffee Bars

1/2 cup butter, 1 cup oats
1/2 cup flour
1/2 cup packed brown sugar
1/2 cup finely chopped walnuts
1 14-oz can sweetened condensed milk
2 tbsp butter
2 tsp vanilla
1 6-oz pack semisweet chocolate chips
1/4 cup almond brickle pieces (or a couple of chopped Heath candy bars)

Melt 1/2 cup butter in a large saucepan. Stir in oats, flour, brown sugar and nuts. Press mixture firmly in the bottom of a greased 13x9 inch pan. Bake in 350 degree oven for 12-15 minutes.

Meanwhile heat sweetened condensed milk and 2 tbsp butter over medium heat until bubbly, stirring constantly. Stir in vanilla. Pour over baked crust layer. Bake 8-10 minutes or until golden. Remove from oven and immediately sprinkle with chocolate. Let stand for 2-3 min or until softened. Spread chocolate evenly over top. Sprinkle with almond brickle pieces. Cool. Chill for 5-10 minutes or until chocolate layer is set before cutting into pieces. Makes about 36 if you cut methodically. (I did not.)


I thought the English Toffee bars tasted like a candy bar, although there was nothing particularly Christmas'y about them. The recipe was easy and I was able to double it without a problem. The bars came out of the baking dish perfectly without any kind of hassel, which is always nice, and when the cookies were delivered to their recipients, this was the first cookie that about 75% of them went after.


********


For years and years I have tried to make macaroons. Each year I adapt the recipe just a touch, and each year the recipe fails. I was just going to give up on the idea of macaroons this year but looked at all the coconut I had leftover and changed my mind. I'm glad I did, because 2008 became my year for kicking coconut macaroon's asses! The cookie had always kinda melted into a flat mess that tasted really good, but did not resemble a macaroon at all. In this go'round, I added a little flour to stabalize the batter...and it worked. I came out with an army of perfectly shapped coconut macaroons!


(no fail) Plain Coconut Macaroons


3/4 cup sugar


2 1/2 cups shredded coconut


2 large egg whites


1 tsp vanilla extract


pinch of salt


1/4 cup flour


Preheat oven to 350 degrees. Line a baking sheet with parchment paper or use silicon silpats. In a large bowl whip egg whites until frothy. Mix in all other ingredients. Dampen hands with cold water. Form 1/2 inch balls. Keep macaroons about an inch apart on baking sheet. Bake until golden brown, about 10 minutes. Remove from heat and let cool on wire rack.


******


Cheesecake Cookie Cups


1 package Nestle Toll House Refrigerated Mini Chocolate Chip Cookie Bar Dough


2 packages of cream cheese, room temp


1 can sweetened condensed milk


2 large eggs


2 tsp vanilla extract


1 can (21 oz) cherry pie filling


Preheat oven to 325 degrees. Paper-line 24 muffin cups. Place one piece of mini chocolate chip cookie dough in each muffin cup, and press down slightly. Bake for 8 minutes of until cookie has spread to the edge of each cup.


Meanwhile, beat cream cheese, sweetened condensed milk, eggs and vanilla in a medium bowl until smooth. Pour about 3 tbsp of the mixture over each cookie in cup. Bake for an additional 15 minutes or until set. Cool completely on a wire rack. Top each cheesecake with a level tablespoon of pie filling. Keep refridgerated.


You could use your own homemade cookie dough, if you so desire...but taking a little help when you can is SMART! Totally tasty and very much like the real thing.

Tuesday, November 11, 2008

Pumpkin Empanadas

Let me start off by saying that I am not a big fan of pumpkin pie at Thanksgiving - or anytime, actually. I prefer fruit pies or anything cheesecake or chocolate or better yet, any combination of the three. However, when I saw this recipe for Pumpkin Empanadas, I was intrigued and knew that I had to try them.


The result? A rich morsel of goodness wrapped in a light, flaky crust. The recipe promised that the empanada would taste like an individual slice of pumpkin pie. Not so, in my opinion...it's more of a cross between a pumpkin pie and a super sweet pecan pie.


PUMPKIN EMPANADAS

Filling ingredients:
1 cup canned pumpkin
1 cup firmly packed brown sugar
1 tbsp butter
1 tsp ground cinnamon
1 tsp pumpkin pie spice (I didn't have this, so I substituted 1/4 tsp ground cloves, 1/2 tsp ground nutmeg and 1/4 tsp ground ginger)
1/4 cup chopped pecans

Crust ingredients:
1 1/2 cups flour
2 tbsp sugar
1 tsp salt
1 cup cold butter, cut into small cubes
8-10 tbsp cold water

Glaze ingredients:
1 egg
1 tsp water

In a saucepan, combine pumpkin, brown sugar, 1 tbsp butter, filling spices. Stir to combine some and cook over medium heat until mixture is thickened. Remove from heat, and cool completely (approximately 1 hour). Stir in pecans and set aside.


(OK - so I realize this is not the most appetizing of photos...but the filling is really tasty!)


Preheat oven to 400 degrees. In a food processor, combine flour, sugar, salt and butter. Pulse ingredients until mixture resembles coarse crumbs. Pulse in enough water until dough is just moistened.

Divide dough in half. Roll out dough on a lightly floured surface, until about 1/8 inch thick. (Keep remaining dough in the refrigerator so it remains cold.) Cut circles with a 2 1/2 inch cookie cutter. Place 1/2 tsp of the filling in the center of each circle. Fold one side of the circle over to form a crescent-shaped empanada. Pinch dough lightly to form a seam, then use the tines of a fork to seal the empanada closed. Place on a non-greased cookie sheet. Repeat until all cookies are made.


Whisk together egg and 1 tsp water in a small bowl. Brush egg mixture lightly onto empanadas. Bake for 12-15 minutes, or until cookies are browned and glossy. Remove from oven and let cool. Eat warm!


Although I appreciate the absolute perfection that is homemade pie crust - the next time I make these, I will probably cheat and buy some pre-made crust to cut down on the mess and save time. The recipe also said that it would yield 4 dozen cookies...which is a total LIE! I got about a dozen and half out of my dough, with lots of filling left over. This did irritate me some, but I plan to make another batch tonight, so I threw the leftover filling in the fridge with a little plastic wrap to cover it.

I do think that a touch of "sugar in the raw" sprinkled over the top, pre-bake, would give these cookies a little somethin-somethin. All I'm thinking about today, is how good they would be with a side of vanilla ice cream!

Monday, March 17, 2008

Happy St. Patty's Day!

While others are filling their blogs with Corned Beef and Cabbage recipes, I thought I would go the sweet route and tell/show you the cookies I made last night in celebration of this Irish holiday!


MINTY CHOCOLATE 'SURPRISE' COOKIES


1 3/4 cups flour
3/4 cup cocoa powder
1/2 tsp baking soda
1/2 tsp salt
1 stick butter, room temperature
1 cup sugar
1/2 cup whole milk
1 egg
1 tsp vanilla
1 tsp mint extract
bag of large marshmallows
chocolate frosting
Green spinkles, optional


Preheat oven to 375 degrees.


In a medium bowl, sift all dry ingredients - flour, cocoa, baking soda and salt. Set aside.


In a large mixing bowl fitted with a paddle attachment, cream together sugar and butter until light and fluffy. Add milk, extracts and egg beating well to throughly combine. Turn mixer onto low and beat in dry ingredients a little at a time until all of the dry is incorporated into the wet. Use a 2 inch cookie scoop to drop dough onto a silpat lined cookie sheet. Bake for 8-10 minutes.


Meanwhile, cut each marshmallow in half. Place one half of a marshmallow onto the hot cookie, pressing gently, and return to oven for an additional 2 minutes. (Any longer and the marshmallow may fall off the cookie!) Remove from heat and let cook on a wire rack.


Once cooled, ice each cookie with the prepared chocolate frosting, completely covering the marshmallow center - making it a 'surprise'! Store in the refrigerator.

Thursday, December 20, 2007

The Great Cookie Bake-Off of 2007!

It's officially OH-VAH!


Shakeer and Kelsey arrived Saturday night, in an effort to beat the Nor'easter that rocked the East Coast this past weekend. We were baking by 8:00am Sunday morning, after a quick cereal breakfast and didn't take a break until Kelsey told me that she was "going to die from hunger!"

On the agenda:
Delux Sugar Cookies
Cream Cheese Cookies
Thumbprint Cookies
Peanut Butter Cup Cookies
Buckeyes
Russian Teacakes
Strawberry Oatmeal Bars
Checkerboard Cookies
Cherry Snowballs
Bourbon Balls
Peanut Clusters
Fudge
Chocolate-Mint Wafers
Triple Chocolate Brownie Cookies
Poinsettia Cookies
Petite Lemon Sandwich Cookies
Macaroons

We went waaaaaaaaaaaaaaay overboard, and had a great time doing it. (Of course, we got a little behind schedule, so I had to take a personal day off of work to finish up.) You can either click on the highlighted cookie name, or you can scroll down a little.

Happy cookie season!

Tuesday, December 18, 2007

Russian Teacakes

These cookies happen to be Nathan's mother's favorite...and in a couple short days, she will be receiving a surprise package in the mail which will include these melt-in-your-mouth cookies! They are also a family favorite and one cookie that I will never not include in my Christmas cookie arsenal.

The dough is tender, with a nutty walnut crunch - and the confectioner's sugar coating gives a great lip-smacking finish.

RUSSIAN TEACAKES

1 cup of butter, softened (no substitutions)
1/2 cup confectioner's sugar
1 tsp vanilla
2 1/4 cups flour
1/4 tsp salt
3/4 cup finely chopped walnuts
Additional confectioner's sugar, for dredging

Preheat oven to 400 degrees.

Mix butter, sugar and vanilla in a large mixing bowl. Work in flour, salt and nits until dough holds together when squeezed. Shape into 1 inch balls. Place on ungreased cookie sheet and bake for 10-12 minutes, or until set but not brown. While warm, roll in powdered sugar. Cool on a wire rack. Once completely cool, roll again in powdered sugar.


(Photo credit: Talida at http://talidabakes.blogspot.com)

No Bake Treats

2 ingredients are all you need to make dipped nuts (of any kind). I prefer peanuts because I really like that peanut and chocolate combination. (Who doesn't?!) You can totally play around with this technique, substituting white or dark chocolate, or adding pecans instead of peanuts. Last year, I drizzled a little bit of white chocolate or a marbled effect. Whatever you decide to do - definitely make these at home...it's a shame to spend $9.99 a pound on dipped nuts at your local Candy Shoppe.

NUT CLUSTERS

1 12 oz package of chocolate chips
2 cups chopped nuts of your choice

Place chocolate chips/pieces in a heavy saucepan over low heat, stirring constantly until melted. Stir in nuts. Spoon mixture by rounded spoonfuls onto a baking sheet lined with waxed paper. Chill until firm. Store in the refrigerator.


I've never seen anyone turn down a peanut butter cup, and the same holds true for no-bake Buckeye cookies at Christmas time. They are the perfect two bite treat, and they have great stage presence on any cookie platter. The peanut center is smooth and sweet, and the chocolate outside is firm and delicious.

BUCKEYES

3/4 cup butter, no substitutes
3 1/4 - 3 3/4 cups confectioner's sugar
1 cup peanut butter
1 tbsp milk
1/2 tsp vanilla
16 oz. semisweet chocolate chips
1 tbsp shortening

Melt butter in a small saucepan over low heat. Combine melted butter and 2 cups of confectioner's sugar in a medium mixing bowl. Beat until smooth. Add peanut butter, beating well until combined. Stir in milk and vanilla. Beat in enough of the remaining sugar to make a firm, crumbly-looking mixture.

Roll dough into 1 inch balls. Arrange on a lined tray; insert toothpick into the center of each ball and chill for at least 30 minutes. (The step is crucial - by chilling the cookies, the toothpick will remain firmly in the center while you are dipping them.)

Meanwhile, melt chocolate and shortening in a heavy saucepan over low heat. Cool slightly. Dip 3/4 of each ball into the chocolate mixture, so that the ball resembles a buckeye. Place balls, undipped side up, on a tray lined with a silpat or waxed paper. Chill until chocolate becomes firm. Store in the refrigerator.

Check Mate

I sat looking at this recipe for an hour, I swear...there were so many words and it looked so complicated. I had some experience with a Checkerboard Cake that yielded wonderful results, and was not as hard as what I am imagined (or read). I bucked it up and decided to use my brain and threw the directions into the trash! You don't need to read all of those words either...so I posted my own abreviated directions below.

FESTIVE CHECKERBOARD COOKIES

1-1/4 cups butter, softened
1 cup packed brown sugar
1/2 cup sugar
2 eggs
1/4 tsp vanilla extract
4 cups all-purpose flour
1 tsp baking powder
1 tsp salt
1/4 tsp baking soda
Red food coloring

In a large mixing bowl, cream butter and sugars. Beat in eggs and vanilla. Combine flour, baking powder, salt and baking soda; gradually add to creamed mixture. Divide dough in half. Tint one portion red and leave the other plain. (At this point, you can flavor the red portion with a touch of peppermint extract, if you would like.) Form each dough portion into a 6 inch long by 2 inch wide log. Wrap red and plain portions separately in plastic wrap; chill for 2 hours or until stiff.


Preheat oven to 375 degrees.


Using a sharp knife, slice 8 to 10 - 1/2 inch strips lengthwise off of each log. Stack the strips in groups of four, alternating plain and red strips, until you have 4-5 rows of alternating colors. Press together gently. Cut dough into 1/4 inch slices. (If you would like to cut into specific shapes, do so at this time...) Place 1 inch apart on ungreased baking sheets. Bake for 9-11 minutes or until set. Remove to wire racks to cool.


(I cut out about 2 paragraphs from the original recipe there!)


These cookies will make your family and friends squeal for joy, then wonder aloud how you made such a cookie. You don't have to tell them how easy it actually was!

Poinsettias you can chow on!

POINSETTIA COOKIES (recipe courtesy of Taste Of Home Magazine)

1 cup butter, softened
1 cup confectioners' sugar
1 egg
2 to 3 drops red food coloring (or more to achieve desired results)
2 1/3 cups all-purpose flour
3/4 tsp salt
1/4 cup finely crushed red-hot candies*


FROSTING:
1 cup confectioners' sugar
2-3 tsp milk
Additional red-hot candies


Preheat oven to 350 degrees.


In a large mixing bowl, cream butter and confectioners' sugar. Beat in egg and food coloring. Combine flour and salt; gradually add to the creamed mixture. Stir in red-hots. Divide dough in half; wrap in plastic wrap. Refrigerate for at least 1 hour or until firm.


On a lightly floured surface, roll out one portion of dough into a 12-in. x 10-in. rectangle. With a sharp knife, pastry wheel or pizza wheel, cut dough into 2-in. squares. Place 1 in. apart on lightly greased baking sheets. Cut through dough from each corner of square to within 1/2 in. of center. Fold alternating points of square to center to form a pinwheel; pinch gently at center to seal. Repeat with remaining dough.


Bake for 7-9 minutes or until set. Remove to wire racks to cool. Combine the confectioners' sugar and milk. Pipe 1/2 teaspoon frosting in center of each cookie; top with red-hot candy.


(Photo Credit: Taste of Home)

(*) Our red hot candies would not break down in the food processor!!! They were tough little suckers! Instead, I placed them in a plastic baggie, and gave the kids permission to beat the heck out of them with a rolling pin. It was a whole lotta fun for them - although a little stressful for me, since I mistakenly forgot that I had a glass kitchen table under the protective plastic tablecloth. Oops. I did the assembly of the poinsettia leaves because it seemed like it would be a little too complicated for the kiddos to handle.


The cookies came out moist and delicious - not unlike a plain sugar cookie. I was expecting more cinamon flavor from the red hots, but loved the color and texture the candies gave.

Triple Chocolate Brownie Cookies

I have to admit - I was a little under impressed with this recipe and the way the cookies finally turned out. Although tasty (Shakeer called them "the love of his life!"), they came out flat and crisp, leading me to believe that the leavening measurements were a little off. The cookies also stuck to my silpats, which ticked me off because nothing sticks to silpats!!! I ended up with a lot of cookie 'mistakes' that the bakers got to try.

We tried making the cookies smaller, and that didn't help either. I may have to enable a google search to find out how to solve this issue.


(Photo credit: Taste Of Home, since this is what they are supposed to look like!)


TRIPLE-CHOCOLATE BROWNIE COOKIES

3/4 cup butter, cubed
4 squares (1 ounce each) unsweetened chocolate
2 cups sugar
4 eggs
1-1/2 cups all-purpose flour
1/2 cup baking cocoa
2 tsp baking powder
1/2 tsp salt
2 cups (12 ounces) semisweet chocolate chips, divided
2 teaspoons shortening


Preheat oven to 350 degrees.

In a small saucepan over low heat, melt butter and unsweetened chocolate; cool. Transfer to a large mixing bowl; add sugar and eggs. Beat until smooth. Combine the flour, cocoa, baking powder and salt; gradually add to chocolate mixture. Stir in 1-1/2 cups chocolate chips. Cover and refrigerate for 2 hours or until easy to handle.

Drop by tablespoonfuls 2 in. apart onto greased baking sheets. Bake 7-9 minutes or until edges are set and tops are slightly cracked. Cool for 2 minutes before removing from pans to wire racks to cool completely. In a microwave-safe bowl, heat shortening and remaining chocolate chips on high for 1 minute or until chips are melted; stir until smooth. Drizzle over cookies. Let stand for 30 minutes or until chocolate is set. Store in an airtight container.


Bourbon Balls...with Southern Comfort!

I made these Bourbon Balls two years ago, and people raved about them - especially my little brother who was about 16 years old at the time. I'm pretty sure he thought he could get drunk off of these little cookies. Little did he know, even if he ate the entire batch, he'd only get about 1 1/2 shots of bourbon into his body!


This year, the bourbon was gone...but I had some Southern Comfort - - and that seemed like a good enough substitution to me!


"COMFORT" BALLS (no bake!)
1 1/4 cups semi-sweet chocolate chips
1/2 cup sugar
3 tbsp light corn syrup
1/3 cup bourbon
2 1/2 cup (about 5 dozen) finely crushed graham cracker wafers
1 cup finely chopped walnuts
Granulated Sugar to roll balls in

Melt chocolate over hot water in a heat safe bowl. Remove from heat and stir in sugar and syrup. Blend in bourbon. Combine graham crackers and nuts and add to chocolate mixture; mix well. Form 1-inch balls and roll in granulated sugar. Let ripen in covered container at least several days.

Cherry Snowballs

CHERRY SNOWBALLS (Original recipe courtesy of TasteOfHome.com)
A juicy maraschino cherry is the pleasant surprise tucked inside these unique cookies.

1 cup butter (no substitutes), softened
1/2 cup confectioners' sugar
1 tbsp water
1 tsp vanilla extract
2 cups all-purpose flour
1 cup quick-cooking oats
1/2 tsp salt
36 maraschino cherries, well drained

COATING:
2 cups confectioners' sugar
1/4 to 1/3 cup milk
2 cups flaked coconut, finely chopped


In a mixing bowl, cream butter, sugar, water and vanilla. Combine flour, oats and salt; gradually add to the creamed mixture. Shape a tablespoonful of dough around each cherry, forming a ball. Place 2 in. apart on un-greased baking sheets.


Bake at 350° for 18-20 minutes or until bottoms are browned. Remove to wire racks to cool. Combine sugar and enough milk to achieve smooth dipping consistency. Dip cookies, then roll in coconut.


The kids really enjoyed making these cookies - mainly because there were a couple of cherries left over for them to snack on! Kelsey did the rolling in the confectioner's sugar mixture, and Shakeer finished off the cookie by giving it a good roll in coconut.


These cookies look absolutely terrific on the cookie platter against all of the other colors.


Chocolate-Mint Wafers

CHOCOLATE-MINT WAFERS (Courtesy of MarthaStewart.com)

Imagine the Girl Scout's "Thin Mints" - only more substantial and surprisingly easy to make. This one is definitely a winner on all counts and will be added to my cookie arsenal for future use.


1 cup all-purpose flour
1/2 cup unsweetened cocoa powder
1/4 tsp baking powder
1/4 tsp plus 1/8 tsp salt
6 tbsp (3/4 stick) unsalted butter, room temperature
1/2 cup sugar
1 large egg
1/2 tsp pure vanilla extract
12 ounces semisweet chocolate chips
1/4 tsp pure peppermint extract
Sprinkles, for decorating (optional)

Preheat oven to 350 degrees. In a medium bowl, whisk together flour, cocoa, baking powder, and 1/4 tsp salt. Set aside.

In a large bowl, beat butter and sugar until light and fluffy. Beat in egg and vanilla. With mixer on low, gradually add flour mixture; mix just until combined.

Form balls of dough (each equal to 1 tsp) and place on two baking sheets, about 2 inches apart. Dip the bottom of a glass in water, and flatten balls into 1 1/2-inch rounds (about 1/4 inch thick). Bake until slightly firm to the touch, 8 to 10 minutes. Immediately transfer cookies to a wire rack to cool completely.

Make chocolate coating: Place chocolate, peppermint extract, and remaining 1/8 tsp salt in a large heatproof bowl set over (not in) a saucepan of simmering water. Heat, stirring occasionally, until smooth, 2 to 3 minutes; remove from heat. Line a baking sheet with parchment or waxed paper. Set each cookie on a fork, dunk in chocolate, then tap underside of fork on side of the bowl to allow excess chocolate to drip off. Place cookies on prepared baking sheet, and decorate with sprinkles, if desired. I dragged a fork over the tops of the cookie to give them a little decoration.

Refrigerate until chocolate has hardened, about 30 minutes, and keep chilled until ready to serve.


Your family and friends will gooble them up... if you don't eat them all yourself.


Tuesday, October 30, 2007

Giving you the finger

Halloween is tomorrow, so it is only fitting that we celebrate with something creepy!


Sugar Cookie Fingers! Ewwwwww!


I saw an original recipe at http://www.epicurious.com/, but decided to use my family's "Delux Sugar Cookie" recipe, since those cookies come out perfect every time. Everyone is totally freaked out by the fingers this morning at work!

DELUX SUGAR COOKIES

1 cup butter, softened
1 1/2 cups confectioner's sugar
1 egg
1 tsp vanilla
1/2 tsp almond extract
2 1/2 cups flour
1 tsp baking soda
1 tsp cream of tartar

In a large bowl, mix together butter, confectioner's sugar, egg, vanilla and almond extracts. Blend in flour, soda and cream of tartar. Form dough into a ball, cover and chill for 2-3 hours.

Preheat oven to 375 degrees.

Divide dough. Roll out tiny finger shapes on a lightly floured surface, pinching around the knuckle area to create a knarly shape. (The first batch I did was so big, that I scaled down the dough on the second batch - which worked perfectly.) Use a knife to create the lines of the knuckles. Gently place an almond slice as the fingernail. Place on a greased cookie sheet. Bake 7-8 minutes. Cool on a wire rack.

With the other half of the dough, I decided to make a cookie piano. (What better way to highlight my gorgeous fingers?!) The piano is frosted with vanilla and chocolate store-bought icing.