Showing posts with label Dessert. Show all posts

Tuesday, December 20, 2011

Pumpkin Spiced Ice Cream

The ice cream maker...my nemesis.

I loved you so much the day I brought you home. You were hiny and new and smelled good...then I began to loath you as one recipe failed. Then, another. And another. I spent so much money in hopes that I would win you over. Finally, I gave up on you. I stored you in the back of the cabinet, out of sight and out of mind. I forgot about you and all of the embarrassment you laid on me. I forgot your smell and your newness and the hum of your motor.

Then one day, I made a joke to my niece who *hates* pumpkin everything, and said "hmmm...I'm going to make some pumpkin ice cream to go with our pumpkin pie." Why would say such a thing when all you have done over the course of 5 years is fail me? I think it's because I'm a persistent bitch. And, I really want to make a successful ice cream!

On Wednesday, November 23, 2011, I cracked your code and your ice cold heart!

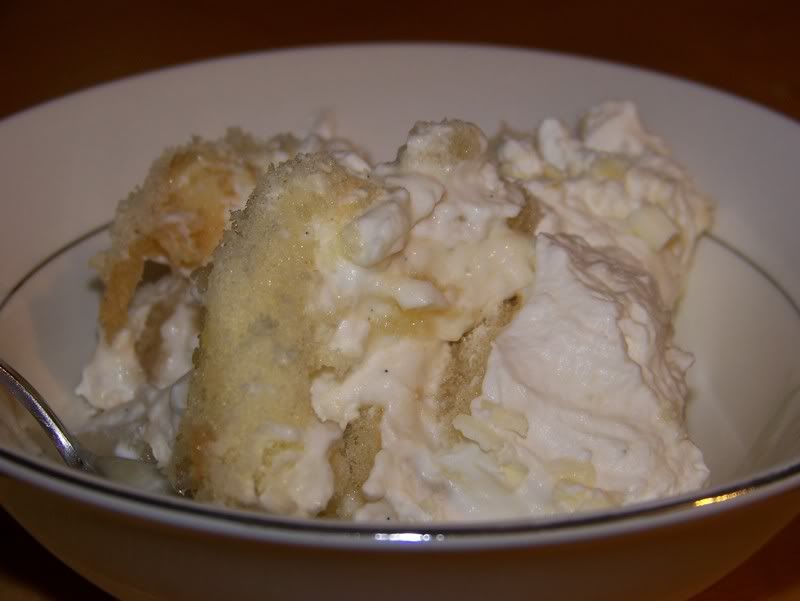
That's right!!! Ice cream SUCCESS!

I promptly threw out your little "recipe book" that does not have one single recipe that tells me to make an ice cream base with eggs. That truly is the secret.

So, now that I'm onto you and your trickiness, I can welcome you back into the family. Instead of the back of the cabinet, you now take center stage next to the blender and food processor. Welcome home, ice cream maker.

PUMPKIN SPICED ICE CREAM

1 cup canned unsweetened pumpkin puree
the seeds of 1 vanilla bean or 1 tsp pure vanilla extract
2 cups heavy cream
3/4 cup firmly packed brown sugar
5 egg yolks
1/2 tsp ginger
1/4 tsp salt
5 grates of fresh nutmeg

In a bowl, whisk together the pumpkin puree and vanilla. Cover and chill for at least 3 hours.

In a heavy saucepan over medium heat, combine 1 1/2 cups of the cream and 1/2 cup of brown sugar. Cook, stirring constantly, until bubbles form around the edges of the pan, approximately 5 minutes.

Meanwhile, in a bowl, combine the egg yolks, cinnamon, ginger, salt, nutmeg. Add the remaining cream and brown sugar. Whisk until the sugar begins to dissolve and the mixture becomes creamy.


Remove the cream mixture from the heat and temper your egg mixture. (Seriously - click on the link to learn how to "temper" your eggs - or else you will make scrambled egg ice cream, and that can't be tasty.) Transfer tempered mixture into the heavy saucepan and cook over medium hear, stirring constantly with a wooden spoon and keeping the custard at a low simmer, until it becomes thick and coats the back of the spoon. Not not allow the custard to boil! Strain mixture through a fine-mesh sieve into a bowl and place the bowl into an ice bath, stirring occasionally to cool. Whisk the chilled pumpkin mixture into your ice cream base. Cover with plastic wrap, pressing it directly onto the surface of the custard, so you don't make a "skin." Chill for 3-24 hours.


After chilling, transfer to your ice cream maker and churn per the manufacturer's instructions. (I have to completely freeze my maker's bowl prior to churning, so there is definitely some plan-ahead activities to be aware of.) Transfer your ice cream into a freezer-safe container and freeze until firm. Scoop and serve!

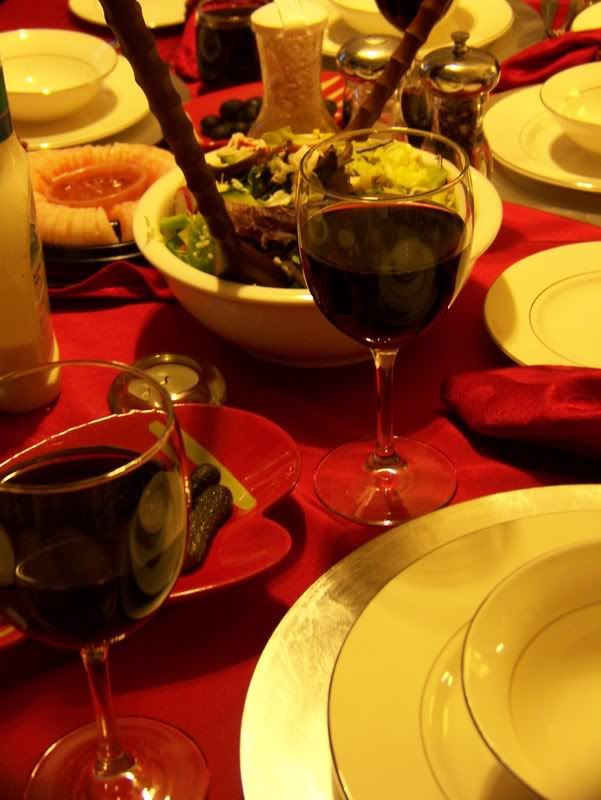
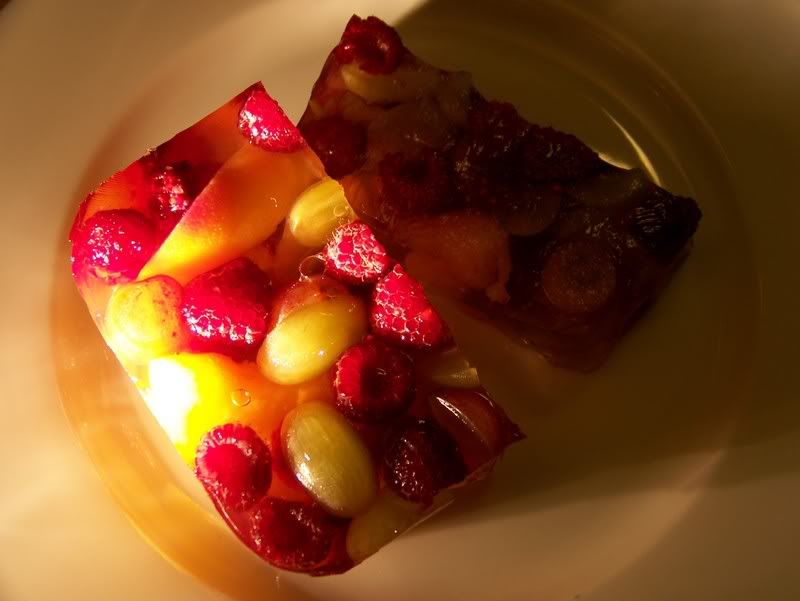
Our Thanksgiving dessert was pumpk'tastic! Pumpkin pie, pumpkin spiced ice cream and a little drizzle of homemade Carmel sauce. Funny thing is, I didn't taste much pumpkin in the ice cream - just the essence of it, which is fine by me. The ice cream was surprisingly smooth and VERY rich, so one scoop really went a long way. My niece did try a small spoonful, but was not impressed. Oh well. I was! And really, all that matters is that the whole experiment didn't crash and burn.

Pumpkin spiced ice cream is so freaking good!!!


For those looking to make plain vanilla ice cream, I italicized the base ingredients. The recipe itself is pretty easy to decifer. If you'd like to add in something special, prior to churning, throw in whatever you'd like: fresh strawberries, chocolate chips, crushed cookies, etc.

Sunday, June 26, 2011

Frozen Tiramisu

I like Tiramisu. I like ice cream. Is there a way to combine the two? Hell yes! Buck "tradition" and make this...pronto! (And be extremely disappointed when there are no leftovers to chow on.)

Frozen Tiramisu

1 cup sugar
1 1/2 cups strong, freshly brewed coffee
1/3 cup Kahlua liqueur
Pre-made angel food cake
1/4 cup crushed Oreo Cookies
1/2 gallon of chocolate ice cream, softened*
1/2 gallon of coffee ice cream, softened*
whipped cream
Cocoa (for garnish)

Place sugar and 2/3 cups of water into a sauce pan. Bring to a boil over medium heat, stirring occasionally until dissolved. Remove from heat and stir in brewed coffee and Kahlua. Let syrup cool completely.

Meanwhile, spray a 9x9x2 inch baking dish with vegetable spray. Using a serrated knife, cut angle food cake into thin squares, layering along the bottom of the dish. Using a pastry brush, brush the cake layer with the coffee syrup. Sprinkle 2 tablespoons of crushed oreos over cake.

Spread a layer of chocolate ice cream over cake. Place a second layer of angle food cake over ice cream, and once again brush the cake with the remaining coffee syrup. Place in freezer until completely frozen.

Remove from freezer, sprinkle with remaining oreo cookie crumbs, and spread a layer of coffee ice cream over top. Freeze until completely hardened. When ready to serve, top each portion with freshly whipped cream and a sprinkle of cocoa, if desired.


Hello, lover.

*Time saver: If you do not have time to let your ice cream soften, place into a stand mixer bowl and beat on low until spreadable.

I was completely amazed at how great this turned out! The layers of angel food cake absorbed all of the liquid and became this gooey, coffee goodness - and the ice cream just held it all together, making it taste like traditional Tiramisu. It was a big hit at the "going away" dinner party I held for a friend who is going on a mission trip to Africa.


I may have licked my bowl.

Tuesday, February 22, 2011

Very Berry Gummy Squares

My all-time favorite candy is a tie between RED Gummy Bears and RED Sour Patch Kids, so when I came across a recipe in Taste of Home Magazine for making your own gumdrops, I was intrigued, but I had to change it up because I wanted more of an all-inclusive berry taste.

I must admit, I shelved it for quite some time. I like instant gratification and the process of making these provides none of that. There is a full 24-hour waiting period, while the semi-done gumdrops stare at you from across the room, taunting and whispering your name in their gelatenous sweetness. If you have a sweet tooth, like me, it's worse than Chinese Water Torture - or so I would think. The payoff is grand if you can muster up the extreme patience.

These gumdrops are soft and chewy and go down a little too easy, especially if you cut them into small bite sized pieces. They were the most perfect little Valentine's Day gift. I was impressed with how the cranberry flavor wasn't overwhelming, and am left wondering how I could change up the recipe to include other flavors. I have a couple of ideas that center around lemon curd and fruit juices, but that may include adding an additional packet of unflavored gelatin, to balance the liquid out. I'm up for figuring out the science of it all, because they are just that good.

My warning to anyone who makes this must be headed...1.) If you eat too much, you will get a severe stomach ache. And, 2.) Embrace the pink pee and poo! It means your systems are all working! *Sadly, this is not the first time I've mentioned poo on this blog.*


VERY BERRY GUMMY SQUARES


2 envelopes unflavored Knox gelatin
1/2 cup cold water

1 can jellied cranberry sauce

2 cups sugar

2 3-oz packages of raspberry gelatin

1 3-oz package of strawberry gelatin

granulated sugar, for dusting


In a saucepan, sprinkle unflavored gelatin over water. Let stand for two minutes, or until the gelatin softens. Add the cranberry sauce and 1 cup of sugar and cook over low heat until the cranberry sauce is melted and the sugar is completely dissolved, whisking lightly. Remove from the heat and add the raspberry and strawberry gelatin, stirring to completely dissolve.


Coat an 8x8x2'' pyrex baking pan with cooking spray. Dust lightly with sugar, and pour your gelatin mixture into the prepared pan. Cover with plastic and let stand at room temperature overnight.

Cut into 1-inch squares with a knife that you've run until hot water, so it slips through the candy easier. Roll each piece in sugar. Place on baking sheets and let stand for 3 hour
s. Turn pieces over, roll in additional sugar, and let stand an additional 3 hours until very firm.

Store in an airtight container at room temperature until they are gone!

Sunday, November 28, 2010

What one should bring when attending an adult-only party...

Every couple of years, one of my horny friends decides to throw a sex toy party which I always feel *obligated* to attend. (I see you rolling your eyes!) It's the ultimate girls night**, with yummy fruity cocktails, lots of amazing finger foods, nervous laughter, inappropriate jokes (me) and touching (me, again), demonstrations (not me!) and the exchange of funds for goods. Being a little deviant, I offered to make a cake.

Tell me? What the hell was I thinking? I HATE making cakes! But, since I opened my big mouth and couldn't back out without looking like a huge schmuck, I pressed onwards. I wanted to do some kind of kinky jacuzzi tub cake with nakedness that would shock the ladies. A couple of years ago, I made a camping cake with a "lake" made with jell-o, so I used that same basic technique.


The run-down:


  • The CAKE is Betty Crocker, from a box. No brainer! I doubted that anyone would want to eat this thing, so I wasn't going to bake from scratch and cross my fingers that it would be OK.


  • The TILES are Mike & Ikes candies.


  • The PEOPLE and ACCESSORIES are gum paste.


  • The "WATER" is jell-o. Prepared after assembly of the people, with a hope and a prayer!
The assembly:

Followed all cake ingredient directions with two 8 inch round cake pans. Frosted the layers, cut out the hole for the Jacuzzi, then crumb coated the entire cake and set aside. Later, frosted the cake, smoothing out the sides and top. Attached candy tiles.

Making the people sucked! I've never used gum paste before and it's tricky stuff. (And, BTW - tastes disgusting!) I found the gum paste in the cake decorating section of Michael's Crafts. $10 bucks for a 10 oz. bag. Some tips I picked up the hard way: 1. Keep the bag sealed, because it dries out fast! To tint the paste I used basic food grade food coloring and kneaded the paste until it was colored to my satisfaction. My hands were the color of the rainbow for a day or so afterwards - so 2. use plastic gloves or be prepared. 3. Make sure that you position your figures how you would like them to dry, otherwise you have to start over.


I tried to be as anatomically correct as possible. At least when it came to the nether-regions! I mean this guy has no head hair, but a very nice package if I do say so myself!


This lady was a little more demure, I decided.


Add your figures to the cake, using icing to prop them up if needed. Prepare jell-o according to the instructions. Let jell-o cool slightly, and gently pour into the iced cake hole. If you are not gentle, you'll get bubbles. If you get bubbles, just pretend that your figures are farting. :)


I am the first to admit that this cake, although hilarious, it's very amateurish - but really, who cares. There's penis and vagina and ass and boobies! Looking back, I should've tinted the paste that I used to make the people so that they had somewhat of a tan. Poor little sculptures were very, very white! I'm just happy that the whole thing made it to the party without a major cake'tastrophy and that it made all the ladies giggle.

**To all the boys out there, sorry...these parties are so much more fun without your participation - just sit back and hope that your woman receives a package in about 6-8 weeks.

Monday, May 17, 2010

3-Blend Citrus Poppy Seed Cake

"Cake from scratch."

That single line often makes me break out in hives. Seriously. The measuring, the testing, the uncanny ability for all of your hard work to go up in smoke! Hey...I'm a cheater. (No comments from the peanut gallery!) If I can use a cake mix, I will. I openly and freely admit it!

However, sometimes you have to take the plunge...like when all there is for "Poppy Seed" mixes is muffin mix - and surely that would've sucked. Scratch was my only option. Sigh. Lucky for me, the recipe turned out to be pretty fool-proof. Without further adu...


3-BLEND CITRUS POPPY-SEED CAKE
(I apologize if you see the word "poopy" instead of "poppy." I've caught myself twice already.)

Cake (all ingredients should be room temp):
3 sticks of unsalted butter
3 3/4 cups of flour
2 1/2 tsp baking powder
4/3 tsp salt
2 1/2 cups sugar
7 large eggs, lightly beaten
1 1/2 tsp vanilla
1 cup milk
1/2 tsp grated lime, lemon and orange zest
1/3 cup poppy seeds

Preheat oven to 350 degrees. Prepare 2 or 3 8x2 inch round cake pans. Set aside. (2 pans will give you (4) 1/2 inch layers, 3 pans will give you (3) 1-inch layers.)

In a medium bowl, combine flour, baking powder and salt. Set aside.

In the bowl of an electric mixer fitted with a paddle attachment, cream butter on medium-low speed until lightened, about 1 to 2 minutes. Gradually add sugar, and once again beat until lightened, about 3 to 4 minutes, scraping the sides of the bowl as needed to combine thoroughly. Drizzle in eggs, a little at a time, beating on medium-low speed after each addition until batter is smooth and fluffy, about 5 minutes. Beat in vanilla.


7 eggs is a lotta eggs!


Reduce mixer speed to low and alternately add flour mixture and milk, a little at a time, beginning and ending with the flour mixture until well combined, scraping often. Beat in the zest of the lime, lemon and orange, as well as the poppy seeds.


OOOOOO...zesty!


Divide batter into prepared pans. Bake 30 minutes, then rotate pans for even browning, baking an additional 5 to 10 minutes more - or until a skewer comes out clean when poked into the center of the cake. Transfer pans to a wire rack to cool for about 15 minutes, then carefully turn cakes out (top up) to completely cool.

Meanwhile...

The icing will need to chill at least 3 hours before spreading. Don't taste it though, or you might eat it all!

Icing (reminder - ingredients should be kept at room temp!):
12 oz. cream cheese
6 tbsp butter
3 cups confectioner's sugar

In the bowl of an electric mixer fitted with a paddle attachment, beat cream cheese until smooth, about 1 minute. Add the butter, scraping the sides often, until combined. Carefully add the confectioner's sugar on low-speed until the mix is completely combined. Beat frosting on medium-speed until smooth and fluffy, about 1 full minute, then transfer to an airtight container and chill until firm.

Assemble the cake...

Place a little of the icing on the serving platter to keep the cake from sliding around. Place one layer of cake on top, then spread 1/3 of the icing onto the cake and repeat until all you have left is one layer of cake.

When ready to serve, glaze!

Lemon Glaze (can be made 3 to 4 hours ahead):
1 1/2 cups confectioner's sugar
3 to 4 tbsp freshly squeezed lemon juice
2 tsp poppy seeds

Place sugar in a bowl. Gradually add lemon juice, stirring with a fork to combine until smooth. The mixture should be slightly thick. Stir in poppy seeds. Glaze cake immediately by pouring mixture over the center of the top and allowing it to run down the sides.

Then, DIG IN!


The recipe is definitely not as complicated as it seems, and the finished product was excellent, much to the delight of my dinner guests (and co-workers who got the leftovers the next day). My only other alternate addition for next time...I might play a little with the moistness of the cake by brushing some Limoncello over the cut layers. It would also give the cake a little more robust lemon flavor, which I was missing. Wish I thought of it earlier.

Am I still afraid of "cake from scratch?" Hell yes! But this recipe did give me a little more confidence in that realm.

Wednesday, December 09, 2009

mini Cheesecake Cookie Cups

Last year, I posted the original recipe for these awesome Cheesecake Cookie Cups. At the time I thought they were great, but this year I wanted to play around with the size of them. I really like the idea of mini, bite-sized cookies...which allows me to justify eating 2 or 3 of them without feeling *too much* guilt.


Of course, making things minature means that you spend a little more time on baking the buggers. Something to keep in mind if you have a life. Obviously, since I made 250'ish of these little delights...well, we won't go there.

Cheesecake Cookie Cups (the mini version)

1 package Nestle Toll House Refrigerated Mini Chocolate Chip Cookie Bar Dough
2 packages of cream cheese, room temp
1 can sweetened condensed milk
2 large eggs
2 tsp vanilla extract
1 can (21 oz) cherry pie filling

Preheat oven to 325 degrees. Paper-line mini muffin trays. Place 1/2 piece of mini chocolate chip cookie dough in each muffin cup, and press down slightly. Bake for 8-10 minutes of until cookie has spread to the edge of each cup, but is not fully cooked through. (If it doesn't spread to the edge, don't sweat it...they will still be delicious, and I promise no one will notice.) Let cool in mini muffin tray until they collapse slightly.

Meanwhile, beat cream cheese, sweetened condensed milk, eggs and vanilla in a medium bowl until smooth. Pour about 1 tbsp of the mixture over each cookie in cup. Bake for an additional 15 minutes or until set. Cool completely on a wire rack. Top each cheesecake with pie filling. Keep refridgerated.


So cute! You can substitute the chocolate chip dough with sugar cookie dough, or use a traditional graham cracker crust.

Tuesday, November 11, 2008

Pumpkin Empanadas

Let me start off by saying that I am not a big fan of pumpkin pie at Thanksgiving - or anytime, actually. I prefer fruit pies or anything cheesecake or chocolate or better yet, any combination of the three. However, when I saw this recipe for Pumpkin Empanadas, I was intrigued and knew that I had to try them.


The result? A rich morsel of goodness wrapped in a light, flaky crust. The recipe promised that the empanada would taste like an individual slice of pumpkin pie. Not so, in my opinion...it's more of a cross between a pumpkin pie and a super sweet pecan pie.


PUMPKIN EMPANADAS

Filling ingredients:
1 cup canned pumpkin
1 cup firmly packed brown sugar
1 tbsp butter
1 tsp ground cinnamon
1 tsp pumpkin pie spice (I didn't have this, so I substituted 1/4 tsp ground cloves, 1/2 tsp ground nutmeg and 1/4 tsp ground ginger)
1/4 cup chopped pecans

Crust ingredients:
1 1/2 cups flour
2 tbsp sugar
1 tsp salt
1 cup cold butter, cut into small cubes
8-10 tbsp cold water

Glaze ingredients:
1 egg
1 tsp water

In a saucepan, combine pumpkin, brown sugar, 1 tbsp butter, filling spices. Stir to combine some and cook over medium heat until mixture is thickened. Remove from heat, and cool completely (approximately 1 hour). Stir in pecans and set aside.


(OK - so I realize this is not the most appetizing of photos...but the filling is really tasty!)


Preheat oven to 400 degrees. In a food processor, combine flour, sugar, salt and butter. Pulse ingredients until mixture resembles coarse crumbs. Pulse in enough water until dough is just moistened.

Divide dough in half. Roll out dough on a lightly floured surface, until about 1/8 inch thick. (Keep remaining dough in the refrigerator so it remains cold.) Cut circles with a 2 1/2 inch cookie cutter. Place 1/2 tsp of the filling in the center of each circle. Fold one side of the circle over to form a crescent-shaped empanada. Pinch dough lightly to form a seam, then use the tines of a fork to seal the empanada closed. Place on a non-greased cookie sheet. Repeat until all cookies are made.


Whisk together egg and 1 tsp water in a small bowl. Brush egg mixture lightly onto empanadas. Bake for 12-15 minutes, or until cookies are browned and glossy. Remove from oven and let cool. Eat warm!


Although I appreciate the absolute perfection that is homemade pie crust - the next time I make these, I will probably cheat and buy some pre-made crust to cut down on the mess and save time. The recipe also said that it would yield 4 dozen cookies...which is a total LIE! I got about a dozen and half out of my dough, with lots of filling left over. This did irritate me some, but I plan to make another batch tonight, so I threw the leftover filling in the fridge with a little plastic wrap to cover it.

I do think that a touch of "sugar in the raw" sprinkled over the top, pre-bake, would give these cookies a little somethin-somethin. All I'm thinking about today, is how good they would be with a side of vanilla ice cream!

Monday, May 12, 2008

Reward your Mama

Happy Mother's Day!!!

Tulips, fresh with morning dew, from my garden.

For the past couple of years, I treated my mother and sister to a gourmet brunch as a special Mother's Day gift. My mother has the craziest diet restrictions, so this is no easy feat. This year, my sister had to work Mother's Day morning, so while brunch was pretty much out of the question...dinner was not. Personally, I like brunch better because I never treat myself to yummy breakfast foods like french toast and sweet breads - my breakfasts usually consist of buttered toast and a glass of juice.

Each woman had a special request...my mother really wanted Butternut Squash Soup. My sister asked for Corn Chowder. 2 soups you say? No problemo! My sister also requested cheesecake, minus the crunchy eggshells. Smartass. (My brother requested cheesecake for his birthday last year, and I didn't do what I tell everyone else to do: crack your eggs into a separate container. A small bit of eggshell got into the batter and disbursed so that every bite had a cruch to it! Apparently, no one likes that added bit of calcium in their cheesecake!) Good thing for her that I have been jonesing cheesecake for several weeks now, ever since I spied Amanda's salted caramel sauce on her blog.

So, this is what my menu looked like:

Butternut Squash Soup, with a bit of grated fresh ginger
Bacon, Potato and Corn Chowder
9-Grain Rolls
Pork Tenderloin with a Cherry Reduction
Cherry and Apple'sauce
Baked Potatoes
Grilled Skewered Vegetables (colorful bell peppers, yellow summer squash, mushrooms and tomatoes)
Cheesecake with Salted Caramel Sauce


Sometimes cheesecake can be a real hassel. My cheesecakes have a tendency to crack (and I mean crack!) and the result is not the pretty smooth cake that is always pictured in cookbooks. This time, I settled on a new cheesecake recipe that turned out really, really delicious. It was smooth and creamy and mile high! The baking technic was a little different than I had seen before, but it totally worked because it came out with only one small crack that was easily hidden with the caramel sauce. No gaping craters!!! Horray!


See? Isn't it beautiful? No trick photography here!


SMOOTH SPRING CHEESECAKE


For the cheesecake:

5 (8 oz.) bricks of creamcheese,


1/4 cups sugar
3 tablespoons all-purpose flour


Finely grated zest of 1 orange


Finely grated zest of 1 lemon
5 large eggs
2 large egg yolks


1/2 teaspoon vanilla


Graham Cracker Crumb:


1 1/2 cups (5 oz) finely ground graham crackers


5 tablespoons unsalted butter, melted


1/3 cup sugar


1/8 teaspoon salt


Preheat oven to 550°F.
Stir together crust ingredients and press onto bottom and 1 inch up side of a buttered 9-12'' springform pan. Set aside.


Beat together cream cheese, sugar, flour, and zests with an electric mixer until smooth. Add eggs and yolks, 1 at a time, then vanilla, beating on low speed until each ingredient is incorporated and scraping down bowl between additions.


Put springform pan with crust on a large cookie sheet. Pour filling into crust (springform pan will be completely full) and bake on cookie sheet (to catch drips) in the middle of the oven for 12 minutes, or until puffed. Reduce temperature to 200°F and continue baking until cake is mostly firm (center will still be slightly wobbly when pan is gently shaken), about 1 hour more. Turn off oven and allow the cake to sit on oven rack for another oven. Remove cake from oven and run a knife around top edge of cake to loosen. Cool completely in springform pan on a cooling rack. Chill cake, loosely covered, at least 6 hours. Remove side of pan and transfer cake to a plate. Serve as is, or with any kind of fruit, chocolate or caramel sauce.


Oh so good with just a slight hint of lemon and orange flavors from the zests of the fruits. It made the cheesecake come alive and dance on your taste buds. Beware though, this cake is rich!!!! Cut small slices and don't be ashamed when you have lots leftover. Share the love by bringing the remaining cake to work!

Wednesday, March 26, 2008

It's bread...that tastes like puddin'

I have an issue with textures, which is why I have never tried bread pudding until recently. Bread is for sandwiches or toast. Or, so I thought.

A trip to the buffet changed my mind. They had a slight menu change, and replaced my beloved banana cream dream with bread pudding. "Oh yuck" I thought, but took a spoonful to try anyways. Oh my goodness gracious!!! I waited 30 *mutter, mutter* some-odd years to try this stuff?! Why am I such a fool? The crust on top was nice and dense, and the insides were so creamy and full of vanilla flavoring, yet the whole dish was so rich, which made it so sinfully delicious.

When I started to talk to my Aunt J. about Easter dinner, I knew that bread pudding had to make it onto the menu. Lucky for me, she was down with it - - and I began the search for a bread pudding recipe that would awaken our taste buds out of a sleepy winter slumber.

BANANA BREAD PUDDING WITH CARAMEL

1 jar of purchased caramel sauce
1/4 tsp kosher salt (table salt would make the dish way too salty)
8-9 slices potato sandwich bread, very lightly toasted, torn into large pieces
3 ripe bananas, mashed
4 large eggs
1 1/2 cups half and half
1/3 cup whole milk
2 1/2 tbsp sugar, divided
1 vanilla bean, split and seeds removed
2 tbsp unsalted butter, melted

To make 1 large bread pudding dessert: Spray one pyrex 8x8x2'' glass baking dish with a non-stick cooking spray, such as PAM. Pour enough caramel into the dish to coat the bottom. Arrange half of the torn bread into the baking dish. Spoon about 3 tbsp caramel sauce over bread. Spread mashed bananas over bread, then arrange second half of torn bread on top, fitting layers snugly. (Like a dessert lasagna!)

In a medium bowl, whisk together half and half, eggs, milk, salt, 1 1/2 tbsp sugar and vanilla until combined. Pour 3/4 of custard into baking dish, and let stand app. 30 minutes until the bread absorbs the prepared custard.

Preheat oven to 400 degrees.

Pour any remaining custard onto bread mixture. Brush any exposed bread pieces with melted butter, and drizzle top with 2-3 tbsp caramel sauce. Sprinkle with remaining sugar. Bake bread pudding uncovered for 55-60 minutes, or until middle is set. Remove and let cool. Serve warm or at room temperature with vanilla ice cream and a final drizzle of caramel sauce.


To add a touch of whimsy, I also fried up a couple of plantains as a garnish - but next time I will just leave them out...bread pudding shouldn't be so fussy.

Additional preparations...

To make 8 individual portions: Butter eight 3/4-cup ramekins. Spoon 1 generous tablespoon caramel into each ramekin. Tear each bread slice into 6 squares, for 48 pieces total. Set 1 tbsp of mashed banana on each bread square. Arrange 6 banana-topped bread squares standing on edge, side by side in each prepared ramekin, fitting snugly.

In a medium bowl, whisk together eggs, half and half, milk, 1 1/2 tablespoons sugar, vanilla and salt until combined. Pour enough custard into each ramekin to reach top. Let stand until bread absorbs some of custard, about 30 minutes. Reserve any remaining custard. Meanwhile, position rack in bottom third of oven and preheat to 400°F. Pour remaining custard into ramekins. Brush exposed bread pieces with melted butter, and drizzle with caramel sauce. Sprinkle with 1 tablespoon sugar. Set ramekins in large roasting pan. Pour enough hot water into pan to come halfway up sides of ramekins. Bake puddings until set and knife inserted into custard comes out clean, about 45 minutes. Remove from pan; cool.

Sunday, February 10, 2008

Doughnuts

Doughnuts or donuts? Who the heck knows..."doughnuts" makes my poor spell check go crazy, throwing red squiggly lines all over the place, but "donuts" is the incorrect spelling according to all of my cookbooks and the recipes listed on the internet! Whatever way you spell it, just call them delicious.


Last Thursday I had the most intense craving for doughnuts. Cake doughnuts, in particular. Moist, dense little circles of pleasure covered in sugar or dipped into a glaze. I thought about them all day. Now, I could certainly run over to Duncan Donuts and pick up one on the way home to satisfy the craving, but with my luck they would be out of my favorites or they would be stale. So, why not make them at home? After all, any well stocked (or even partially stocked) pantry has all the ingredients you need to make these fresh...

BASIC CAKE DOUGHNUTS (and doughnut holes!)

3 cups of flour
2 tsp baking powder
1/2 tsp ground cinnamon
1/4 tsp ground nutmeg
1/4 tsp salt
2/3 cup milk
1/4 cup butter, melted
2 beaten eggs
2/3 cup sugar
1 tsp vanilla
cooking oil for deep fat frying
Glaze: 2 cups powdered sugar, 3-5 tbsp water. In a bowl, mix together sugar and water until you have achieved the desired consistancy.


Combine 2 cups of flour, baking powder, cinnamon, nutmeg and salt in a medium mixing bowl. In a large mixing bowl (I used my KitchenAid Mixer) combine eggs, sugar and vanilla. Beat about 3 minutes or until mixture begins to thicken slightly. In a smaller bowl, combine milk and butter. Alternately add flour mixture and milk mixture to egg mixture, beating well after eat addition. Stir in remaining 1 cup of flour. Cover dough with plastic wrap and chill for at least 2 hours.

Heat cooking oil in a large, deep skillet until temperature reaches 375 degrees.

Meanwhile, turn dough out onto a lightly floured surface. Roll dough into a 1-inch thick slab. Cut dough with floured doughnut cutter (size of your choice), dipping cutter into flour between cuts. Reroll as necessary.

Fry doughnuts, 2 or 3 at a time, for about 1-2 minutes on each side, turning once with a slotted spoon. Drain fried doughnuts on a rack or on paper towels. Repeat with remaining doughnuts and doughnut holes. If desired, shake warm doughnuts in a plastic zip lock baggie with cinnamon and sugar. Or, dip tops in a simple glaze.


Tip: Do a "test fry" with one doughnut, so that you can gage the correct frying time and thickness of your dough. My first batch came out perfect on the outside, but raw on the inside - and that is not good eats! I simply flattened out my donuts more and that did the trick. Oh, and make a double batch...they are that good. (And, not greasy believe it or not!)


Friday, January 25, 2008

Poached Pears with a Simple Fruit Salad

I've been craving dessert like no body's buisness lately - probably because I am trying to restrict myself from sugary foods in an effort to get back on track after the holidays, which pretty much isn't as bad as I thought it would be. However, the other day I went to a local produce outlet and was blown away by all of the beautiful fruits and vegetables at just pennies! For $19 and change, I bought: a cantelope, 3 kiwi fruits, 2 pears, 1 pint each of blueberries and blackberries, 1 lb of strawberries, a cucumber, 1 red pepper, 1 bunch of flat leaf parsley, a loaf of crusty Italian bread and some feta cheese. How exciting is that?!??

Back when I made the White Chocolate and Spiced Pear Tiramisu, I really enjoyed the soft graininess of the poached pears, and immediately wanted to try a different kind of dessert that involved those wine poached pears. A perfect inspiration!

The following is the result:

WINE POACHED PEARS WITH A SIMPLE FRUIT SALAD

Poaching liquid:
4 ripe Anjou pears, peeled but left whole
2 cups of dry Vermouth
2 cups of pear nector
4 whole cloves
1 cinnamon stick
1 vanilla bean, split
4 tbsp honey

Fruit Salad (cut into small pieces):
1/2 cantelope
1 lb strawberries
1 pint blueberries
1 pint blackberries
3 kiwi fruit

In a deep saucepan, combine all sauce ingredients. Drop in peeled pears and bring liquid to a boil. Drop heat to a simmer and cook for 30-40 minutes, or until the pears are fully poached and soft when pierced with a knife. Remove pears from heat and set aside. Increase heat and bring the liquid to a boil, cooking until liquid is reduced and thick. Let cool.

Meanwhile, cut up all fruit salad ingredients into small pieces (as this resembles a salsa of sorts). Place in a bowl and keep chilled until service.

For service: Place fruit salad in a bowl, creating a crater in the middle for the poached pear to sit. Position pear, and drizzle sauce over everything. Add a sprig of mint (I only had parsley on hand!) to the pear for a bit of whimsy. If desired, sprinkle a touch of powdered sugar over dessert, or add a dollop of fresh whipped cream. Stand back and take the compliments!


Not only are you eating every color in the rainbow - which the experts say is beneficial, but you are also experiencing a bunch of different tastes and textures. This dessert was the perfect ending to a light meal, and was not much fuss to prepare (although it did remind me that it is time to sharpen my knife). Plus, how pretty!

Edited to add: Son of a Bitch!!! I thought I was being super cleaver creating a new recipe...but epicurious.com had a very similar recipe (and picture) for almost the exact same thing! Sigh.

Wednesday, January 09, 2008

Chocolate Mousse

For years, Nathan has been telling me that he does not like chocolate. I always chuckle when he makes this statement, because he is totally fooling himself! Case in point, whenever we go out to dinner and treat ourselves to dessert, he picks whatever delicious confection has "chocolate" in the title. Naturally I do too - but I'm not lying to myself over my likes and dislikes! I gently remind him of his total apparent dislike for chocolate when he's on his last bite.

Last night, he succumbed and admitted that he is a chocolate fan.

I've been wanting to try my hand at Chocolate Mousse for some time now. Mousse is supposed to be cloud-like, yet rich...and the recipe that I found looked very easy, with only a couple of ingredients and steps. And you know what? It came out amazing!!! I may use a milk chocolate instead of bittersweet chocolate next time, since it was a little too bitter for my tastes - but the end result was light and fluffy, and the perfect ending to a light meal.

BASIC CHOCOLATE MOUSSE

3 large egg yolks
Pinch of salt
2/3 cup whole milk
12 ounces imported milk chocolate, finely chopped
1 teaspoon dark rum (optional)
1 1/2 cups chilled whipping cream, divided
Dark chocolate shavings (for garnish)


Whisk yolks and salt to blend in medium bowl. Bring milk to simmer in medium saucepan over medium heat. Temper milk into eggs, then gradually whisk tempered eggs to hot milk into yolk mixture; return to same pan. Stir over low heat until custard thickens, about 1 minute (do not boil). Remove from heat; add chocolate. Whisk until chocolate melts and mousse base is smooth; whisk in rum. Cool 45 minutes on the counter.

Beat 3/4 cup cream in bowl until peaks form; fold into mousse base. Place prepared mousse in service cups, cover with plastic wrap; chill at least 4 hours. (This mousse is extremely rich, so don't go overboard filling your vessels...)

Before service, beat 3/4 cup cream in another bowl until peaks form. Drop a dollop of whipped cream onto mousse and sprinkle with chocolate shavings. Serve!


I wish I had taken a before picture of the finished dessert, because it was so impressive...but we were both too excited to dig that we didn't stop to think first.

Monday, December 31, 2007

Christmas Dinner - start to finish

My family's Christmas tradition was thrown out the window this year when my mother decided to have dinner with the steps - leaving me and my sister to fend for ourselves. We tried to make the best of it, and I invited my sister and her children to celebrate at our tiny apartment. We set up two card tables, I bought some new dishes and linens and tried some interesting recipes full of fat and flavor! And, you know...we had a great time. My mother better watch out, because we may have started a whole new tradition without her! (One that includes wine!)

Christmas Dinner Menu:
Risotto Cakes - your favorite risotto recipe, chilled, rolled into balls and flattened, then pressed into Italian-style breadcrumbs and fried in oil. Serve with a simple salad and a sprinkle of freshly grated Parmesan cheese to bring it on home.
Olives / Sweet Baby Pickles
Shrimp Cocktail
Onion, Apple and Potato Gratin
Slow Roasted Prime Rib with a Madeira Wine Au Jus
Roasted Baby Carrots with Herbs
White Chocolate and Spiced Pear Tiramisu

It was heavenly. Especially dessert.

And, now for your blogging pleasure....the recipes:

ROASTED PRIME RIB with a MADEIRA WINE AU JUS
1 9- to 9 1/2-pound prime rib beef roast, excess fat trimmed

1 tablespoon olive oil

6 medium onions, peeled, quartered

2 1/2 cups beef broth

1 3/4 cups Madeira

1 1/4 cups dry red wine

4 large fresh thyme sprigs

4 large fresh parsley sprigs

3 large fresh rosemary sprigs

1 bay leaf


Position rack in center of oven and preheat to 450°F. Place beef, fat side up, on heavy large rimmed baking sheet. Rub with oil; sprinkle generously with salt and pepper. Roast beef 20 minutes. Reduce oven temperature to 350°F. Place onions around beef. Continue to roast until thermometer inserted into center of beef registers 125°F for medium-rare, stirring onions occasionally, about 2 hours 5 minutes.

Meanwhile, combine broth, Madeira, wi
ne, thyme, parsley, rosemary, and bay leaf in medium saucepan. Boil until mixture is reduced to 2 cups, about 25 minutes. Remove from heat. Discard herbs. Transfer beef to platter. Using slotted spoon, transfer onions to same platter; tent with foil. Let stand 30 minutes.


Nothing goes better with a slab of pink beef, then a side of tender potatoes! I was going to do a regular old mashed/smashed potato, but that seemed a little on the boring side. Instead, I found a recipe that combined onions, apples and potatoes (3 classic flavors) - but still remained on the healthier side, omitting all of the cream and cheese from a traditional gratin. It was a gamble that paid off!

ONION, APPLE AND POTATO GRATIN

12 tablespoons (1 1/2 sticks) butter, divided
2 pounds onions, sliced

2 tablespoons (packed) chopped fresh thyme

4 teaspoons fine sea salt, divided

2/3 cup water

2/3 cup dry white wine

2 1/2 pounds Baby Yellow and Red potatoes, left unpeeled and cut into 1/4-inch-thick rounds
2 pounds Granny Smith Apples - peeled, halved, cored, cut into 1/4-inch-thick slices


Preheat oven to 400°F.

Butter 13x9x2-inch glass or ceramic baking dish. Melt 6 tablespoons butter in large nonstick skillet over medium heat. Add onions, thyme, and 2 teaspoons salt; sauté until onions are translucent, about 10 minutes. Increase heat to medium-high; sauté until onions are tender and begin to color, about 8 minutes longer. Remove from heat. Add remaining 6 tablespoons butter, 2/3 cup water and wine to skillet; stir and swirl skillet to combine. Bring to boil. Cool onion mixture to lukewarm. Combine potatoes, apples, remaining 2 teaspoons salt, and onion mixture in large bowl; toss gently to blend.

Transfer to prepared baking dish, spreading evenly. Cover dish with parchment paper, then cover with foil, shiny side down. Bake gratin until potatoes are tender, about 55 minutes. Uncover and bake until top browns and juices bubble thickly, about 20 minutes l
onger. Let gratin stand about 15 minutes before serving.


(Photo Credit: www.epicurious.com)

Last, but not least...DESSERT! The photo can speak for itself, no? Although this recipe was a tad time consuming, it was so worth it. The layers were creamy and delicious. I'm not a fan of white chocolate - but this recipe made me a believer for sure!


WHITE CHOCOLATE AND SPICED PEAR TIRAMISU


Spiced Pears:
1 750-ml bottle dry white wine
2 cups pear juice or pear nectar (Goya has a great pear nectar)
1 1/4 cups sugar
4 1-inch-diameter rounds peeled fresh ginger (each about 1/8 inch thick)
2 cinnamon sticks, broken in half
5 large firm but ripe Anjou pears, peeled and cut in half with stems and core removed

White Chocolate Mascarpone Mousse:
7 ounces high-quality white chocolate, finely chopped
1/3 cup poire Williams (clear pear brandy - beware, you are going to drop $20 for a small bottle - but I can't imagine substituting anything else)
1/4 cup water
1/2 vanilla bean, split lengthwise
1 8- to 8.8-ounce container mascarpone cheese (found in the specialty cheese case at the market)
1 cup chilled heavy whipping cream

Trifle Assembly:
3 3-ounce packages soft ladyfingers
2 cups chilled heavy whipping cream
1/4 cup minced crystallized ginger
White chocolate curls**
1 tablespoon powdered sugar

For spiced pears:

Combine first 5 ingredients in large saucepan. Stir over medium-high heat until sugar dissolves. Add pears and bring to boil. Reduce heat to medium, cover, and simmer until pears are just tender when pierced with knife, about 35 minutes.

Using slotted spoon, transfer pears to plate. Boil poaching liquid in heavy large saucepan over medium-high heat until slightly thickened and reduced to generous 1 1/2 cups, about 15 minutes. Strain into 2-cup measuring cup; discard spices in strainer. Cool. Cover and chill pears and pear syrup until cold, approximately 3 hours.

For mousse:
Combine white chocolate, pear brandy, and 1/4 cup water in top of double boiler set over simmering water. Stir until smooth (mixture will be very liquidy). Scrape in seeds from vanilla bean; discard bean. Transfer white chocolate mixture to large bowl; gradually add mascarpone, whisking until mixture is smooth. Cool mascarpone mixture until barely lukewarm.

Using electric mixer, beat 1 cup cream in medium bowl until peaks form. Fold whipped cream into mascarpone mixture in 4 additions. Cover and chill white chocolate mousse until set, about 3 hours.

Pears and mousse can be made 1 day ahead. Keep chilled.


For trifle assembly:
Cut pears lengthwise into 1/4-inch-thick slices.

Arrange ladyfingers, rounded sides down, in single layer in bottom of 12-cup trifle dish (about 8 inches in diameter and 5 inches deep), covering bottom completely (using about 15 ladyfingers). Drizzle 5 tablespoons pear syrup evenly over ladyfingers. Using small offset spatula, spread 1/3 of white chocolate mousse over ladyfingers, making layer slightly thicker around outer edges of dish to allow mousse to be more visible (center of mousse layer will be thin). Starting at outer edges of dish, place pear slices in single layer with curved edges against sides of dish atop mousse, covering completely. Repeat layering of ladyfingers, syrup, mousse, and pears 2 more times. Cover with fourth layer of ladyfingers (some ladyfingers and pear slices may be left over). Drizzle ladyfingers evenly with 5 tablespoons syrup.

Using electric mixer, beat 2 cups whipping cream in large bowl until soft peaks form. Add 1/4 cup pear syrup and beat until stiff peaks form. Working in batches, transfer cream to large pastry bag fitted with large star tip. Pipe rosettes all over top of trifle, mounding slightly in center. Sprinkle with crystallized ginger. Garnish with chocolate curls.

Sift powdered sugar over trifle just before serving.


**To make chocolate curls, place one 3 1/2-ounce bar of white chocolate on a plate and microwave on high at 5-second intervals just until slightly softened, but not hot or beginning to melt. Using vegetable peeler and starting at one long edge of the chocolate bar, shave white chocolate into curls. If the shaved chocolate breaks into small shards, it's not soft enough, so place in microwave again for a few seconds. If the chocolate becomes too soft, let it stand at room temperature or chill briefly until it firms up a bit.

Monday, September 03, 2007

Summer Fruit Terrine

Does anyone remember those molded jar candles that Bed, Bath and Beyond used to make? The wax would be shaped like fruits that would melt down inside this clear jelly-like substance. The fruit would be suspended in time! I had about three of them - - my favorite being the candy corn version, which I never lit because that sweet smell would make me ill.

This dessert reminds me of those candles.

SUMMER FRUIT TERRINE

Bottle of non-alcoholic Sparkling Cider* (which I found in my market's cheese section)
pint of fresh raspberries
green and red seedless grapes - halved
1 small can of sliced peaches, drained
2 (1/4 oz) envelopes of non-flavored powdered gelatin
1/2 cup sugar
2 tsp fresh lemon juice

Arrange fruit in a glass, ceramic of nonstick loaf pan.

Pour 1/4 cup sparkling cider in a small bowl, and sprinkle with gelatin. Let stand 1 minute to soften.

Meanwhile, bring 1 cup of cider to a bowl with sugar, stirring until sugar is dissolved. Remove from heat and add gelatin mixture, also stirring to dissolve completely. Gently stir in 3/4 cup cider and lemon juice, then transfer to a metal bowl set in a larger bowl of ice and cold water to cool. Stir occasionally, until cider is room temperature.

Slowly pour cider over fruit, then chill, covered, until firm - approximately 5-6 hours.

To unmold, dip pan in hot water for 3-5 seconds to loosen and invert onto serving dish.

*For an adult-only audience, substitute the sparkling cider for a Prosecco - an Italian Sparkling Wine.


Much to my dismay, people seemed afraid of this dessert, and I ended up bring over 1/2 of it home...which is a pure shame, since it was really light and tasty. The berries added a sour punch, and the grapes remained firm and sweet. The next time I make it, I will go a little lighter on the fruit so that it is not so dense.

You can also use any fruit you'd like - - but I really like the idea of this dish being an "end of summer" item, with traditional summer fruits. Plus, it looked really pretty. (Although it would've looked even prettier if I had a fluted dish or something to mold it into.)