Monday, December 31, 2007

Christmas Dinner - start to finish

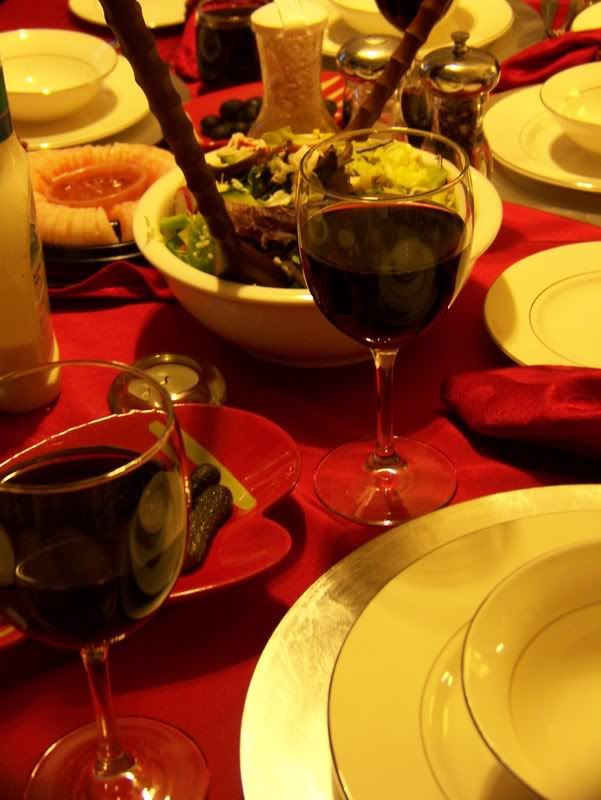
My family's Christmas tradition was thrown out the window this year when my mother decided to have dinner with the steps - leaving me and my sister to fend for ourselves. We tried to make the best of it, and I invited my sister and her children to celebrate at our tiny apartment. We set up two card tables, I bought some new dishes and linens and tried some interesting recipes full of fat and flavor! And, you know...we had a great time. My mother better watch out, because we may have started a whole new tradition without her! (One that includes wine!)

Christmas Dinner Menu:
Risotto Cakes - your favorite risotto recipe, chilled, rolled into balls and flattened, then pressed into Italian-style breadcrumbs and fried in oil. Serve with a simple salad and a sprinkle of freshly grated Parmesan cheese to bring it on home.
Olives / Sweet Baby Pickles
Shrimp Cocktail
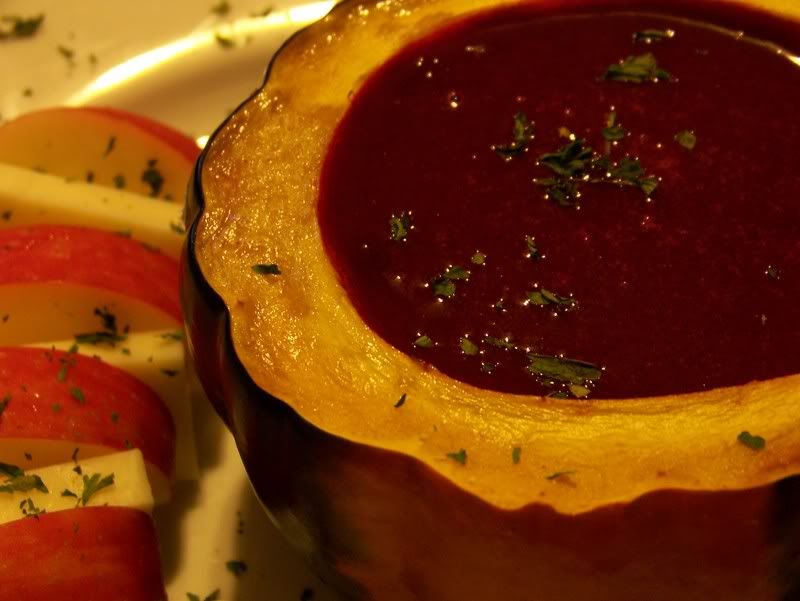
Onion, Apple and Potato Gratin
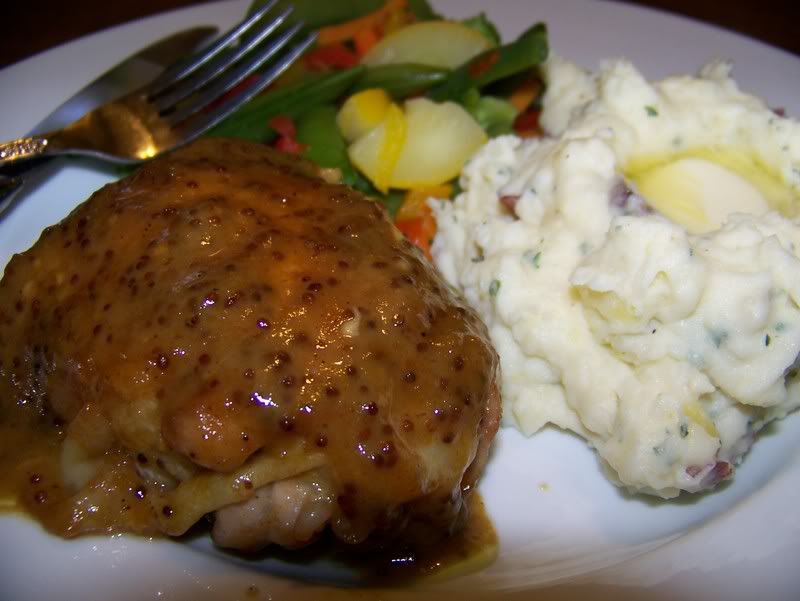
Slow Roasted Prime Rib with a Madeira Wine Au Jus
Roasted Baby Carrots with Herbs
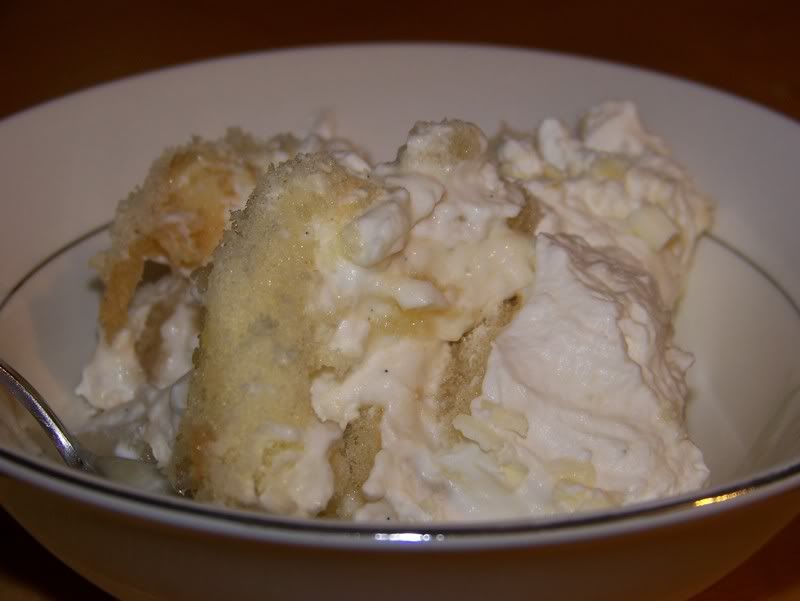
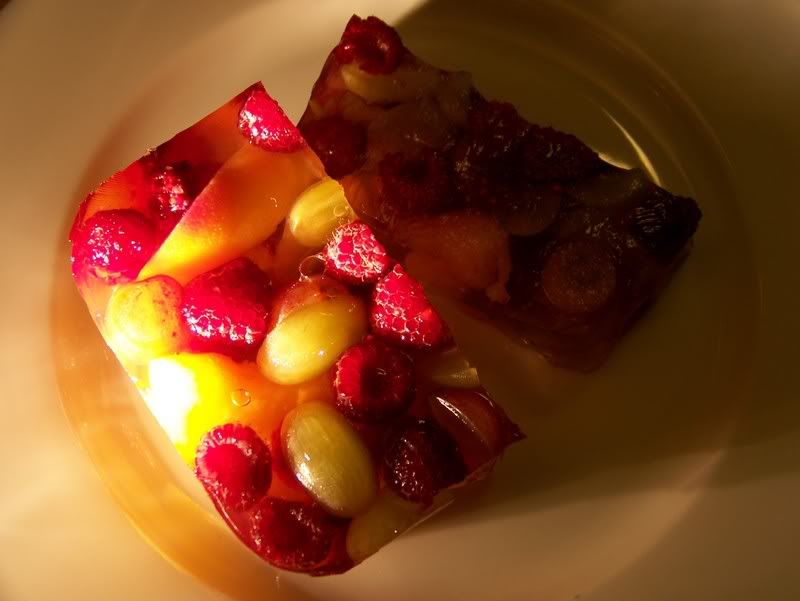
White Chocolate and Spiced Pear Tiramisu

It was heavenly. Especially dessert.

And, now for your blogging pleasure....the recipes:

ROASTED PRIME RIB with a MADEIRA WINE AU JUS
1 9- to 9 1/2-pound prime rib beef roast, excess fat trimmed

1 tablespoon olive oil

6 medium onions, peeled, quartered

2 1/2 cups beef broth

1 3/4 cups Madeira

1 1/4 cups dry red wine

4 large fresh thyme sprigs

4 large fresh parsley sprigs

3 large fresh rosemary sprigs

1 bay leaf


Position rack in center of oven and preheat to 450°F. Place beef, fat side up, on heavy large rimmed baking sheet. Rub with oil; sprinkle generously with salt and pepper. Roast beef 20 minutes. Reduce oven temperature to 350°F. Place onions around beef. Continue to roast until thermometer inserted into center of beef registers 125°F for medium-rare, stirring onions occasionally, about 2 hours 5 minutes.

Meanwhile, combine broth, Madeira, wi
ne, thyme, parsley, rosemary, and bay leaf in medium saucepan. Boil until mixture is reduced to 2 cups, about 25 minutes. Remove from heat. Discard herbs. Transfer beef to platter. Using slotted spoon, transfer onions to same platter; tent with foil. Let stand 30 minutes.


Nothing goes better with a slab of pink beef, then a side of tender potatoes! I was going to do a regular old mashed/smashed potato, but that seemed a little on the boring side. Instead, I found a recipe that combined onions, apples and potatoes (3 classic flavors) - but still remained on the healthier side, omitting all of the cream and cheese from a traditional gratin. It was a gamble that paid off!

ONION, APPLE AND POTATO GRATIN

12 tablespoons (1 1/2 sticks) butter, divided
2 pounds onions, sliced

2 tablespoons (packed) chopped fresh thyme

4 teaspoons fine sea salt, divided

2/3 cup water

2/3 cup dry white wine

2 1/2 pounds Baby Yellow and Red potatoes, left unpeeled and cut into 1/4-inch-thick rounds
2 pounds Granny Smith Apples - peeled, halved, cored, cut into 1/4-inch-thick slices


Preheat oven to 400°F.

Butter 13x9x2-inch glass or ceramic baking dish. Melt 6 tablespoons butter in large nonstick skillet over medium heat. Add onions, thyme, and 2 teaspoons salt; sauté until onions are translucent, about 10 minutes. Increase heat to medium-high; sauté until onions are tender and begin to color, about 8 minutes longer. Remove from heat. Add remaining 6 tablespoons butter, 2/3 cup water and wine to skillet; stir and swirl skillet to combine. Bring to boil. Cool onion mixture to lukewarm. Combine potatoes, apples, remaining 2 teaspoons salt, and onion mixture in large bowl; toss gently to blend.

Transfer to prepared baking dish, spreading evenly. Cover dish with parchment paper, then cover with foil, shiny side down. Bake gratin until potatoes are tender, about 55 minutes. Uncover and bake until top browns and juices bubble thickly, about 20 minutes l
onger. Let gratin stand about 15 minutes before serving.


(Photo Credit: www.epicurious.com)

Last, but not least...DESSERT! The photo can speak for itself, no? Although this recipe was a tad time consuming, it was so worth it. The layers were creamy and delicious. I'm not a fan of white chocolate - but this recipe made me a believer for sure!


WHITE CHOCOLATE AND SPICED PEAR TIRAMISU


Spiced Pears:
1 750-ml bottle dry white wine
2 cups pear juice or pear nectar (Goya has a great pear nectar)
1 1/4 cups sugar
4 1-inch-diameter rounds peeled fresh ginger (each about 1/8 inch thick)
2 cinnamon sticks, broken in half
5 large firm but ripe Anjou pears, peeled and cut in half with stems and core removed

White Chocolate Mascarpone Mousse:
7 ounces high-quality white chocolate, finely chopped
1/3 cup poire Williams (clear pear brandy - beware, you are going to drop $20 for a small bottle - but I can't imagine substituting anything else)
1/4 cup water
1/2 vanilla bean, split lengthwise
1 8- to 8.8-ounce container mascarpone cheese (found in the specialty cheese case at the market)
1 cup chilled heavy whipping cream

Trifle Assembly:
3 3-ounce packages soft ladyfingers
2 cups chilled heavy whipping cream
1/4 cup minced crystallized ginger
White chocolate curls**
1 tablespoon powdered sugar

For spiced pears:

Combine first 5 ingredients in large saucepan. Stir over medium-high heat until sugar dissolves. Add pears and bring to boil. Reduce heat to medium, cover, and simmer until pears are just tender when pierced with knife, about 35 minutes.

Using slotted spoon, transfer pears to plate. Boil poaching liquid in heavy large saucepan over medium-high heat until slightly thickened and reduced to generous 1 1/2 cups, about 15 minutes. Strain into 2-cup measuring cup; discard spices in strainer. Cool. Cover and chill pears and pear syrup until cold, approximately 3 hours.

For mousse:
Combine white chocolate, pear brandy, and 1/4 cup water in top of double boiler set over simmering water. Stir until smooth (mixture will be very liquidy). Scrape in seeds from vanilla bean; discard bean. Transfer white chocolate mixture to large bowl; gradually add mascarpone, whisking until mixture is smooth. Cool mascarpone mixture until barely lukewarm.

Using electric mixer, beat 1 cup cream in medium bowl until peaks form. Fold whipped cream into mascarpone mixture in 4 additions. Cover and chill white chocolate mousse until set, about 3 hours.

Pears and mousse can be made 1 day ahead. Keep chilled.


For trifle assembly:
Cut pears lengthwise into 1/4-inch-thick slices.

Arrange ladyfingers, rounded sides down, in single layer in bottom of 12-cup trifle dish (about 8 inches in diameter and 5 inches deep), covering bottom completely (using about 15 ladyfingers). Drizzle 5 tablespoons pear syrup evenly over ladyfingers. Using small offset spatula, spread 1/3 of white chocolate mousse over ladyfingers, making layer slightly thicker around outer edges of dish to allow mousse to be more visible (center of mousse layer will be thin). Starting at outer edges of dish, place pear slices in single layer with curved edges against sides of dish atop mousse, covering completely. Repeat layering of ladyfingers, syrup, mousse, and pears 2 more times. Cover with fourth layer of ladyfingers (some ladyfingers and pear slices may be left over). Drizzle ladyfingers evenly with 5 tablespoons syrup.

Using electric mixer, beat 2 cups whipping cream in large bowl until soft peaks form. Add 1/4 cup pear syrup and beat until stiff peaks form. Working in batches, transfer cream to large pastry bag fitted with large star tip. Pipe rosettes all over top of trifle, mounding slightly in center. Sprinkle with crystallized ginger. Garnish with chocolate curls.

Sift powdered sugar over trifle just before serving.


**To make chocolate curls, place one 3 1/2-ounce bar of white chocolate on a plate and microwave on high at 5-second intervals just until slightly softened, but not hot or beginning to melt. Using vegetable peeler and starting at one long edge of the chocolate bar, shave white chocolate into curls. If the shaved chocolate breaks into small shards, it's not soft enough, so place in microwave again for a few seconds. If the chocolate becomes too soft, let it stand at room temperature or chill briefly until it firms up a bit.

Thursday, December 27, 2007

Filet of Beef with Cucumber Raita

As much as I love to entertain - I loath big gatherings. Gatherings such as our family Christmas. I often feel out of the loop and lost in a sea of strangers whom I have nothing in common with. This year, it wasn't even fun to shop for anyone, since it was decided that we would all participate in a Chinese Auction. It also didn't help that I basically went into the party in a sour mood.


My mother asked everyone to bring something for the brunch part of the shin-dig. There were muffins, quiches, egg pies, cinnamon breads and general breakfast'y sorts of things...oh, and my beef filet with cucumber raita sauce! Brunch is a combination of breakfast and lunch - and I wanted to bring something a little more lunch-like than eggs and donuts. I guess it was a hit, because I came home with a clean platter to store until next time.


Beef filet is expensive (I got mine at a Discount Club and still paid about $60.00 for the whole filet). If you go to a regular grocery store, be warned...you'll probably drop about a $100 bucks on the same filet. (Save that other half by slicing into 1inch thick slices and freezing them for a later use.) It's totally worth it though - there is nothing like filet mignon!


FILET OF BEEF WITH CUCUMBER RAITA SAUCE


1 center cut Beef Filet, visible fat removed

salt and pepper

1 tbsp olive oil

probe thermometer


Raita:

1 English Cucumber (sometimes known as "Burpless" and "Seedless" cucumber), grated with skin on

1 1/2 cups Plain Full-Fat Yogurt

salt and pepper, to taste

1/4 cup Red Onion, finely chopped


Preheat oven to 375 degrees.


In a large skillet, heat oil over medium high heat. Season beef with salt and pepper. Pan fry until meat is carmelized and nicely browned, sealing in the juices. Transfer beef to a baking sheet, insert thermometer into the center of the filet and place in a hot oven until the internal temperature reaches 170 degrees for medium. (Take it out at 160 dregrees and tent the beef with foil - carry over cooking will allow it to reach 170 without direct heat.)


Meanwhile, mix together all raita ingredients in a bowl and chill until service.


Once beef is cool to the touch, use a sharp knife to thinly slice meat. Arrange on a platter and serve at room temperature.


Tender and juicy.

Monday, December 24, 2007

English Muffin Bread

I'm not sure where this recipe originated, but my family has been preparing and eating it for as long as I can remember. If you like to nosh on traditional English Muffins, then you will love the nooks and cranies that you can bake up yourself with very little effort. Plus, chances are - you will have most ingredients already in your pantry.

Each batch makes two loafs...eat the first, and wrap the second tightly in foil, the freeze.

ENGLISH MUFFIN BREAD

2 pkg. yeast
6 cups flour
1 tbsp sugar
2 tsp salt
2 cups milk
1/4 tsp baking soda
1/2 cup water
cornmeal

Grease bread pans and sprinkle with cornmeal. Set aside.

In a microwave-safe bowl, heat water and milk until just warmed in a microwave - about 90 seconds. In a mixer, combine 3 cups of flour, yeast, sugar, salt and baking soda. Add warmed liquids to dry ingredients, and beat well to combine. Stir in remaining 3 cups of flour. (Dough will be sticky.)

Transfer dough to prepared bread pans and let rise for 45 minutes - covered with a damp tea towel and left in a semi-warm spot. Meanwhile, preheat oven to 400 degrees. Bake for 25 minutes. While still hot, sprinkle top of bread with cornmeal. Once cooled to the touch, remove from bread pan and cool completely on wire rack.

To serve: Slice bread and toast until browned. Spread with real butter or jam!


It really is a little slice of heaven.

Thursday, December 20, 2007

The Great Cookie Bake-Off of 2007!

It's officially OH-VAH!


Shakeer and Kelsey arrived Saturday night, in an effort to beat the Nor'easter that rocked the East Coast this past weekend. We were baking by 8:00am Sunday morning, after a quick cereal breakfast and didn't take a break until Kelsey told me that she was "going to die from hunger!"

On the agenda:
Delux Sugar Cookies
Cream Cheese Cookies
Thumbprint Cookies
Peanut Butter Cup Cookies
Buckeyes
Russian Teacakes
Strawberry Oatmeal Bars
Checkerboard Cookies
Cherry Snowballs
Bourbon Balls
Peanut Clusters
Fudge
Chocolate-Mint Wafers
Triple Chocolate Brownie Cookies
Poinsettia Cookies
Petite Lemon Sandwich Cookies
Macaroons

We went waaaaaaaaaaaaaaay overboard, and had a great time doing it. (Of course, we got a little behind schedule, so I had to take a personal day off of work to finish up.) You can either click on the highlighted cookie name, or you can scroll down a little.

Happy cookie season!

Tuesday, December 18, 2007

Russian Teacakes

These cookies happen to be Nathan's mother's favorite...and in a couple short days, she will be receiving a surprise package in the mail which will include these melt-in-your-mouth cookies! They are also a family favorite and one cookie that I will never not include in my Christmas cookie arsenal.

The dough is tender, with a nutty walnut crunch - and the confectioner's sugar coating gives a great lip-smacking finish.

RUSSIAN TEACAKES

1 cup of butter, softened (no substitutions)
1/2 cup confectioner's sugar
1 tsp vanilla
2 1/4 cups flour
1/4 tsp salt
3/4 cup finely chopped walnuts
Additional confectioner's sugar, for dredging

Preheat oven to 400 degrees.

Mix butter, sugar and vanilla in a large mixing bowl. Work in flour, salt and nits until dough holds together when squeezed. Shape into 1 inch balls. Place on ungreased cookie sheet and bake for 10-12 minutes, or until set but not brown. While warm, roll in powdered sugar. Cool on a wire rack. Once completely cool, roll again in powdered sugar.


(Photo credit: Talida at http://talidabakes.blogspot.com)

No Bake Treats

2 ingredients are all you need to make dipped nuts (of any kind). I prefer peanuts because I really like that peanut and chocolate combination. (Who doesn't?!) You can totally play around with this technique, substituting white or dark chocolate, or adding pecans instead of peanuts. Last year, I drizzled a little bit of white chocolate or a marbled effect. Whatever you decide to do - definitely make these at home...it's a shame to spend $9.99 a pound on dipped nuts at your local Candy Shoppe.

NUT CLUSTERS

1 12 oz package of chocolate chips
2 cups chopped nuts of your choice

Place chocolate chips/pieces in a heavy saucepan over low heat, stirring constantly until melted. Stir in nuts. Spoon mixture by rounded spoonfuls onto a baking sheet lined with waxed paper. Chill until firm. Store in the refrigerator.


I've never seen anyone turn down a peanut butter cup, and the same holds true for no-bake Buckeye cookies at Christmas time. They are the perfect two bite treat, and they have great stage presence on any cookie platter. The peanut center is smooth and sweet, and the chocolate outside is firm and delicious.

BUCKEYES

3/4 cup butter, no substitutes
3 1/4 - 3 3/4 cups confectioner's sugar
1 cup peanut butter
1 tbsp milk
1/2 tsp vanilla
16 oz. semisweet chocolate chips
1 tbsp shortening

Melt butter in a small saucepan over low heat. Combine melted butter and 2 cups of confectioner's sugar in a medium mixing bowl. Beat until smooth. Add peanut butter, beating well until combined. Stir in milk and vanilla. Beat in enough of the remaining sugar to make a firm, crumbly-looking mixture.

Roll dough into 1 inch balls. Arrange on a lined tray; insert toothpick into the center of each ball and chill for at least 30 minutes. (The step is crucial - by chilling the cookies, the toothpick will remain firmly in the center while you are dipping them.)

Meanwhile, melt chocolate and shortening in a heavy saucepan over low heat. Cool slightly. Dip 3/4 of each ball into the chocolate mixture, so that the ball resembles a buckeye. Place balls, undipped side up, on a tray lined with a silpat or waxed paper. Chill until chocolate becomes firm. Store in the refrigerator.

Check Mate

I sat looking at this recipe for an hour, I swear...there were so many words and it looked so complicated. I had some experience with a Checkerboard Cake that yielded wonderful results, and was not as hard as what I am imagined (or read). I bucked it up and decided to use my brain and threw the directions into the trash! You don't need to read all of those words either...so I posted my own abreviated directions below.

FESTIVE CHECKERBOARD COOKIES

1-1/4 cups butter, softened
1 cup packed brown sugar
1/2 cup sugar
2 eggs
1/4 tsp vanilla extract
4 cups all-purpose flour
1 tsp baking powder
1 tsp salt
1/4 tsp baking soda
Red food coloring

In a large mixing bowl, cream butter and sugars. Beat in eggs and vanilla. Combine flour, baking powder, salt and baking soda; gradually add to creamed mixture. Divide dough in half. Tint one portion red and leave the other plain. (At this point, you can flavor the red portion with a touch of peppermint extract, if you would like.) Form each dough portion into a 6 inch long by 2 inch wide log. Wrap red and plain portions separately in plastic wrap; chill for 2 hours or until stiff.


Preheat oven to 375 degrees.


Using a sharp knife, slice 8 to 10 - 1/2 inch strips lengthwise off of each log. Stack the strips in groups of four, alternating plain and red strips, until you have 4-5 rows of alternating colors. Press together gently. Cut dough into 1/4 inch slices. (If you would like to cut into specific shapes, do so at this time...) Place 1 inch apart on ungreased baking sheets. Bake for 9-11 minutes or until set. Remove to wire racks to cool.


(I cut out about 2 paragraphs from the original recipe there!)


These cookies will make your family and friends squeal for joy, then wonder aloud how you made such a cookie. You don't have to tell them how easy it actually was!

Poinsettias you can chow on!

POINSETTIA COOKIES (recipe courtesy of Taste Of Home Magazine)

1 cup butter, softened
1 cup confectioners' sugar
1 egg
2 to 3 drops red food coloring (or more to achieve desired results)
2 1/3 cups all-purpose flour
3/4 tsp salt
1/4 cup finely crushed red-hot candies*


FROSTING:
1 cup confectioners' sugar
2-3 tsp milk
Additional red-hot candies


Preheat oven to 350 degrees.


In a large mixing bowl, cream butter and confectioners' sugar. Beat in egg and food coloring. Combine flour and salt; gradually add to the creamed mixture. Stir in red-hots. Divide dough in half; wrap in plastic wrap. Refrigerate for at least 1 hour or until firm.


On a lightly floured surface, roll out one portion of dough into a 12-in. x 10-in. rectangle. With a sharp knife, pastry wheel or pizza wheel, cut dough into 2-in. squares. Place 1 in. apart on lightly greased baking sheets. Cut through dough from each corner of square to within 1/2 in. of center. Fold alternating points of square to center to form a pinwheel; pinch gently at center to seal. Repeat with remaining dough.


Bake for 7-9 minutes or until set. Remove to wire racks to cool. Combine the confectioners' sugar and milk. Pipe 1/2 teaspoon frosting in center of each cookie; top with red-hot candy.


(Photo Credit: Taste of Home)

(*) Our red hot candies would not break down in the food processor!!! They were tough little suckers! Instead, I placed them in a plastic baggie, and gave the kids permission to beat the heck out of them with a rolling pin. It was a whole lotta fun for them - although a little stressful for me, since I mistakenly forgot that I had a glass kitchen table under the protective plastic tablecloth. Oops. I did the assembly of the poinsettia leaves because it seemed like it would be a little too complicated for the kiddos to handle.


The cookies came out moist and delicious - not unlike a plain sugar cookie. I was expecting more cinamon flavor from the red hots, but loved the color and texture the candies gave.

Triple Chocolate Brownie Cookies

I have to admit - I was a little under impressed with this recipe and the way the cookies finally turned out. Although tasty (Shakeer called them "the love of his life!"), they came out flat and crisp, leading me to believe that the leavening measurements were a little off. The cookies also stuck to my silpats, which ticked me off because nothing sticks to silpats!!! I ended up with a lot of cookie 'mistakes' that the bakers got to try.

We tried making the cookies smaller, and that didn't help either. I may have to enable a google search to find out how to solve this issue.


(Photo credit: Taste Of Home, since this is what they are supposed to look like!)


TRIPLE-CHOCOLATE BROWNIE COOKIES

3/4 cup butter, cubed
4 squares (1 ounce each) unsweetened chocolate
2 cups sugar
4 eggs
1-1/2 cups all-purpose flour
1/2 cup baking cocoa
2 tsp baking powder
1/2 tsp salt
2 cups (12 ounces) semisweet chocolate chips, divided
2 teaspoons shortening


Preheat oven to 350 degrees.

In a small saucepan over low heat, melt butter and unsweetened chocolate; cool. Transfer to a large mixing bowl; add sugar and eggs. Beat until smooth. Combine the flour, cocoa, baking powder and salt; gradually add to chocolate mixture. Stir in 1-1/2 cups chocolate chips. Cover and refrigerate for 2 hours or until easy to handle.

Drop by tablespoonfuls 2 in. apart onto greased baking sheets. Bake 7-9 minutes or until edges are set and tops are slightly cracked. Cool for 2 minutes before removing from pans to wire racks to cool completely. In a microwave-safe bowl, heat shortening and remaining chocolate chips on high for 1 minute or until chips are melted; stir until smooth. Drizzle over cookies. Let stand for 30 minutes or until chocolate is set. Store in an airtight container.


Bourbon Balls...with Southern Comfort!

I made these Bourbon Balls two years ago, and people raved about them - especially my little brother who was about 16 years old at the time. I'm pretty sure he thought he could get drunk off of these little cookies. Little did he know, even if he ate the entire batch, he'd only get about 1 1/2 shots of bourbon into his body!


This year, the bourbon was gone...but I had some Southern Comfort - - and that seemed like a good enough substitution to me!


"COMFORT" BALLS (no bake!)
1 1/4 cups semi-sweet chocolate chips
1/2 cup sugar
3 tbsp light corn syrup
1/3 cup bourbon
2 1/2 cup (about 5 dozen) finely crushed graham cracker wafers
1 cup finely chopped walnuts
Granulated Sugar to roll balls in

Melt chocolate over hot water in a heat safe bowl. Remove from heat and stir in sugar and syrup. Blend in bourbon. Combine graham crackers and nuts and add to chocolate mixture; mix well. Form 1-inch balls and roll in granulated sugar. Let ripen in covered container at least several days.

Cherry Snowballs

CHERRY SNOWBALLS (Original recipe courtesy of TasteOfHome.com)
A juicy maraschino cherry is the pleasant surprise tucked inside these unique cookies.

1 cup butter (no substitutes), softened
1/2 cup confectioners' sugar
1 tbsp water
1 tsp vanilla extract
2 cups all-purpose flour
1 cup quick-cooking oats
1/2 tsp salt
36 maraschino cherries, well drained

COATING:
2 cups confectioners' sugar
1/4 to 1/3 cup milk
2 cups flaked coconut, finely chopped


In a mixing bowl, cream butter, sugar, water and vanilla. Combine flour, oats and salt; gradually add to the creamed mixture. Shape a tablespoonful of dough around each cherry, forming a ball. Place 2 in. apart on un-greased baking sheets.


Bake at 350° for 18-20 minutes or until bottoms are browned. Remove to wire racks to cool. Combine sugar and enough milk to achieve smooth dipping consistency. Dip cookies, then roll in coconut.


The kids really enjoyed making these cookies - mainly because there were a couple of cherries left over for them to snack on! Kelsey did the rolling in the confectioner's sugar mixture, and Shakeer finished off the cookie by giving it a good roll in coconut.


These cookies look absolutely terrific on the cookie platter against all of the other colors.


Chocolate-Mint Wafers

CHOCOLATE-MINT WAFERS (Courtesy of MarthaStewart.com)

Imagine the Girl Scout's "Thin Mints" - only more substantial and surprisingly easy to make. This one is definitely a winner on all counts and will be added to my cookie arsenal for future use.


1 cup all-purpose flour
1/2 cup unsweetened cocoa powder
1/4 tsp baking powder
1/4 tsp plus 1/8 tsp salt
6 tbsp (3/4 stick) unsalted butter, room temperature
1/2 cup sugar
1 large egg
1/2 tsp pure vanilla extract
12 ounces semisweet chocolate chips
1/4 tsp pure peppermint extract
Sprinkles, for decorating (optional)

Preheat oven to 350 degrees. In a medium bowl, whisk together flour, cocoa, baking powder, and 1/4 tsp salt. Set aside.

In a large bowl, beat butter and sugar until light and fluffy. Beat in egg and vanilla. With mixer on low, gradually add flour mixture; mix just until combined.

Form balls of dough (each equal to 1 tsp) and place on two baking sheets, about 2 inches apart. Dip the bottom of a glass in water, and flatten balls into 1 1/2-inch rounds (about 1/4 inch thick). Bake until slightly firm to the touch, 8 to 10 minutes. Immediately transfer cookies to a wire rack to cool completely.

Make chocolate coating: Place chocolate, peppermint extract, and remaining 1/8 tsp salt in a large heatproof bowl set over (not in) a saucepan of simmering water. Heat, stirring occasionally, until smooth, 2 to 3 minutes; remove from heat. Line a baking sheet with parchment or waxed paper. Set each cookie on a fork, dunk in chocolate, then tap underside of fork on side of the bowl to allow excess chocolate to drip off. Place cookies on prepared baking sheet, and decorate with sprinkles, if desired. I dragged a fork over the tops of the cookie to give them a little decoration.

Refrigerate until chocolate has hardened, about 30 minutes, and keep chilled until ready to serve.


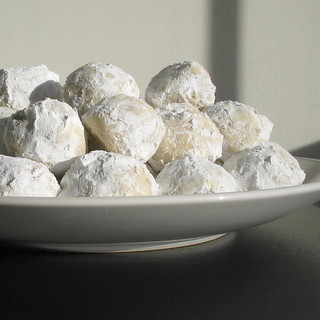
Your family and friends will gooble them up... if you don't eat them all yourself.


Wednesday, December 12, 2007

Tomato and Goat Cheese Pasta

Rachael Ray created an empire on 30-minute meals. I am bitter about her success (to say the least) and posted about my feelings at least once - cleverly titled "Damn that Rachael Ray!" Tee-hee. Dinner doesn't have to be made in 30 minutes, it can be made in 15 with time leftover to make yourself a beautiful cocktail!


TOMATO AND GOAT CHEESE PASTA


1 lb Dried Pasta, shape of your choice
Container of Cherry Tomatoes
1 small block of Goat Cheese, crumbled
1 bunch of fresh Parsley, roughly chopped
2 tbsp Extra Virgin Olive Oil
salt and pepper, to taste


Cook pasta in boiling water. Once drained, add tomatoes, crumbled goat cheese, parsley, salt and pepper and olive oil and toss to combine. Serve!


The heat from the pasta will soften the tomatoes and melt the cheese. It's simply fabulous. If you don't care for goat cheese, make a substitute of either fresh mozzarella cheese or a crumbled feta.

White Chili AKA Chicken Chili

I was never a fan of white chili, or chicken chili - until I decided to take matters into my own hands and fool around with a recipe of my own. What I came up with was creamy and flavorful and satisfying for a cold night, and completely changed my mind about chicken chili forever.


CHICKEN CHILI
(Be forewarned - this recipe will make enough to feed a freakin' army!)


1 pre-cooked rotisserie chicken, white and dark meat removed and shredded (or roast your own if you have the time!)
1 large onion, diced
2 garlic cloves, finely minced
1 green bell pepper, diced
2 tbsp extra virgin olive oil
1 tsp cayenne pepper
1 tbsp dried oregano
1 tsp cumin
couple of grates of fresh nutmeg
1 carton of chicken stock
1/2 cup sour cream
3 cans of Northern White Beans, drained but not rinsed
salt and pepper, to taste
2 tbsp fresh parsley, roughly chopped


Heat oil in a large stock pot over medium high heat. Add onion and garlic and cook until onion becomes translucent. Add in all dried herbs and spices - the cayenne pepper, oregano and cumin and cook for a couple of minutes longer to develop the flavors. Add shredded chicken, beans, peppers and chicken stock. Bring to a simmer, stirring occasionally.


Just before service, turn off heat and gently stir in sour cream, nutmeg and season with salt and pepper. Sprinkle with fresh parsley. Eat as is, or serve with steamed white rice.


The beans add just enough starchiness to thicken the chili and the tiny bit of sour cream adds a nice richness that rounds out the dish. I added a bit more cayenne pepper - which ever so slightly added some gentle heat to the back of your throat. Next time, I will add some chopped carrot into the mix for a little more color and pizazz. YUMMY!

Monday, December 10, 2007

Suckered into it.

This Sunday will mark the Second-Anual Great Cookie Bake-off. I was going to skip it this year, since I've been feeling under the weather, but my niece pulled out the cute factor and totally tricked me into saying yes. (And, how could I say no and live with myself - I am so *into* children helping out in the kitchen!)

This year I have a new tool that will make cookie making even faster - if it doesn't blow out a fuse to the shared outlet - another KitchenAid mixer that Nathan acquired during one of his clean outs! Now, both kids can make their own batch of cookies at the same time. (God help me!)

On the docket this year: our usual family favorites - Jam Thumbprints, Cream Cheese Cookies, Russian Teacakes, No-Bake Buckeyes, Chocolate Covered Peanut Clusters, Delux Sugar Cookies and Strawberry Cheese Cake Bars. And, what cookie escapade wouldn't be complete without some new recipes to try: Chocolate Mint Wafers (think Girl Scout Thin Mints!) and Petite Lemon Curd Cookies. There may be a couple of tricks up my sleeves as well.

Monday, December 03, 2007

Turkey-day Leftovers - - Swedish Meatballs made healthier

2 people.


18 pound fresh turkey.
4 1/2 hours cooking time.
Leftovers galore = PRICELESS

We're not totally glutenous...we planned for an entire week of leftovers when we bought such a large turkey for two people. Not only did we feast on hot open-faced sandwiches, but I also re-purposed some traditional items into entirely new dishes.
, meat
Who says that you need to roast the entire bird all at once? Before our brine experiment, I cut away one of the breasts and placed it in the fridge for the next day. Why? So that I could use the lean meat to make some homemade turkey meatballs! I just ground the meat myself in my food processor.

(Not Really) SWEDISH MEATBALLS

2 lbs ground turkey meat to substitute the ground beef in my meatball recipe.
1 medium onion, diced
1 garlic clove, finely minced
1 tsp olive oil
2 cups half & half
(the original recipe called for cream!)
1 cup reduced fat sour cream
1 (10 3/4 oz) can condensed cream of chicken, 99% fat free
black pepper
1 package of uncooked dried egg noodles
chopped fresh parsley, for garnish if desired

Follow meatball recipe in the link provided, substituting 2 lbs ground turkey in place of the ground beef, or make you own meatballs using your recipe...OR purchase a package of pre-made meatballs!

In a large skillet, sweat onions and garlic in olive oil over medium-high heat. Add the half & half, sour cream and chicken soup, stirring to combine. Add already cooked meatballs and continue to cook in skillet for 20-25 minutes, or until sauce begins to thicken. Meanwhile, prepare egg noodles as directed on package.

Season meatballs and sauce with a few grinds of fresh black pepper, and garnish with chopped parsley. Serve over eggs noodles.


This dish satisfies that creamy texture I was craving - but still remained on the healthier side, since I used fat-free or low-fat ingredients and lean turkey breast meat in the meatballs. Be forewarned that the turkey meatballs will have a slightly different texture than beef or pork meatballs traditionally used in Swedish Meatballs. Plus, it was totally different than the other turkey meals we had after Thanksgiving!!! It was a total curve ball!

Sunday, December 02, 2007

Dinner is served - a little late...

I hope everyone who reads this blog had a wonderfully chaotic Thanksgiving!

This year, Nathan and I decided that we wanted to keep everything low-key and instead of celebrating with family we made a tasty Thanksgiving meal for the two of us. We cooked (and ate) way too much food, checked out all of the Black Friday circulars, napped, played with the puppies and went to bed early. It was my idea of heaven!

The chefs over at Food TV have been telling us to brine our turkeys for years now - to ensure a moist, flavorful bird. Since we don't mind being Guinea pigs, I said "What the hell, let's do it!"

POULTRY BRINE

1 gallon of boiling water

2 cups kosher salt
2 cups honey

1 (5lb.) bag of ice

cooler, or other large vessel

raw turkey, cleaned
with giblets removed

Once gallon of water is boiling, dissolve both salt and honey. Let cool slightly. Position turkey in container so the cavity is within your reach. Empty 1/2 of the bag of ice...carefully pour brine liquid
over turkey (add additional water to fully cover bird, if needed) and follow up with remaining ice. Make sure that the liquid is in the cavity as well, or you will have a floating turkey. Cover and place in a cool, dry place and leave at least 12 hours or overnight.

Ready to roast: Drain liquid from container and remove
bird. Thoroughly rinse bird removing any brine residue. Set in roasting pan, and pat dry with paper towels. Prepare bird as desired.

I like to think the brining worked, since we *kinda* took positioned our turkey a little too close to the top of the oven, thus giving it a little more color than we hoped. The breast meat still came out super moist and succulent. I'm pretty sure that if we didn't do the brine, it would've been as dry as sandpaper. Everyone has been asking "Is the meat salty?" and the short answer is NO. I don't really understand all of the science behind it, so if you are like me, you just gotta take my word for it. The brining process is a bit of a pain in the ass, to put it bluntly, so we may not do it again. I've read some bloggers who dry brined their bird with good success, so there's a possibility we may take that route next time.

The dogs waited on the couch patiently as we dressed the table.


Unfortunately, the turkey did not make a formal appearance at our table, since the table was a little small, and we had so much other food! It was a tad disappointing for me, since I purchased a beautiful new serving platter to place it on, and fresh herbs as a "bed" to ground the turkey and keep it in place. Oh well.

Leftover recipes to follow!

Saturday, November 17, 2007

Thanksgiving menu 2007

I am cooking my very first whole turkey this Thursday, and I am waiting patiently (not!) with eager anticipation. Nathan and I have decided to break away from the family scene this year and have Thanksgiving dinner with just the two of us. We are planning some major leftovers to justify purchasing an 18 lb. bird for only 2 people! (You can see last year's Thanksgiving menu here!)

On the menu this year:

Deviled Eggs
Baked Artichoke Flowers (made with wonton wrappers)

Roasted Turkey with gravy
Mashed Potatoes
Homemade Stuffing
Steamed Broccoli and Baby Carrots
Individual Green Bean Casseroles
Cranberry Fruit Conserve
9-grain rolls

Pumpkin-Ginger Cheesecake Pie with fresh whipped cream

Note to self: pick up a new meat thermometer before Thursday.

Tell me your Thanksgiving menu!!! (Or post a link in the comments so I can check you out!)

Thursday, November 08, 2007

SPICY Noodles with Veggies (out in the open!)

Thanks to Nathan, I love Korean food and all things spicy! He's half Korean, and when we started dating he brought me to a Korean restaraunt, opening up a whole new world of sights and tastes.

I rarely dabble into Korean food at home because it is just not the same, unfortunately. However, I've been holding onto this recipe because I thought it might have some potential...and I was right! It was simple to make, the ingredients were easy to find (with an easy substitution if you don't want to go to an Asian food store) and the meal was really, really tasty. But, he forewarned - it was HOT! Grab a glass of milk, a side of kimchee, some chop sticks and enjoy Korea, without the plane ride and language barrier.

SPICY NOODLES WITH MUSHROOMS AND CABBAGE


1/3 cup water
1/3 cup soy sauce
3 tsp
gochujang* 1 tbsp brown sugar
1 lb dried spaghetti (or soba noodles, if you want to keep it truly authentic)
10 oz. of sliced mushrooms - I prefer shiitake for the visual
2 cups shredded cabbage
1 cup shredded carrot
1/2 cup sliced green onions
2 tbsp sesame seeds, toasted until browned

3 tbsp vegetable oil
2 tsp garlic, finely minced
1 inch of fresh ginger, finely minced

In a small bowl combine water, soy sauce, brown sugar and gochujang together until sugar dissolves and set aside. Prepare pasta as directed.

While pasta is cooking, heat oil in a large skillet until hot. Take off direct heat, and add ginger and garlic. (If you keep your ginger in the freezer, like me - be prepared for some "spitting" when the residual water hits the oil!) Return to the heat and immediately follow with the sliced mushrooms, and cook, stirring constantly, until the mushrooms take on a darker brown color, approximately 6 minutes. Add cabbage, carrot and green onion, and saute until veggies become crisp tender. Add sauce and mix thoroughly, until heated through.

Add your noodles to the vegetable mixture and toss to combine. Sprinkle with toasted sesame seeds for a garnish. Serve immediately.


*Gochujang, a Korean spicy bean paste, is readily available in most supermarkets in the international food aisle. If you can't find it there - check out your local Asian Food Market. It retails between $4.00 - $5.00. You can substitute 3/4 teaspoon Chinese chile paste and reduce the amount of soy sauce to 1/4 cup.

Wednesday, November 07, 2007

C & C Chicken

In pouring over various cookbooks and websites, I'm finding that one of the quickest and healthiest ways to add color and flavor to your food is to top it with a homemade salsa. To me, there is nothing better than fresh vegetables and fruits. Salsa is perfect because you are only limited by your own imagination, and what you have in your kitchen. I made mine with the slightest pinch of salt and maybe a tsp of olive oil to bind it all together. I'm totally eating the leftovers for lunch in a lettuce wrap!


CORNMEAL AND CORRIANDER CRUSTED CHICKEN with BLACK BEAN AND MANGO "SALSA"


...for the chicken:
4 slightly pounded boneless, skinless chicken breasts
1/4 cup yellow cornmeal
1 tbsp ground corriander
1 tbsp olive oil


...for the salsa:
1 ripe mango, peeled and diced
1/2 cup corn (if using frozen, thawed)
1 can of black beans, drained and rinsed
1 large shallot, finely diced
1/4 cup cherry or grape tomatoes, diced
2 tbsp finely chopped cilantro (or parsley, if you do not like cilantro)
2 tbsp cider vinegar
1 tsp olive oil
salt and pepper, to taste


Place cornmeal and corriander in a large plate and mix with fingertips. Dredge each chicken breast into the mixture until coated.


Heat oil in a large skillet over medium-high heat. Cook chicken approximately 7 minutes on each side, until completely cooked through, and the crust turns a nice golden brown.


Meanwhile, mix together all salsa ingredients - tasting before adding salt for seasoning.


Serve by spooning the salsa over the chicken!


This meal took about 15 minutes to put together, start to finish - so it is the perfect "on the go" dinner. I also whipped up a batch of polenta made the cornmeal, chicken stock and milk (instead of cream and butter). No salt. And you know what?! It totally didn't even need it - - the salsa was the perfect compliment without being overpowering.

Tuesday, November 06, 2007

Times are a ch-ch-changin'

The past couple of times that I have gone to my doctor, my blood pressure has been high. Since I was either sick or in pain (or both), they didn't worry too much - but I was asked to return for a quick blood pressure check when I was feeling better. Last week, I did.

And the results were not pretty.

No more Creamy Beef Stroganoff...no more Mac and Cheese...no more Baby Back Ribs! No more of my absolute favorites!!! Whaaaaaaa! It really is hell on earth right now, but I have to keep reminding myself that it is time to take care of me.

This weekend marked the beginning of a newer, healthier Kat. I'm ready to give this low sodium/low fat/lower carb thing a try. I have to.

Tuesday, October 30, 2007

Giving you the finger

Halloween is tomorrow, so it is only fitting that we celebrate with something creepy!


Sugar Cookie Fingers! Ewwwwww!


I saw an original recipe at http://www.epicurious.com/, but decided to use my family's "Delux Sugar Cookie" recipe, since those cookies come out perfect every time. Everyone is totally freaked out by the fingers this morning at work!

DELUX SUGAR COOKIES

1 cup butter, softened
1 1/2 cups confectioner's sugar
1 egg
1 tsp vanilla
1/2 tsp almond extract
2 1/2 cups flour
1 tsp baking soda
1 tsp cream of tartar

In a large bowl, mix together butter, confectioner's sugar, egg, vanilla and almond extracts. Blend in flour, soda and cream of tartar. Form dough into a ball, cover and chill for 2-3 hours.

Preheat oven to 375 degrees.

Divide dough. Roll out tiny finger shapes on a lightly floured surface, pinching around the knuckle area to create a knarly shape. (The first batch I did was so big, that I scaled down the dough on the second batch - which worked perfectly.) Use a knife to create the lines of the knuckles. Gently place an almond slice as the fingernail. Place on a greased cookie sheet. Bake 7-8 minutes. Cool on a wire rack.

With the other half of the dough, I decided to make a cookie piano. (What better way to highlight my gorgeous fingers?!) The piano is frosted with vanilla and chocolate store-bought icing.

Tuesday, October 23, 2007

Beet Soup (don't be afraid!)

I just love Autumn! We've finally begun to snap out of the Indian Summer we are courting, and allowed the chill to enter the air - and finally I can start to plan menus that involve some heavier flavors and longer cooking times. Plus, having the leaves changing colors brings on some much needed inspiration into my everyday cooking.

At the market this weekend, I spotted some very nice looking beets - firm and dark red with robust looking leafy greens attached. I hurriedly plucked them from their spot on the shelf - not really thinking about what I would do with them. The last time fresh beets were in my kitchen, I transformed them into tasty little
ravioli. This time I desperately wanted to make a soup.

So, I did.

BEET SOUP (served in a roasted acorn squash "bowl")

5 medium beets, peeled* and diced
1 red-skinned tart apple, peeled and diced
1 smallish red onion, diced
2 cloves of garlic, finely minced
4 cups of chicken or vegetable stock (I used chicken stock, because I do not like the taste of veggie stock)
1 tbsp olive oil
2 tbsp apple cider vinegar
1 tbsp brown sugar
salt and pepper, to taste

If serving in an acorn squash bowl: Preheat oven to 375 degrees. Cut the top off the squash, and hollow out the insides. (if needed, take a little off the bottom, so that the bowl is stable) Place on a cookie sheet, brush a little olive oil into the cavities and season with salt. Roast for approximately 60 minutes, or until the flesh is tender. Remove from heat and let cool slightly.

Meanwhile, heat oil in a large pot and cook onion and garlic until the onion becomes translucent. Add apple and beets and cook for approximately 5 minutes, stirring often. Add stock and let simmer for about an hour, or until the beets are fork tender. Remove from heat and add vinegar and brown sugar.

Blend soup with either an immersion blender or a food processor. (I used an immersion blender first and then had to clean off the wall! A food processor is a little less messy believe it or not!) Add water to achieve the consistency you like. Season with salt and pepper and serve.


*Unless you want red hands, invest in some disposable latex or fitted plastic gloves...beets will stain just about anything they come in contact with including skin and cutting boards! You were warned!!! I will be rocking the purple handed look tomorrow at work.

I was blown away at first bite! The beet soup was sweet, yet had a hint of tartness from the vinegar - and the flavor of the overall dish was subtle and delicious. The color was so vibrant and beautiful that I almost didn't want to dip my spoon into it. Using the acorn squash (my favorite of all the squashes) was awesome, because it gave the meal a little more substance as well as a bit of whimsy. The flesh of the squash went so well with the soup itself. The next time I make this, I may add a dollop of sour cream or Greek yogurt to richen the soup up just a bit.

Stick your vegetables in something cheesy!

There has been a recent influx of cookbooks designed to take healthy vegetables and disguise them in everyday meals. Jessica Seinfeld, wife of comedian Jerry Seinfeld, recently wrote a cookbook entitled Deceptively Delicious. From the Publisher: Deceptively Delicious has all of Jessica's winning combinations, including cauliflower in mac and cheese and spinach in brownies.


Forgive me, but WHAT THE FUCK?! If someone tries to feed me a brownie with spinach in it, I will punch them in the face! I definitely do not agree with this method of cooking because I think it could cause more harm them good - if a child isn't given the opportunity to try new tastes, that kid is going to grow up into an insufferably picky adult!


(Have you ever been to a restaurant with a person who hates everything except chicken nuggets? It makes me want to scratch my eyes out, and I am not even an adventurous eater! "Can you omit the onions?" WHOA lady!!!! No! Just stop already!)


I cook and bake regularly with my niece Kelsey and nephew Shakeer - avid readers will remember our forray into Christmas cookies. I found that if they participate in the food prep, they are more likely to eat something new...plus, they love to help out in the kitchen. Banning children from the kitchen can make things easier, but you are seriously missing out on a great experience, as well as the opportunity to teach them about good nutrition.


That being said - I totally found a recipe that hid a great deal of perfectly tasty vegetables under a melting mound of delicious cheese! I'm such a hypocrite!


SWEET PEA AND ARTICHOKE LASAGNA


12 no-boil lasagna noodles
2 (15 oz.) containers of ricotta cheese
1 1/2 cups whipping cream
1 (1 lb) bag of frozen peas, thawed
1/4 cup fresh basil
3/4 cup grated parmesan cheese
4 cups mozzarella cheese
2 eggs
2 jars of marinated artichokes, drained
salt and pepper


Preheat oven to 350 degrees.


Brush a 13x9x2 baking dish with oil, and set aside. In a small bowl, combine drained artichokes, 1/2 cup of cream and basil. Set aside. In a large blender or food processor, combine peas, ricotta, parmesan cheese, 1 cup of whipping cream, salt and pepper and 2 eggs. (I had to do this in 2 batches.)


Pour 1 cup of ricotta mixture in the bottom of the baking dish. Layer 4 lasanga noodles, then 1/2 of artichoke mixutre, then 1/3 of the ricotta mixture. Sprinkle 1 cup of mozzarella cheese. Repeat process with second layer.


For the last layer - 4 additional noodles, rest of ricotta mixture and 2 cups of mozzarella cheese. Cover with foil and bake for 30 minutes. Remove foil and bake for another 25 minutes or until cheese has browned slightly, and is bubbly around the edges. Remove from oven and let stand 15 minutes before serving.


Yes, it's a little time consuming - but the reward is this sweet and creamy, yet tangy combination of flavors. I never even missed the tomato sauce! The bottom layer of noodles almost becomes this crust of sorts - anchoring the whole dish. Plus, just look at the color of the layers...it's quite eye catching, and everyone knows, you eat with your eyes first.

I ate the leftovers for 3 days!

Friday, October 19, 2007

When life gives you lemons...

...just save yourself the trouble, and make lemonade.


I was blown away by the produce at the market the other day, and totally succumbed to the enticing lemons that were staring me down from across the aisle. I grabbed about a dozen or so, and happily went along to the check out counter with my loot.

When I got home, I poured over my cookbooks, finally settling on an "all lemon" meal consisting of lemon spaghetti and mini lemon souffles. (And, maybe a lemon drop to wash it all down!)


The lemon souffles were especially intriguing - - a typical custard made with egg yolks, gently cooked over a water bath then mixed with fluffy meringue and baked in their own hollowed out lemon shell. Let me tell you, although they looked really pretty, they were so gross!!!!


Same result with the lemon spaghetti. Dry and disgusting.

My lemon meal made my eyes water, and that's NOT a good thing. The whole mess went straight into the garbage, and I ended up chowing on a peanut butter and jelly sandwich. Sometimes even the best laid plans fall through - no matter the best intentions.

Wednesday, October 03, 2007

Mixed Berry Bundt Cake

Wow, it's been a long time since I posted last! I'm totally slapping myself on the wrist! Truth of the matter is, I have been cooking - just not anything that's picture worthy...or recipe posting worthy. I'm hoping that this weekend I will be able to get my "cooking mojo" working again.

Until then, here is a fantastic recipe for a cake I made which was mostly gobbled up by the puppies only about an hour afterwards, while I thought it was safely cooling. They allowed me some of the crumbs. Note to self...Sparky can now reach the table with his grubby little paws.


The little that I was able to taste was moist (OMG, so moist) and sweet and simply delicious. It was also incredibly easy to make! I used frozen strawberries and raspberries because the fresh ones at the market looked terrible, and I really wanted to try the recipe. It was a successful substitute!

MIXED BERRY BUNDT CAKE

5 eggs
1 2/3 cups granulated sugar
20 Tbs. (2 1/2 sticks) unsalted butter, at room temperature, cut into small pieces
2 Tbs. kirsch or other fruit liqueur
2 1/2 cups all-purpose flour
1 tsp. baking powderPinch of salt
3 1/2 cups raspberries
1 1/2 cups blueberries or blackberries
Confectioners’ sugar for dusting (optional)

Preheat an oven to 325°F. Butter and flour a bundt cake pan.

In a large bowl, blend the eggs and granulated sugar. Using an electric mixer, beat in the butter and liqueur until fluffy. Add all but 2 Tbs. of the flour and the baking powder and salt, and beat until well incorporated and no lumps remain. In another bowl, combine 1 1/2 cups of the raspberries and the blueberries with the remaining 2 Tbs. flour. Toss to coat the berries evenly with the flour. Using a rubber spatula, gently fold the berries into the batter. Pour the batter into the prepared pan. Bake until a wooden skewer inserted into the center of the cake comes out clean, about 1 hour.

Transfer the pan to a wire rack and let the cake cool in the pan for 20 to 25 minutes. Unmold the cake onto the rack and let cool completely. Fill the center of the cake with the remaining 2 cups raspberries. Dust the cake with confectioners' sugar. Serves 10 to 12.


Yum, yum!

Sunday, September 16, 2007

Moroccan Spiced Chickpea Soup

I adore chickpeas. I love them roasted and covered with garlic powder, or on salads, or mashed up in hummus. My most favorite Indian dishes either include or feature chickpeas in them. When I saw the recipe for this soup, I knew I had to try it. Not only was this meal hearty - but it is also pretty cheap to make, and the leftovers were fantastic.

MOROCCAN SPICED CHICKPEA SOUP


3 tbsp olive oil
1 onion, diced
4 garlic cloves, finely chopped
1 tsp cinnamon
1 tsp cumin
1/4 tsp cayenne pepper
1 tsp paprika
1 can of diced tomatoes
3 (15 oz) cans of chickpeas, rinsed and drained
1 quart chicken or vegetable stock
salt and pepper
2 good handfuls of pre-washed baby spinach

Heat the olive oil in a large skillet over medium high heat. Add onions and garlic and cook until onions become translucent. Add cinnamon, cumin, paprika and cayenne pepper and cook for approximately 2 minutes to develop the flavors. Add the tomatoes, chickpeas and stock and bring to a simmer, stirring occasionally. Continue cooking on medium-low for approximately 45 minutes or until the chickpeas become tender.

Take soup off heat, and use a potato masher to mash up some of the chickpeas right in the pot. (This is an optional step...but it does change up the texture and makes the soup thicker.) Stir in the spinach until it wilts, then season with salt and pepper and serve!


If you don't like the heat, omit the cayenne - because even though you are using just a tad of the spice, it still will hit the back of your throat when you least expect it!

Monday, September 10, 2007

Cal-zone-ezzzzz

Every now and then calzones will pop up on my menu planning - yet in all this time, I have never posted a recipe or a picture. I love calzones, because you can change them up so easily by adding a variety of different ingredients. Personally, I like mine to be stuffed with cheese, spinach and broccoli. Nathan likes meat. You can also use what you have and clean out the fridge making it "garbage bread."

To me, it's all about the layering of ingredients. Pick up a round of your favorite raw pizza dough from your supermarket, and divide into 4 equal servings. Gently pull on the dough, creating a round even circle. Lay on a slightly floured surface, and begin to introduce the "stuffing:" I use provolone cheese slices as my first layer. The cheese keeps the dough from shrinking, providing a nice base for the rest of my ingredients. Then, I pile on ham, dollops of ricotta cheese, raw broccoli florets, a touch of minced garlic, and finally a handful of shredded mozzarella cheese. For flavor add about a tsp of your favorite dried herb - I used thyme and a sprinkle of salt. Pull the dough up and around your mound of fillings, and secure by folding it under, creating a pouch. Crimp the edges. Brush some melted butter over the top, and season with salt, pepper and dried parsley. Poke a couple of holes in the top so that steam can escape.

Rectangle calzone, unbaked.

Bake in a 450 degree oven for 10-15 minutes or until calzone is golden brown. Let cool 5 minutes. Serve with your favorite tomato sauce.

Baked...and ready to eat! YUM!

Tonight I made a family'zone, then served slices alongside a spinach salad. Huge success. Even the kids eat it, because it's like a stuffed pizza. Just look at all the gooey good stuff leaking out.

Smells like feet - and weekly meal planning

The other day I made the Meditteranean Risotto that I had on deck in last week's dinner menu. The idea was so appealing...I adore sun-dried tomatoes, olives and feta cheese. I love rice and the creaminess of risotto. I thought the dish would be a slam dunk!

However, when feta cheese is heated up, it smells like old, disgusting, wet gym socks. In this dish, it tasted about the same also.

Looks pretty though!

I really, really wanted to like it! I tried so hard to encourage myself to continue eating it - but in the end, I gave up. I don't know why I kept the copious amounts of leftovers...maybe I'll revisit the risotto cold. Maybe. Probably not.

Monday - Calzones
Tuesday - Roasted Garlic and Citrus Chicken
Wednesday - Moraccan Spiced Chickpea Soup with Sandwiches
Thursday - Tofu Ka-bobs with Mustard Dipping Sauce
Friday - Pizza

Friday, September 07, 2007

Coconut Curried Tofu with Green Jasmine Rice

When I type "tofu" most people say "ewwwww!" Truth of the matter is, tofu takes on the flavors that you are cooking with, and is a great alternative, or substitution to meat in some dishes. It's not just for vegetarians, I swear! I tend to use the extra-firm variety because it has the texture that I prefer.

This particular recipe has a lot of big flavors that blend perfectly. Garlic, lime, ginger, cilantro, curry and cumin. YUM!!! You'll smell for days, but it is so worth it!

COCONUT CURRIED TOFU with GREEN JASMINE RICE


1/4 cup unsweetened shredded coconut

2 cups water
1 tsp salt
1 cup jasmine or basmati rice

1 big handful of coarsely chopped fresh cilantro (if you do not like cilantro, you can use parsley)
3/4 cup unsweetened light coconut milk
4 tsp minced fresh ginger
1 tbsp fresh lime juice
2 large garlic cloves, minced

2 tbsp vegetable oil
16 oz. extra firm tofu, drained, patted dry and cut into 1/2 inch cubes
1/2 cup thinly sliced green onion
2 tsp curry powder
1 tsp ground cumin
1/8 tsp dried crushed red pepper flake
1 cup whole small cherry (or grape) tomatoes

2 tbsp coarsely chopped peanuts

Brown shredded coconut in a small saucepan over medium heat, stirring constantly. Set aside.

Bring water and salt to a boil in a heavy saucepan. Stir in rice; return to a boil. Reduce heat to low, cover and simmer until water is absorbed and rice is tender - between 18 to 20 minutes.

Meanwhile, puree cilantro (parsley), 1/2 cup coconut milk, 1 tsp ginger, lime juice and half of the garlic in a blender until smooth. Set aside.

Heat oil in a large non-stick skillet over high heat. Add tofu and stir fry until golden. Add onions, curry, cumin, red pepper flakes, remaining ginger and remaining garlic. Stir fry for 1 minute. Stir in remaining coconut milk, and season with salt and pepper. Right before service, add tomatoes. The residual heat will soften the skins without turning the tomatoes to complete mush.

When rice is finished cooking, stir in shredded coconut and cilantro puree until combined. For service, spoon rice onto plate. Top with tofu mixture and sprinkle with peanuts. Garnish with a little lime, and right before digging in - squeeze that lime over the dish. It adds a wonderful brightness to the whole meal.


I liked this meal the further I got into eating it, which is just strange. The tofu resembled chicken in taste and texture, and the warmed tomatoes exploded when you bit into them. Each bite had a different flavor - which was so cool. The leftovers were even good!

Of course, my major flaw (which you can see from the picture) is that my rice is not green. The cilantro looked disgusting at the store, and the parsley looked even worse so I used dried parsley instead. It worked, but didn't give that green verdant color that I really wanted. Although, green rice would probably turn a lot of people off!

Tuesday, September 04, 2007

(Two) Mustard Chicken

Dark meat chicken is cheap. Most people like it. I do not. I like the breast meat...same goes for turkey. However, every once in a while I purchase the dark meat since it is one of Nate's favorites (and let's face it - all of what I do in the kitchen is for him). This recipe originally calls for boneless, skinless chicken breast - - but the bone-in thigh meat in the store looked really good, so I made a couple of adjustments, and saved myself about $5.00 in the process!

It was absolutely the right thing to do. The meat was succulent, and since the mustards have so much flavor, I was not bothered by the slightly "gamy" taste that I specifically do not like about dark meat. This dish is definitely on our "must make again" list. Plus there are only 4 ingredients. How can you go wrong?

(TWO) MUSTARD CHICKEN


Chicken pieces that you like the best (I chose bone-in and skin-on thighs)*
1/2 cup dijon mustard
1/2 cup honey
1/4 cup stone-ground mustard

(Yep, that's it!)

Preheat oven to 375 degrees.


Mix together mustards and honey in a 9x13 baking dish. Coat chicken in mustard mixture, and bake for 25-30 minutes, until chicken is no longer pink with a safe internal temperature of 170 degrees. Turn chicken once, to ensure that all sides are basted with mustard mixture. Spoon extra mustard mixture over chicken at service.

*If you are using skin-on chicken of any kind, heat a couple of tsp of oil over medium-high heat in a large skillet, and brown on all sides. Transfer to baking dish with mustard, and bake as directed. For bone-in chicken, you may have to add 5-10 minutes onto the cooking time.


I can not believe how non-mustard'y this meal was...I don't know exactly what I expected - but in my head I really thought that we would be reacting as if we had sucked on a lemon. The sauce was sweet and delicious, the perfect balance of sweet and sour. I served it alongside some mashed potatoes and a bit of vegetable medley, so as not to compete with the main dish. Just look at how that chicken glistens!

Make extra...the leftovers were just as good! Oh, and pack lots of napkins - it's just that finger-lickin' good!

Weekly Meal Planning

Monday - 2 Mustard Chicken
Tuesday - Swiss cheese "trapped" hamburgers on the grill, with pasta salad
Wednesday - Curry Tofu with green Jasmin rice
Thursday - Eggs Benedict
Friday - Pizza
Saturday - Mediterranean Risotto

Monday, September 03, 2007

Summer Fruit Terrine

Does anyone remember those molded jar candles that Bed, Bath and Beyond used to make? The wax would be shaped like fruits that would melt down inside this clear jelly-like substance. The fruit would be suspended in time! I had about three of them - - my favorite being the candy corn version, which I never lit because that sweet smell would make me ill.

This dessert reminds me of those candles.

SUMMER FRUIT TERRINE

Bottle of non-alcoholic Sparkling Cider* (which I found in my market's cheese section)
pint of fresh raspberries
green and red seedless grapes - halved
1 small can of sliced peaches, drained
2 (1/4 oz) envelopes of non-flavored powdered gelatin
1/2 cup sugar
2 tsp fresh lemon juice

Arrange fruit in a glass, ceramic of nonstick loaf pan.

Pour 1/4 cup sparkling cider in a small bowl, and sprinkle with gelatin. Let stand 1 minute to soften.

Meanwhile, bring 1 cup of cider to a bowl with sugar, stirring until sugar is dissolved. Remove from heat and add gelatin mixture, also stirring to dissolve completely. Gently stir in 3/4 cup cider and lemon juice, then transfer to a metal bowl set in a larger bowl of ice and cold water to cool. Stir occasionally, until cider is room temperature.

Slowly pour cider over fruit, then chill, covered, until firm - approximately 5-6 hours.

To unmold, dip pan in hot water for 3-5 seconds to loosen and invert onto serving dish.

*For an adult-only audience, substitute the sparkling cider for a Prosecco - an Italian Sparkling Wine.


Much to my dismay, people seemed afraid of this dessert, and I ended up bring over 1/2 of it home...which is a pure shame, since it was really light and tasty. The berries added a sour punch, and the grapes remained firm and sweet. The next time I make it, I will go a little lighter on the fruit so that it is not so dense.

You can also use any fruit you'd like - - but I really like the idea of this dish being an "end of summer" item, with traditional summer fruits. Plus, it looked really pretty. (Although it would've looked even prettier if I had a fluted dish or something to mold it into.)

Saturday, September 01, 2007

Garlic and Tomato Chicken

We were all set to go out to eat the other night, when suddenly I felt the sudden urge to cook. I didn't have a recipe, but I did have some thawed chicken breast waiting to be used...as well as a boatload of garden fresh tomatoes.

So, we stayed home.

I made dinner in 20 minutes, on the fly - with what I had on hand.

And, it was fabulous.

GARLIC AND TOMATO CHICKEN

4 boneless, skinless chicken breasts - pounded to 1/4 inch thickness
1 tbsp olive oil
1/4 cup sliced button mushrooms
1 large ripe tomato, cut into cubes
2 garlic cloves, sliced thin
1/2 cup dry vermouth (or white wine, or chicken stock)
1 cup heavy cream
1/4 cup grated Parmesan cheese
salt and pepper
1/4 tsp Cayenne pepper
palm-full of dried parsley

Heat oil in a large skillet over medium high heat. Season raw chicken with salt and pepper, then add to skillet and brown on each side. Once browned, add garlic and deglaze pan with vermouth - scraping the bottom with a wooden spoon to pick up all the brown bits. Once reduced by half, add mushrooms, heavy cream and parmesan cheese. Stir occasionally, turning chicken to coat. Finish with cayenne pepper, salt and pepper and some dried parsley for color. At the last minute, add your tomatoes and serve over rice.


The sauce is not a thick sauce, but it is mighty tasty with all that garlic and cheese in it! Rice was indeed the perfect accompaniment, even though I first thought that pasta would work better. I would've been so wrong. If the sauce was thicker, the pasta would've worked.

Tuesday, August 28, 2007

Pad Thai

Weekly meal planning has gone to hell this week, due to our new puppy addition. It's much more fun to play with Patches than it is to pour over cookbooks right now.

Which is why we ate dinner out of a box last night. (Gasp!)

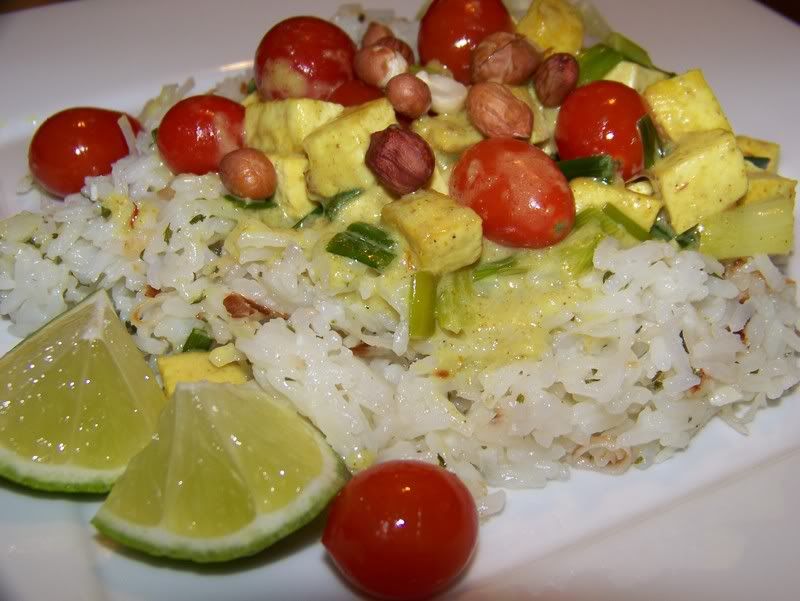
I LOVE PAD THAI! It's what I order when we go out for Thai food. I love the rice noodles, and the sweet yet slightly sour and spicey sauce that accompanies it. I especially love the many textures you get in the dish - the noodles are soft, but still have a bite to them, the peanuts provide a chewiness when they hit the heat, and the bean sprouts lend a nice crunch.

I've been reluctant to try to make original Pad Thai from scratch, when this box version tastes so good. Dinner is ready in a snap - - and because you actually have to cook something, you feel good about making it. It's almost as easy as picking up the phone and ordering take out! For my money, the Thai Kitchen brand is definitely the best one on the store shelves. (Damn, I wish I was getting paid for this review!) I change up the recipe slightly from the directions on the box, depending on my culinary mood.

Thai Kitchen's ORIGINAL PAD THAI
(makes a meal for 2)

1 box Thai Kitchen Original Pad Thai Stir Fry Rice Noodles with Sauce (see picture above)
2 chicken breasts, cut into strips*
12 medium shrimp, de-shelled and de-viened*
6 oz. tofu, cut into cubes*
2 eggs
4 tsbp vegetable oil
1 can of bean sprouts, drained
1/4 cup green onions, sliced into 1-inch straws
1/2 cup peanuts, roughly chopped
boiling water

In a large bowl, soak rice noodles in boiling water for approximately 20-25 minutes.

When you have about 5 minutes left in your soak, heat 1 tbsp oil in a large skillet over high heat. Scramble eggs, stirring constantly. Once eggs are cooked, remove from heat and set aside. Place remaining oil in skillet, and once hot, saute chicken, shrimp and tofu. Add soft rice noodles and sauce packet, and stir to combine. Let cook a couple of minutes until the noodles absorb all of the sauce. Add green onions and peanuts. Cook an additional minute. Finish the dish with cooked eggs and bean sprouts. If desired, garnish with some additional green onion and chopped peanuts. Sometimes I add a lime wedge if I want to be fancy!

*These proteins are completely optional. Last night, I made it with only chicken - which is what I had on hand. However, I've made it with no proteins, or all three, and it is still delicious.


The last time I made it, I didn't have any peanuts (I know I had some - - but they were mysteriously eaten!)...so I added a tablespoon of crunchy peanut butter. I never even missed the peanuts!

BTW - these rice noodles are gluten free, which is pretty darn awesome if you adhere to a gluten free diet.