Showing posts with label Vegetarian. Show all posts

Monday, July 25, 2022

To zucchini...and beyond!

It's funny how sometimes life throws these head-shaking curve balls at you that don't really make any kind of lasting impact, but can be annoying as all get out.

Last year, we spent a lot of time prepping an overgrown area to become a 50' x 100' vegetable garden. We overturned ground, pulled weeds, added bagged compost, and struggled to maintain water distribution (with a well) and proper harvesting. 

We successfully grew sugar snap peas, tomatoes, potatoes, summer squash, zucchini, cucumbers, onions, pumpkins, and butternut squash. We were less than successful growing peppers and corn - so it became a mission to address the sandy soil which we thought was a corn-growing hindrance.

We hedged our corny bets for this year by creating our own kitchen/yard waste compost area, so that we could reuse our own organic material as fertilizer for the garden and then meticulously maintained and turned that material so that it became rich black gold for the soil. (The addition of chicken poop from the barn also assisted with the compost's nutrient capabilities!) Last Fall we purchased bags of cow shit from a local farmer in our town to enrich our soil even more as we turned over the ground one last time at the end of the growing season. The soil looked (and smelled) like real farm dirt - not sand, or clay which really does have a different aroma. 

We planted with one notation...DO NOT PLANT TOO MANY ZUCCHINI AND SQUASH. Even by only planting a few seeds, we still over-planted.

Every home gardener I know jokes about the productivity of zucchini and summer squash in their gardens on good years, without disease or bugs ravaging your plants. I'm not the first to use "Zucchini Apocalypse" by any means, but I do enjoy conjuring up the images of zombie zucchini, en masse, marching their way into our kitchens, multiplying as they slink along.

I imagine it looks kind of like this:

Fuck. And you should see what is *still* waiting for us in the garden. We just started harvesting, and there are still flowers budding.

I was NOT happy when my husband (yes, husband - as of 7/16/22!) came in loaded to the gills, with vegetables twice the size of my forearms! I knew right there that I was going to have to get creative with the cooking, so that none of this produce goes to waste. Zucchini Bread, which I think is gross, was NOT going to be the end-all to use all of this up. In fact, two cups of grated zucchini was a 1/3 of one of these monsters, and that was after seeding it.

I've been scouring the internets searching for recipes to rid us of the onslaught of zucchini and summer squash. 

Last year I discovered the beauty of Zucchini Relish - it's a simple substitution from your regular cucumber/pickle relish, but with more color. I can pints and half pints using a water bath, and it is delicious. Better yet, no one knows it's not traditional pickled relish until we tell them. Same crunch and bite.

I also make Zucchini and Summer Squash pickles, which are amazing on grilled chicken and burgers. Freezing cubes, rounds, and grated veg is also a go-to, but honestly we are still trying to knock off last year's harvest, so I don't want to go too far in that direction. 

So, as we delve further into the Zucchini Apocalypse, I'll be testing more zucchini and squash recipes and sharing them here. Starting....now.

Cheesy Zucchini Smash Cakes 

Baked zucchini pancakes.

Ingredients:
2 cups grated zucchini
1 cup panko breadcrumbs
1 cup shredded sharp cheddar cheese
2 eggs
1 small shallot, minced
1 clove of garlic, minced
Salt and pepper, to taste

Additions: Substitute summer squash for zucchini; add fresh herbs of your choosing; add crumbled bacon; substitute shallot/garlic for onion and/or garlic powder.

Preheat oven to 400 degrees. 

Grate zucchini, and place in the center of a clean kitchen towel. Gather up the towel, and squeeze out the liquid from the zucchini. (I use this technique with frozen spinach dishes, as well as some jam preparations that I want to reduce liquid for before cooking.) 

 You want a semi-dry ball of zucchini to add to your bowl. In the same bowl, add all ingredients and mix with your hands to incorporate thoroughly.

Once fully incorporated, take 1/4 cup of the mixture and shape it into a mini pancake, pressing hard. Gently place on a silpat-lined baking sheet. Bake at 400 degrees for 25 minutes, or until golden brown.


Serve any way you'd like, but I used them as the English Muffin base for an eggs benedict'like dish that blew us away. (And yes, that is indeed a broken Hollandaise! I froze the last batch I made to see if it would stand up...it doesn't, but it still had all the flavor.) The Zucchini Smash Cakes can also be used as an appetizer with a little sour cream and chive, or crème fraîche and smoked salmon if you want to be fancy. I'm sure a topping of caviar would be lovely for people who like that.


This is most definitely a recipe I am keeping in my zucchini arsenal for the rest of the summer! 

Now I am off to find a zucchini ice cream recipe because if I have to eat the stuff, I might as well find interesting ways to incorporate it.

Wednesday, May 23, 2012

Swordfish topped with mango salsa

My ex's father's side of the family is Russian and used to make the best Pierogi which we would fest on for weeks after the Russian Orthodox Easter, or AKA, the Pierogi Sweatshop holiday.  All of the women used to gather in his aunt's kitchen and make homemade potato pierogi until their hands fell off.  Being an outsider, I was never invited to participate and even though I knew how mind-numbing the work was, I kinda wish I was.  Because then I would've never tried to make them alone, at home this past weekend. 

I followed the recipe for Potato and Onion Pierogi from Robert Irvine.  It was HORRIBLE.  So - if you follow the rest of my recipe below, just pick up some Mrs. T's Pierogies and call it a day.  DO NOT suffer like I did!  (BTW - that is a free endorsement right there for Mrs. T's, but really, I love their pierogi!) 

You know what was most horrible about the pierogi making experience?  The fact that the recipe said it would make 24 and I when I finished, I had a solid 6.  Most didn't stay closed in the boiling water, my dough was too thick for some and created a mushy mess and others just looked like something spewed from an animal.  I wish I had photos for the outtake reel, but that would've been just a slap in the face.

Swordfish Topped with Mango Salsa Over Pierogi

For Protein (feel free to change out swordfish with tilapia, or even chicken):
(4) 4oz pieces of Swordfish
1 tbsp olive oil
salt and pepper
2 tbsp compound butter (butter, parsley, salt and pepper combined)

For Salsa:
2 ripe Mangos, peeled and diced
1 cup of fresh pineapple, diced
1/2 a red bell pepper, diced
1/2 a jalapeno pepper, ribs and seeds removed, finely diced
2 ripe kiwi fruit, peeled and diced
1/4 cup red onion, finely diced
salt and pepper, to taste
1 tbsp honey
zest and juice of one lime

Pierogi "soup":
3 pierogi per person
2 tbsp butter
1/2 cup cut green beans
1 carrot, grated
1 small onion, sliced
1 garlic clove, diced
1/2 cup vodka
1 cup vegetable stock
salt and pepper

Prepare mango salsa a day ahead.  Mix all ingredients and refrigerate to let flavors combine.

Preheat oven to 400 degrees.  Place fish in a shallow baking dish brushed with oil, presentation side down. Bake for 18-20 minutes or until fish is done, turning once.

Meanwhile, bring water in a large pot to a boil.  Add pierogi and cook and it floats.

In a large skillet, melt butter.  Add onion and garlic until translucent.  Remove.  Add cooked pierogi and slightly brown each side, turning once.  Add sauteed onion and garlic, green bean and carrots until slightly tender, approximately 2-3 minutes.  Add vodka and reduce by half, then add vegetable stock and simmer with a lid off until slightly reduced.  Add salt and pepper to taste. 

Arrange pierogi and vegetables in a shallow serving dish.  Spoon broth over.  Top with fish and finally the mango salsa.  Each bite is a party in your mouth!  Plus, it's pretty. 


Note: Please be advised that swordfish contains high traces of mercury in it, and if you are prone to migraines, make the substitution!  I got the worst migraine headache hours after feasting on this and my doctor said the mercury may have attributed to it - who knows...but you may want to err on the side of caution. 


Wednesday, January 04, 2012

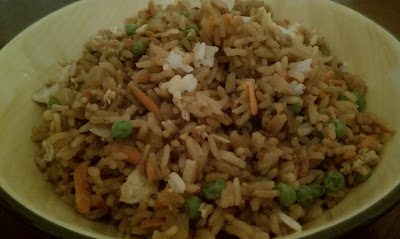
Fried Rice - why order takeout?

I don't know why, but New Years day always makes me crave asian food. Why is this?! Someone please explain!!! Actually, let me think about this for a moment...it could be because New Years is a turning point in America's healthy brigade, and all I can think about (besides the fact that I will not be able to find a parking spot at the gym) is that I want something salty that will give me cankles, high blood pressure and make me hungry a couple of hours later! I've tried my hand at a couple of "asian inspired" dishes throughout the years, but my fried rice has become a staple.

I don't know why more people don't make fried rice at home?! It's easy, and if the rice is already cooked - and left over from your pork chops and applesauce dinner - fast to prepare. It can also be very substantial and satisfying because you can load it with as many vegetables and lean protein as you want! Really, you are limited by your own imagination.


I like making it at home because I like to keep the crunch in my vegetables - something my mother never believed in growing up! A mushy piece of broccoli makes me want to run towards the front door kicking and screaming about the monstrosity of it all. It's funny how I said "growing up" as if her mushy veggie love doesn't still appear to this day. Someone take away her steamer!!!! Or, give her a new kitchen timer that clips to her apron that doesn't go over 6 minutes.

FRIED RICE

2 tbsp vegetable oil
4 large eggs
1 cup onion, chopped
2 garlic cloves, finely diced
1 tsp freshly grated ginger
2 cups of prepared, cooled white rice of your choice*
1 cup cooked and cubed pork or beef
1/2 cup soy sauce, or ginger flavored soy sauce (whatever suites your palette)

1 tsp sesame oil
1 cup frozen peas
1 cup grated carrot

In a large WOK, or skillet heat 1 tbsp of vegetable oil over medium high heat. Add eggs and stir until they form a soft scramble. Remove eggs from WOK and set aside.

Heat remaining vegetable oil over medium high heat. Add onion, garlic and ginger and saute until fragrant, about 2-3 minutes. Add rice and meat, stirring to combine. Add soy sauce and sesame oil, and cook through. Before serving, add frozen peas (they will defrost with the heat of the rice), reserved scrambled egg and carrots. Serve.


That's it...about 10 minutes in prep, total. I've seen fried rice with lots of different kinds of vegetables, seafood and meats...but this happens to be my favorite combination. Oh, and the leftovers are AMAZING!!!

*I use Jasmine rice for all of my rice needs. It's the only kind of rice that I don't seem to burn, and I like the way each individual piece of rice stands on it's own and doesn't clump up or stick.

Sunday, August 14, 2011

How To - fluffy gnocchi

The word gnocchi may derive from the Italian word nocchio, meaning a knot in wood, or from nocca, meaning knuckle...and it's easy to see why, because that's exactly what these tasty little potato dumplings look like. For years I have been purchasing pre-made vacuum packed gnocchi at the grocery store, and it's so silly! Gnocchi are fairly easy to make, and taste a hell of a lot better when made with your own two hands, and not vacuum packed, to sit on a shelf for god knows how long. Although I try not to think about it, I do wonder how many chemicals it takes to keep the egg in them from going bad while sitting on said shelf. Hmmmmm....barf.


Gnocchi are often the served as an alternative to soups or pasta in some Italian eateries. I prefer them to be the star of own soups, which then enable those soups to become more of a meal of substance.


Contrary to popular thought - and what the Food Network has been pounding into my head for years, which is why I've never made them before - you DO NOT NEED a potato ricer. A fine strainer and a spoon will do the job quite nicely, and since most home cooks have them at their disposal already, there's no need to take a trip to the local kitchen supply store. Who has that kind of expendable income now-a-days anyway?!


I think it's pretty amazing that you can take 3 simple, everyday ingredients and transform them into something new and exciting.


Little cute pillows of potato GNOCCHI!


Basic Gnocchi

2 large potatoes
2 cups of flour
1 egg
salt, to taste

Peel and dice the potatoes into bite sized pieces, add to a medium pot and fill with water until potatoes are just covered. Bring to a boil over high heat and cook until potatoes are tender. Drain into a fine strainer for 5 minutes, or until potatoes have lost their moisture and are cool to the touch. Set strainer over a large bowl and mash cooked potatoes into the strainer, until your potatoes are "riced" into the awaiting bowl. It should look something like this:


Combine your "riced" potatoes with two cups of flour and one egg and combine using the paddle attachment of your mixer until the dough just comes together, about 1-2 minutes. Do not overwork the dough, as the gnocchi will then become tough.


Collect a handful of dough and roll into a long log, about 1/2 inch in diameter on a slightly floured surface. Cut into 1 inch pieces, then using the tines of a fork, flick each dough piece off, creating the shape and texture of the gnocchi. Place pre-cooked gnocchi in a single layer on a cookie sheet, and repeat until all the dough is used.

Don't worry if your gnocchi don't look uniform...homemade cooking should be rustic!

To cook: place handful of gnocchi in salted, boiling water until it floats to the top. Serve immediately in your favorite gnocchi application! (You can also store your homemade gnocchi for several days in an air tight container, or freeze them for later use.)

Like I said before, I like to beef up my soups with gnocchi, and since I recently dined on soup, salad and bread sticks from a chain that shall not be mentioned - I was inspired to whip up my own version of creamy chicken and gnocchi soup.

Creamy Chicken and Gnocchi Soup

2 tbsp olive oil
2 tbsp butter
3 large carrots, peeled and diced
3 large celery stalks (leafy tops included), diced
1 large onion, diced
2 garlic cloves, finely minced
2 cups pre-cooked chicken - your choice of diced or shredded white and/or dark meat
2 quarts of chicken stock
16 oz. of prepared gnocchi
1 cup of heavy cream
1 tsp each: dried parsley, oregano and thyme
1/4 tsp freshly grated nutmeg
salt and pepper, to taste

Melt oil and butter in a large stock pot over medium heat. Add onion, garlic, carrot and celery and cook, stirring occasionally, until vegetables are tender. Add parsley, oregano and thyme - then add chicken stock and bring to a boil. Drop chicken and simmer for 1/2 hour until the liquid reduces slightly. (You can add more stock if your soup reduced too much.)

Right before service, add gnocchi. When the gnocchi floats, turn off the heat and add the cream, salt and pepper and grated nutmeg. Spoon into shallow dishes and serve with grated Parmesan cheese, if desired.


The texture of this soup is to die for...between the tender chicken and the fluffy, pillow'y gnocchi...I was in heaven! I also baked up some homemade bread to go along with this, so I could dunk the bread into the broth, which was so flavorful.

Truth be told, not only was this dinner - but also breakfast the next morning.

Sunday, January 24, 2010

Chunky Tomato Soup

It's soup season! Well actually...the Northeast is pretty much half way through "soup season," and I unfortunately am coming to the party a little late. As usual. Don't judge me!

I just love taking everyday ingredients, like tomatoes, potatoes, rice and pasta and making something that's tasty, healthy and easy. Soup is a great way to stretch your dollar, and for me as a singleton living alone, one pot provides many wonderful meals throughout the week. I also like that soup is filling, yet satisfying - so it's great for the waistline (as long as you don't load it with butter and cream).

This particular soup can really be steller...however, it does need a tiny bit of tweaking. So if anyone makes this, please let me know your thoughts and what you added to make it yours. There is one major shortcut that I will also make note of!

CHUNKY TOMATO SOUP

3 tbsp olive oil
1 tbsp butter
1 large onion, diced
2 garlic cloves, minced
2 lbs roma tomatoes*
2 tbsp tomato paste
1 large carton of chicken stock (use Vegetable Stock to make this Vegetarian)
1 can of cannalini beans, drained
3 tbsp fresh parsley, roughly chopped
1/2 tsp cumin
2 tsp paprika
1/4 cup heavy cream
salt and pepper, to taste

Preheat oven to 400 degrees. Halve roma tomatoes and place on baking sheet skin side down. Drizzle with 1 tbsp of olive oil and season with salt. Roast in oven for 15 minutes. Remove from oven and let cool. Once cooled, peel skin off of tomatoes set aside. *This step can be omitted if you would like...substitute roma tomatoes with 2 large cans of stewed tomatoes.*

In a large stock pot, heat 2 tbsp oil and butter until butter is melted. Add onion and garlic, stirring until onion is translucent. Add reserved roasted tomatoes, tomato paste and chicken stock. Stir until tomato paste melts into liquid. Add paprika and cumin. Cover and bring to a boil. Cook for 20 minutes or until tomatoes fall apart completely. Add drained, but not rinsed, cannalini beans, parsley and cream. Remove from heat. Season with salt and pepper, to taste.

Serve with shaved parmesan cheese and crusty bread for dipping.


I can't even begin to imagine how sweet and robust this soup would be if tomatoes were actually in season right now! I can't wait to try it again in the summer. I also think that fresh basil should be the herb'age of choice since parsley is so mild in flavor. And maybe a little palm-ful of crushed red pepper flakes for some heat. However, even with those issues not addressed the first time, I totally enjoyed this soup. I loved how the starch in the beans slightly thickened the liquid and the addition of the cream added just a tiny bit of sweetness that was to die for.

Thursday, July 03, 2008

Tomato Soup

For those who watched Top Chef Chicago as faithfully as I did - you will know that the true test of a chef (or, home cook in my case) is making a successful, yet simple homemade soup. Thank you Ming Tsai for that bit of wisdom!

I love soup. For some reason, I especially love soup in the middle of summer, which I understand is very strange for some. It's light and satisfying and you don't feel like a beached whale after dinner. That does have a certain summertime appeal, right? Unfortunately, Nathan doesn't appreciate a bowl of soup for dinner at any time of the year. For him, soup is a good starter - to be combined with his meat and potatoes. When he decided to cash in his free night at the casino, I decided to tinker around in the kitchen with a few basic ingredients.


I've been wanting to try my hand at a tomato soup for a long time...the thing is, I didn't want to spend a long time preparing it...nor did I want to handle potentially harmful salmonella-infused tomatoes!

What is nice about this tomato soup - besides it being absolutely bowl-liking delicious (I kid you not!) is that all of the ingredients are very basic, and will be found in a well stocked kitchen without any issue. Oh, and BTW...not only did I eat this soup for dinner, I also warmed up a little for breakfast, and took some for lunch the next day as well. I also made a notation to double the recipe next time!

KAT'S SUMMERTIME TOMATO SOUP

1 28oz. can of whole plain tomatoes, in their juice
1 quart of vegetable stock
1 - 1/2 cups heavy cream
2 onions, chopped
2 large garlic cloves, minced
1/4 cup torn fresh basil, plus more for garnish
salt and pepper, to taste
cooked rice*, optional
2 tbsp olive oil

In a large stock pot, saute onion and garlic in olive oil until translucent. Drain tomatoes, reserving the tomato juice. Add drained tomatoes and vegetable stock to pot, stirring to combine. Bring mixture to a boil, then lower heat and simmer for 20 minutes until the tomatoes break down slightly. Add basil and cook for another 2 minutes.

Take pot off the heat, and use a stick blender to puree soup to the desired consistency. Add cream and reserved tomato juice, if desired and stir gently to combine. Return pot to heat. Taste for seasoning and add salt and pepper to taste. Serve with a scoop of cooked rice, and a little fresh basil for garnish.

*Use up those leftovers! Keep the rice separate from the soup until service, or the rice will suck up all the soup and become gummy. You can also substitute your favorite pasta, or omit the starch all together.


There is nothing better than fresh basil! It's one of those herbs that I have no problem growing myself, thank goodness!

Tuesday, March 25, 2008

Chickpea Cakes

Chickpeas are just about my favorite food. I've played around with chickpeas before on this blog with some pretty fantastic results - but this recipe takes the "cake"...uh...literally. Think crab cakes, minus the crab and made with chickpeas instead!

CHICKPEA CAKES with a Blood Orange Sauce

For cakes:
2 cans chickpeas, drained and rinsed
2 small garlic cloves, finely minced
1/2 cup fresh basil, roughly chopped
1/4 cup chopped scallions
2 eggs
3 tbsp flour
1 tsp curry powder
4 swipes of whole nutmeg on a microplane grater
2 tbsp vegetable oil
salt and pepper, to taste

For sauce:
1/4 cup blood orange juice
2 tbsp grated blood orange zest
1/2 cup chicken or vegetable stock
1/4 cup orange marmalade
salt and pepper, to taste
1 tbsp butter
Orange sections (optional)
Cherry tomatoes (optional)

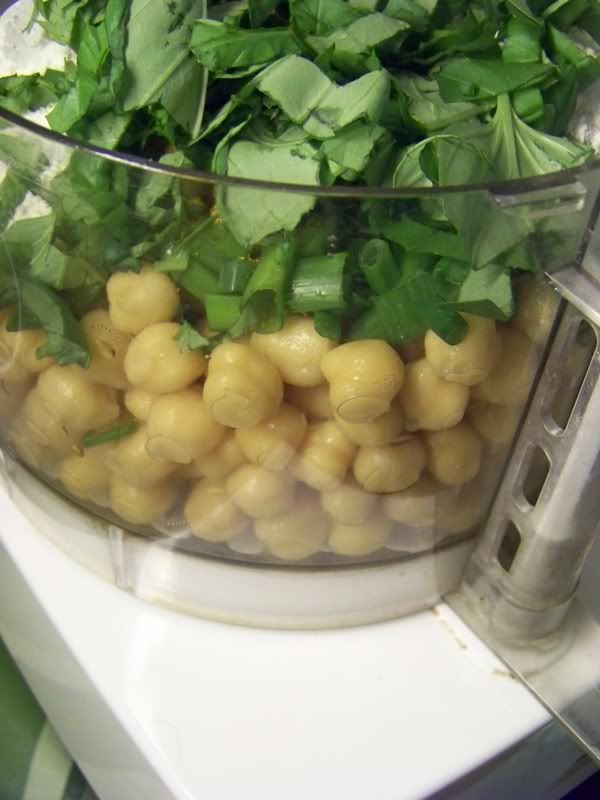
Fill a food processor with chickpeas, garlic, basil, scallions, eggs, flour, curry, nutmeg, salt and pepper. Pulse to combine. (I left mine chunky for added texture.)


Heat oil in a large frying pan until hot. Scoop out chickpea mixture into large baseball sized rounds, and place in pan. With a spatula dipped in water to prevent sticking, gently flatten each chickpea round slightly. Fry for approximately 4-5 minutes on each side, or until golden brown.

Meanwhile, in a small saucepan bring together juice, zest, stock and orange marmalade to a boil. Reduce to about 1/2 cup. Season with salt and pepper and add butter to give the sauce a glistening look.

Arrange chickpea cakes on a plate and garnish with halved cherry tomatoes and blood orange sections. Drizzle orange sauce over the top. If desired, juilenne a little extra basil on top.


I served ours with a couple of slices of roasted pork loin and additional blood orange sauce (I made a double batch of the sauce.) It really brought a touch of Spring to our evening! I was surprised at the texture and flavor that the chickpea cakes gave...the curry was definitely the dominant spice. If you don't like curry, then reduce / omit / replace it! The original recipe actually called for cilantro - but the basil looked so nice in the store that I couldn't pass it up...and I'm really glad I made that change. The basil leant a sweet scent to the entire dish without being bitter or overpowering. Super good!


I used this dish as a side, but they can easily be converted to cover all parts of the meal! These cakes would be fabulous as an appetizer if made smaller, and could also be breaded with Italian breadcrumbs or panko crumbs and fried as you would for risotto rice balls. The next time I make them I will surely put the front and center as the main part of the meal, along with a salad.
I'm sorry - it's pretty obvious that chickpeas in general excite the heck out of me!

Friday, February 08, 2008

Vegetarian Sushi

I am in love with making Sushi!

I'm obsessed with it. I've been scouring the internet for tips and tricks. I stopped at the Asian Food Market and grabbed a sushi rolling mat to increase productivity - which set me back a cool 99 cents! I can now chuck my sacraficed bamboo placemat which is pretty much ruined anyway, since I was pushing it past it's regular job of sitting pretty on my table.

It's funny, because although I wince at the thought of eating fish, no matter how I try to tell myself how good it should be - raw fish (particularly red snapper and tuna) is quite tasty. There's no "fishiness" - or there shouldn't be if it's fresh - and I find the texture to be quite similar to the rice in the sushi roll. Plus, if eaten with a dab of wasabi, dipped in soy sauce and chased with a piece of pickled ginger you can barely taste anything else!

I'm not brave enough to try my hand at working with the raw sea animals - but I have been playing around with the colors of the rainbow via the veggie briggade. Peppers in every single hew, carrots, sprouts, avocado, cucumbers, pickles, zuchinni and squash.

VEGETARIAN BROWN RICE SUSHI

2 sheets of Nori (found in Asian Food Markets)
1 carrot, peeled and cut into long, thin strips
1/2 cucumber, seeded and cut into long, thin strips (Do not peel!)
1/2 red bell pepper, cut into long, thin strips
1/2 a ripe avocado, removed from outer skin and cut into strips
1/4 cup mung bean sprouts
wasabi paste
pickled ginger

For Rice:
2 1/4 cups of water
1 cup brown rice
1 tbsp soy sauce
2 tbsp rice wine vinegar

Bring water to a boil in a saucepan. Add rice and soy sauce. Cover with a lid and let rice steam for 40-45 minutes or until done. Remove from heat and transfer to a bowl with a large surface area for cooling. Sprinkle with rice wine vinegar and gentle stir rice to coat. Let stand 20 minutes.

Meanwhile prepare all vegetables.

Lay out your sushi rolling mat onto a clean cutting board or other flat surface, so the slats are perpendicular to your body. Lay a piece of nori on the mat, shiny side down. Using damp fingers, spread a layer of rice over nori, covering the nori almost entirely - leaving a 1 inch strip at the top of the nori, furthest from you. (Doing this will help to seal the roll.)

Spread a very thin bead of wasabi paste in a single line along the edge nearest to you. Be careful with the wasabi, because if you use too much, you will blow yourself and your dinner mates out of the water! Arrange vegetables strips. Using your thumbs, gently begin to roll up the mat, squeezing gently to adhere the nori to itself. Chill roll for 10 minutes or so, then cut into pieces with a very sharp knife.


I served my sushi alongside some pork and vegetable pot stickers.

Now, some may think that brown rice was a strange choice...but I wanted to up the nutrician level and brown rice certainly did the trick. However, if I didn't tell you, you'd probably never know...it still had the same consistancy as traditional sushi (or sticky) rice, but with a slight nutty flavor.


I'm now thinking of ways to create a little sushi dessert roll. (Hummmm.....YUM!)

Tuesday, February 05, 2008

Beets...lunch ladies beware

Walking through the grocery store last night without a menu or list in mind, put my brain into a tail spin. I continued through the produce aisles, glancing at boring button mushrooms, overgrown eggplant and yellowed icebugh lettuce. I was in an idea rut until I happened upon a bunch of yellow organic baby beets. So tiny and so cute! I also selected a bunch of organic red baby beets as well, and the tide started to turn.

At home, I scrubbed my beets with a spud scrub and let them air dry. I grabbed a couple of carrots, peeled them and set them aside as well. Since the baby beets were so young, I decided to leave them unpeeled. The skins were so thin anyway that it seemed like a waste (of time and nutrients) to remove them.

ROASTED BEET SALAD (served hot or cold)

1 bunch of baby yellow beets, trimmed, scrubbed and cut in half
1 bunch of baby red beets, trimmed, scrubbed and cut in half
4 carrots, peeled and cut into 1/2 inch pieces (keep in similar size to beets)
3 tbsp olive oil, divided
salt and pepper
3 tbsp chopped fresh parsley
1 tbsp balsamic vinegar

Preheat oven to 400 degrees. Prepare all vegetables and place on a baking sheet. With your fingers, mix together vegetables, 2 tbsp olive oil and salt and pepper until coated. Roast for 30 minutes, flipping vegetables half way through.

Remove from heat and place vegetables into a bowl. Add reserved olive oil, fresh parsley and vinegar. Season with salt and pepper, if needed. Serve warm, or chill for two hours if you prefer your salad cold.

I served this earthy salad alongside a portabello mushroom burger with avocado, tomato and onion. It was a beavy of colors and textures - which was just heaven to me!


Be warned though - - eating too many red beets may cause your poo to turn purple. Just trust me on this.

Monday, February 04, 2008

Fast, Easy, Tasty

Fast, easy and tasty just about sums up this meal in 3 simple words.


DITALINI WITH PESTO, BEANS AND BROCCOLI RABE


1/2 lb ditalini pasta
1 jar prepared pesto (or, make your own)
1 can light kidney beans, rinsed
1 bunch of broccoli rabe, cleaned and cut into 1 inch pieces
1 cup vegetable stock


Prepare pasta as directed. About 3 minutes into the pasta cooking, add the broccoli rabe pieces to the boiling water. Drain and return to pot.


Meanwhile, in a small saucepan, bring vegetable stock to a boil. Add drained beans and pesto and cook until beans are heated through, approximately 1 minute. Add mixture to pasta, stirring gently to combine. Serve!


Seriously good eats in about 15 minutes tops. I really enjoyed the nuttiness of the beans against the fresh flavor of the broccoli rabe - and the rabe was not bitter at all! This definitely made my "make again, and again..." list. (And, did a nice job in satisfying that comfort food craving.)

Wednesday, January 30, 2008

Indian Spiced Cauliflower and Potatoes

I love the flavors of India - - cumin, tumeric, curry. I love it all. I don't care that the smell of the strong spices will linger on your skin and in your hair for days. Nathan and I usually hit our favorite Indian restaurant on the weekend for their lunch buffet and leave totally satisfied and full for the rest of the day. Luckily, making Indian food at home is relatively easy, and equally satisfying.


I've never been a huge fan of the cauliflower. I mostly like it raw, but if given an option I would always choose broccoli or peppers or any other kind of veggie platter vegetable. However, I adore cauliflower in it's roasted state. It turns slightly brown and takes on an almost nutty flavor, yet still retains a tender crispness that I like. So, instead of following the original recipe, and boiling my cauliflower and potatoes, I decided to roast them. (Which also saved my kitchen from that terrible cauliflower stench!)

INDIAN SPICED CAULIFLOWER AND POTATOES


1 head of Cauliflower, cut into 3/4 inch florets
1 pound of Potatoes, peeled and cut into 1/2 inch cubes
1 medium red pepper, cubed
5 tbsp vegetable oil
1/2 tsp cumin seeds
salt
1 medium onion, finely chopped
2 garlic clove, finely minced
2 tsp minced peeled fresh ginger
1 tbsp ground cumin
1 tsp ground corriander
1/2 tsp tumeric
1/2 tsp cayenne
1 tbsp paprika
1 cup water
1/4 cup sour cream

Preheat oven to 475 degrees.

Toss cauliflower and potatoes together on a large baking sheet with about 3 tbsp of vegetable oil, cumin seeds and season with salt. Roast on the top rack in your oven for about 20 minutes, turning once, or until the cauliflower begins to brown, and the potatoes are tender.

While the cauliflower and potatoes are roasting, cook the onion, garlic and ginger in a large skillet with the remaining 2 tbsp of vegetable oil over medium heat, stirring frequently, until the onions turn translucent. Add your spices: cumin, coriander, tumeric, cayenne and paprika and cook for approximately 2 minutes. Stir in water and bring to a boil. Add roast cauliflower and potatoes and cubed peppers. Cook covered for about 5 additional minutes. Turn off heat and add the sour cream, stirring gently to combine.

Serve over steamed white or brown rice.


I was pleasantly surprised with the flavor and texture of the entire dish. The peppers - added at the very end - give a nice raw pepper crispness and provide such a vibrant color to the entire dish. Next time I will add more of the spices as the sour cream seemed to "cool" then down a little.

Monday, January 21, 2008

Brussel Sprouts Alfredo

I didn't try a Brussels sprout until I was well into adulthood, and with good reason - - my mother hates them with a passion. I like anything and everything in cabbage family, Brussels sprouts included! Steamed and tossed with some butter and salt...oh man! I just adore their earthy flavor.

The grocery store had some lovely organic Brussels sprouts that I simply could not pass up when I did my weekly shopping. I bought only about a cups worth - - and immediately started to think about how I would use them.

BRUSSELS SPROUTS ALFREDO

1 cup of Brussels sprouts, trimmed and halved
2 tbsp olive oil
1/4 cup pine nuts
egg noodles
1 jar of your favorite Alfredo sauce*
salt and pepper, to taste

Preheat oven to 400 degrees. Place Brussels sprouts on a baking sheet. Drizzle with olive oil and season with salt and pepper. Roast in the oven, turning once, until sprouts are tender and have developed color. Remove from heat.

Prepare pasta as directed. Drain. Add Alfredo sauce and roasted Brussels sprouts, gently stirring to combine. Season with salt and pepper, to taste. Meanwhile, toast pine nuts in a dry skillet until browned. Sprinkle pine nuts over side dish at service time.


I served this pasta side dish alongside breaded and baked bone-in pork chops and applesauce.

The meal itself was pretty darn fantastic! The pasta satisfied that need for something "creamy" without dominating the plate (as I am being very mindful of portion control), and the pine nuts added just a touch of crunch. And, the whole meal was done in about 30 minutes - including roasting time, which also makes it great for a weeknight dinner.

*To make this more of a main dish, add some pre-cooked chicken to the final product.

Wednesday, December 12, 2007

Tomato and Goat Cheese Pasta

Rachael Ray created an empire on 30-minute meals. I am bitter about her success (to say the least) and posted about my feelings at least once - cleverly titled "Damn that Rachael Ray!" Tee-hee. Dinner doesn't have to be made in 30 minutes, it can be made in 15 with time leftover to make yourself a beautiful cocktail!


TOMATO AND GOAT CHEESE PASTA


1 lb Dried Pasta, shape of your choice
Container of Cherry Tomatoes
1 small block of Goat Cheese, crumbled
1 bunch of fresh Parsley, roughly chopped
2 tbsp Extra Virgin Olive Oil
salt and pepper, to taste


Cook pasta in boiling water. Once drained, add tomatoes, crumbled goat cheese, parsley, salt and pepper and olive oil and toss to combine. Serve!


The heat from the pasta will soften the tomatoes and melt the cheese. It's simply fabulous. If you don't care for goat cheese, make a substitute of either fresh mozzarella cheese or a crumbled feta.

Thursday, November 08, 2007

SPICY Noodles with Veggies (out in the open!)

Thanks to Nathan, I love Korean food and all things spicy! He's half Korean, and when we started dating he brought me to a Korean restaraunt, opening up a whole new world of sights and tastes.

I rarely dabble into Korean food at home because it is just not the same, unfortunately. However, I've been holding onto this recipe because I thought it might have some potential...and I was right! It was simple to make, the ingredients were easy to find (with an easy substitution if you don't want to go to an Asian food store) and the meal was really, really tasty. But, he forewarned - it was HOT! Grab a glass of milk, a side of kimchee, some chop sticks and enjoy Korea, without the plane ride and language barrier.

SPICY NOODLES WITH MUSHROOMS AND CABBAGE


1/3 cup water
1/3 cup soy sauce
3 tsp
gochujang* 1 tbsp brown sugar
1 lb dried spaghetti (or soba noodles, if you want to keep it truly authentic)
10 oz. of sliced mushrooms - I prefer shiitake for the visual
2 cups shredded cabbage
1 cup shredded carrot
1/2 cup sliced green onions
2 tbsp sesame seeds, toasted until browned

3 tbsp vegetable oil
2 tsp garlic, finely minced
1 inch of fresh ginger, finely minced

In a small bowl combine water, soy sauce, brown sugar and gochujang together until sugar dissolves and set aside. Prepare pasta as directed.

While pasta is cooking, heat oil in a large skillet until hot. Take off direct heat, and add ginger and garlic. (If you keep your ginger in the freezer, like me - be prepared for some "spitting" when the residual water hits the oil!) Return to the heat and immediately follow with the sliced mushrooms, and cook, stirring constantly, until the mushrooms take on a darker brown color, approximately 6 minutes. Add cabbage, carrot and green onion, and saute until veggies become crisp tender. Add sauce and mix thoroughly, until heated through.

Add your noodles to the vegetable mixture and toss to combine. Sprinkle with toasted sesame seeds for a garnish. Serve immediately.


*Gochujang, a Korean spicy bean paste, is readily available in most supermarkets in the international food aisle. If you can't find it there - check out your local Asian Food Market. It retails between $4.00 - $5.00. You can substitute 3/4 teaspoon Chinese chile paste and reduce the amount of soy sauce to 1/4 cup.

Tuesday, October 23, 2007

Beet Soup (don't be afraid!)

I just love Autumn! We've finally begun to snap out of the Indian Summer we are courting, and allowed the chill to enter the air - and finally I can start to plan menus that involve some heavier flavors and longer cooking times. Plus, having the leaves changing colors brings on some much needed inspiration into my everyday cooking.

At the market this weekend, I spotted some very nice looking beets - firm and dark red with robust looking leafy greens attached. I hurriedly plucked them from their spot on the shelf - not really thinking about what I would do with them. The last time fresh beets were in my kitchen, I transformed them into tasty little
ravioli. This time I desperately wanted to make a soup.

So, I did.

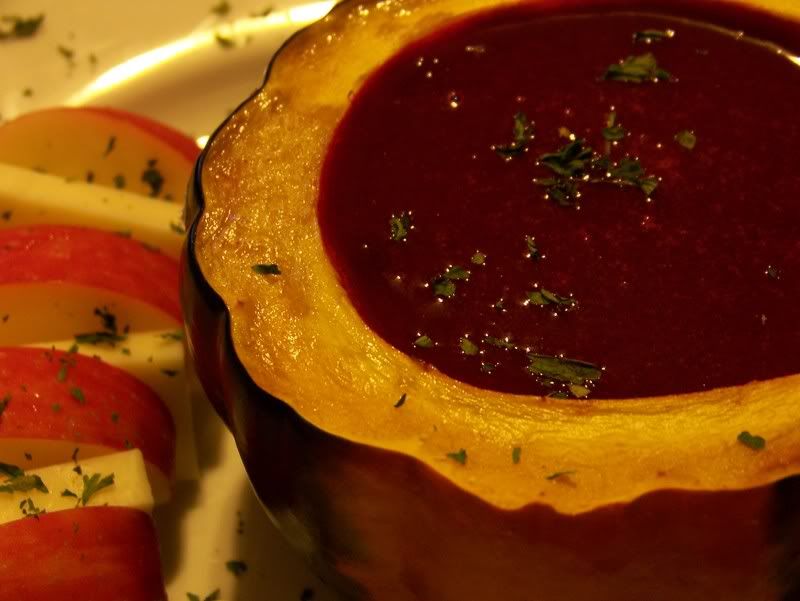
BEET SOUP (served in a roasted acorn squash "bowl")

5 medium beets, peeled* and diced
1 red-skinned tart apple, peeled and diced
1 smallish red onion, diced
2 cloves of garlic, finely minced
4 cups of chicken or vegetable stock (I used chicken stock, because I do not like the taste of veggie stock)
1 tbsp olive oil
2 tbsp apple cider vinegar
1 tbsp brown sugar
salt and pepper, to taste

If serving in an acorn squash bowl: Preheat oven to 375 degrees. Cut the top off the squash, and hollow out the insides. (if needed, take a little off the bottom, so that the bowl is stable) Place on a cookie sheet, brush a little olive oil into the cavities and season with salt. Roast for approximately 60 minutes, or until the flesh is tender. Remove from heat and let cool slightly.

Meanwhile, heat oil in a large pot and cook onion and garlic until the onion becomes translucent. Add apple and beets and cook for approximately 5 minutes, stirring often. Add stock and let simmer for about an hour, or until the beets are fork tender. Remove from heat and add vinegar and brown sugar.

Blend soup with either an immersion blender or a food processor. (I used an immersion blender first and then had to clean off the wall! A food processor is a little less messy believe it or not!) Add water to achieve the consistency you like. Season with salt and pepper and serve.


*Unless you want red hands, invest in some disposable latex or fitted plastic gloves...beets will stain just about anything they come in contact with including skin and cutting boards! You were warned!!! I will be rocking the purple handed look tomorrow at work.

I was blown away at first bite! The beet soup was sweet, yet had a hint of tartness from the vinegar - and the flavor of the overall dish was subtle and delicious. The color was so vibrant and beautiful that I almost didn't want to dip my spoon into it. Using the acorn squash (my favorite of all the squashes) was awesome, because it gave the meal a little more substance as well as a bit of whimsy. The flesh of the squash went so well with the soup itself. The next time I make this, I may add a dollop of sour cream or Greek yogurt to richen the soup up just a bit.
Stick your vegetables in something cheesy!

There has been a recent influx of cookbooks designed to take healthy vegetables and disguise them in everyday meals. Jessica Seinfeld, wife of comedian Jerry Seinfeld, recently wrote a cookbook entitled Deceptively Delicious. From the Publisher: Deceptively Delicious has all of Jessica's winning combinations, including cauliflower in mac and cheese and spinach in brownies.


Forgive me, but WHAT THE FUCK?! If someone tries to feed me a brownie with spinach in it, I will punch them in the face! I definitely do not agree with this method of cooking because I think it could cause more harm them good - if a child isn't given the opportunity to try new tastes, that kid is going to grow up into an insufferably picky adult!


(Have you ever been to a restaurant with a person who hates everything except chicken nuggets? It makes me want to scratch my eyes out, and I am not even an adventurous eater! "Can you omit the onions?" WHOA lady!!!! No! Just stop already!)


I cook and bake regularly with my niece Kelsey and nephew Shakeer - avid readers will remember our forray into Christmas cookies. I found that if they participate in the food prep, they are more likely to eat something new...plus, they love to help out in the kitchen. Banning children from the kitchen can make things easier, but you are seriously missing out on a great experience, as well as the opportunity to teach them about good nutrition.


That being said - I totally found a recipe that hid a great deal of perfectly tasty vegetables under a melting mound of delicious cheese! I'm such a hypocrite!


SWEET PEA AND ARTICHOKE LASAGNA


12 no-boil lasagna noodles
2 (15 oz.) containers of ricotta cheese
1 1/2 cups whipping cream
1 (1 lb) bag of frozen peas, thawed
1/4 cup fresh basil
3/4 cup grated parmesan cheese
4 cups mozzarella cheese
2 eggs
2 jars of marinated artichokes, drained
salt and pepper


Preheat oven to 350 degrees.


Brush a 13x9x2 baking dish with oil, and set aside. In a small bowl, combine drained artichokes, 1/2 cup of cream and basil. Set aside. In a large blender or food processor, combine peas, ricotta, parmesan cheese, 1 cup of whipping cream, salt and pepper and 2 eggs. (I had to do this in 2 batches.)


Pour 1 cup of ricotta mixture in the bottom of the baking dish. Layer 4 lasanga noodles, then 1/2 of artichoke mixutre, then 1/3 of the ricotta mixture. Sprinkle 1 cup of mozzarella cheese. Repeat process with second layer.


For the last layer - 4 additional noodles, rest of ricotta mixture and 2 cups of mozzarella cheese. Cover with foil and bake for 30 minutes. Remove foil and bake for another 25 minutes or until cheese has browned slightly, and is bubbly around the edges. Remove from oven and let stand 15 minutes before serving.


Yes, it's a little time consuming - but the reward is this sweet and creamy, yet tangy combination of flavors. I never even missed the tomato sauce! The bottom layer of noodles almost becomes this crust of sorts - anchoring the whole dish. Plus, just look at the color of the layers...it's quite eye catching, and everyone knows, you eat with your eyes first.

I ate the leftovers for 3 days!

Sunday, September 16, 2007

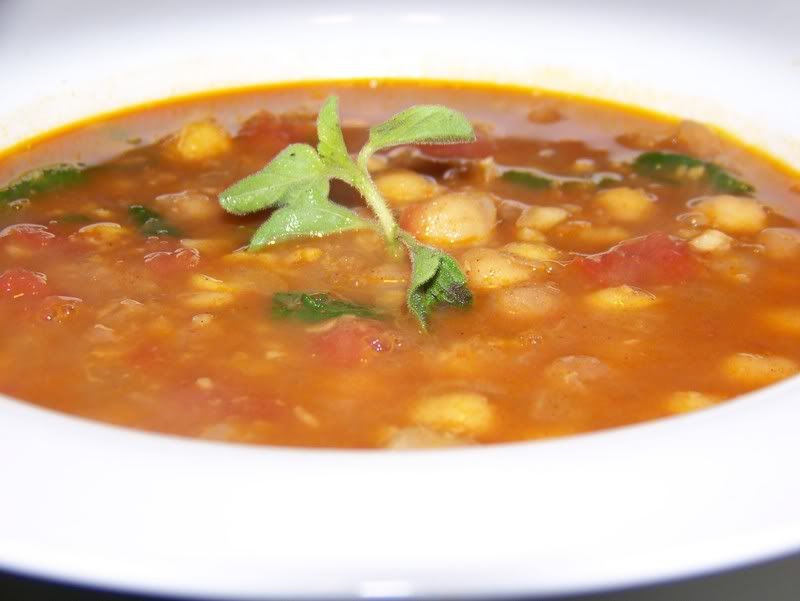
Moroccan Spiced Chickpea Soup

I adore chickpeas. I love them roasted and covered with garlic powder, or on salads, or mashed up in hummus. My most favorite Indian dishes either include or feature chickpeas in them. When I saw the recipe for this soup, I knew I had to try it. Not only was this meal hearty - but it is also pretty cheap to make, and the leftovers were fantastic.

MOROCCAN SPICED CHICKPEA SOUP


3 tbsp olive oil
1 onion, diced
4 garlic cloves, finely chopped
1 tsp cinnamon
1 tsp cumin
1/4 tsp cayenne pepper
1 tsp paprika
1 can of diced tomatoes
3 (15 oz) cans of chickpeas, rinsed and drained
1 quart chicken or vegetable stock
salt and pepper
2 good handfuls of pre-washed baby spinach

Heat the olive oil in a large skillet over medium high heat. Add onions and garlic and cook until onions become translucent. Add cinnamon, cumin, paprika and cayenne pepper and cook for approximately 2 minutes to develop the flavors. Add the tomatoes, chickpeas and stock and bring to a simmer, stirring occasionally. Continue cooking on medium-low for approximately 45 minutes or until the chickpeas become tender.

Take soup off heat, and use a potato masher to mash up some of the chickpeas right in the pot. (This is an optional step...but it does change up the texture and makes the soup thicker.) Stir in the spinach until it wilts, then season with salt and pepper and serve!


If you don't like the heat, omit the cayenne - because even though you are using just a tad of the spice, it still will hit the back of your throat when you least expect it!

Monday, September 10, 2007

Cal-zone-ezzzzz

Every now and then calzones will pop up on my menu planning - yet in all this time, I have never posted a recipe or a picture. I love calzones, because you can change them up so easily by adding a variety of different ingredients. Personally, I like mine to be stuffed with cheese, spinach and broccoli. Nathan likes meat. You can also use what you have and clean out the fridge making it "garbage bread."

To me, it's all about the layering of ingredients. Pick up a round of your favorite raw pizza dough from your supermarket, and divide into 4 equal servings. Gently pull on the dough, creating a round even circle. Lay on a slightly floured surface, and begin to introduce the "stuffing:" I use provolone cheese slices as my first layer. The cheese keeps the dough from shrinking, providing a nice base for the rest of my ingredients. Then, I pile on ham, dollops of ricotta cheese, raw broccoli florets, a touch of minced garlic, and finally a handful of shredded mozzarella cheese. For flavor add about a tsp of your favorite dried herb - I used thyme and a sprinkle of salt. Pull the dough up and around your mound of fillings, and secure by folding it under, creating a pouch. Crimp the edges. Brush some melted butter over the top, and season with salt, pepper and dried parsley. Poke a couple of holes in the top so that steam can escape.

Rectangle calzone, unbaked.

Bake in a 450 degree oven for 10-15 minutes or until calzone is golden brown. Let cool 5 minutes. Serve with your favorite tomato sauce.

Baked...and ready to eat! YUM!

Tonight I made a family'zone, then served slices alongside a spinach salad. Huge success. Even the kids eat it, because it's like a stuffed pizza. Just look at all the gooey good stuff leaking out.

Friday, September 07, 2007

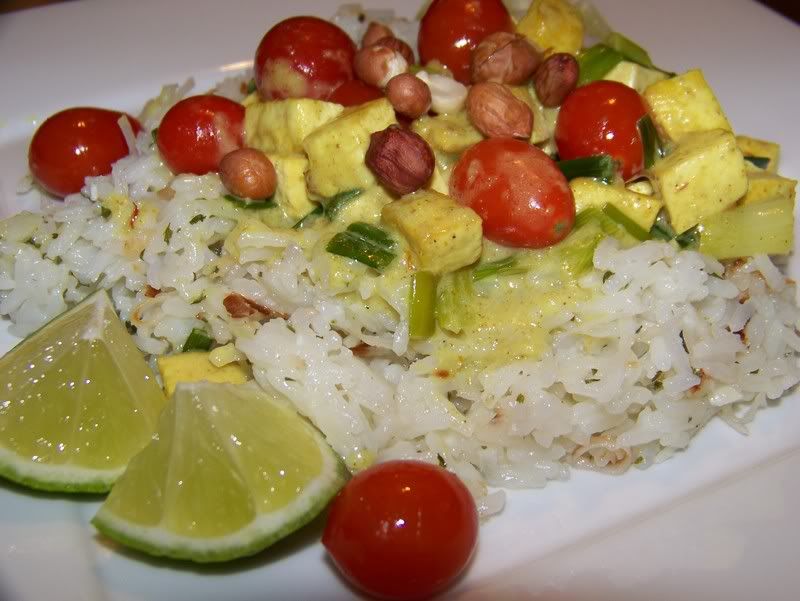
Coconut Curried Tofu with Green Jasmine Rice

When I type "tofu" most people say "ewwwww!" Truth of the matter is, tofu takes on the flavors that you are cooking with, and is a great alternative, or substitution to meat in some dishes. It's not just for vegetarians, I swear! I tend to use the extra-firm variety because it has the texture that I prefer.

This particular recipe has a lot of big flavors that blend perfectly. Garlic, lime, ginger, cilantro, curry and cumin. YUM!!! You'll smell for days, but it is so worth it!

COCONUT CURRIED TOFU with GREEN JASMINE RICE


1/4 cup unsweetened shredded coconut

2 cups water
1 tsp salt
1 cup jasmine or basmati rice

1 big handful of coarsely chopped fresh cilantro (if you do not like cilantro, you can use parsley)
3/4 cup unsweetened light coconut milk
4 tsp minced fresh ginger
1 tbsp fresh lime juice
2 large garlic cloves, minced

2 tbsp vegetable oil
16 oz. extra firm tofu, drained, patted dry and cut into 1/2 inch cubes
1/2 cup thinly sliced green onion
2 tsp curry powder
1 tsp ground cumin
1/8 tsp dried crushed red pepper flake
1 cup whole small cherry (or grape) tomatoes

2 tbsp coarsely chopped peanuts

Brown shredded coconut in a small saucepan over medium heat, stirring constantly. Set aside.

Bring water and salt to a boil in a heavy saucepan. Stir in rice; return to a boil. Reduce heat to low, cover and simmer until water is absorbed and rice is tender - between 18 to 20 minutes.

Meanwhile, puree cilantro (parsley), 1/2 cup coconut milk, 1 tsp ginger, lime juice and half of the garlic in a blender until smooth. Set aside.

Heat oil in a large non-stick skillet over high heat. Add tofu and stir fry until golden. Add onions, curry, cumin, red pepper flakes, remaining ginger and remaining garlic. Stir fry for 1 minute. Stir in remaining coconut milk, and season with salt and pepper. Right before service, add tomatoes. The residual heat will soften the skins without turning the tomatoes to complete mush.

When rice is finished cooking, stir in shredded coconut and cilantro puree until combined. For service, spoon rice onto plate. Top with tofu mixture and sprinkle with peanuts. Garnish with a little lime, and right before digging in - squeeze that lime over the dish. It adds a wonderful brightness to the whole meal.


I liked this meal the further I got into eating it, which is just strange. The tofu resembled chicken in taste and texture, and the warmed tomatoes exploded when you bit into them. Each bite had a different flavor - which was so cool. The leftovers were even good!

Of course, my major flaw (which you can see from the picture) is that my rice is not green. The cilantro looked disgusting at the store, and the parsley looked even worse so I used dried parsley instead. It worked, but didn't give that green verdant color that I really wanted. Although, green rice would probably turn a lot of people off!