Tuesday, November 14, 2006

Coq au Vin

I picked up a new cookbook the other night while at the bookstore. Martha Stewart's Favorite Comfort Food - the best of Martha Stewart Living. I poured over it last night, and I must say...I am very excited to start cooking out of it! So excited, in fact, that I started tonight!

Coq au Vin is a traditional French stew, and something that I have been timid in trying. But, this recipe is moderately easy, with traditional ingredients and a big payoff.

Coq au Vin (recipe courtesy of Martha Stewart)

6 large garlic cloves, smashed
4 whole peppercorns
2 sprigs fresh thyme, plus more for garnish
1 dried bay leaf
7 sprigs fresh flat-leaf parsley
3 tbsp olive oil
8 oz pearl onions, peeled*
12 oz white button mushrooms, halved or quartered - if large
2 whole skinless and boneless chicken breasts**
1 tbsp butter
3 tbsp cognac
1 cup dry red wine
3 1/4 cups chicken stock
1 tbsp tomato paste
1 tbsp cornstarch
salt and pepper, to taste

Using a small piece of cheesecloth, make a bouquet garni. (see picture to the left) Wrap 3 garlic cloves, peppercorns, thyme, bay leaf and parsley stems; tie in a bundle with kitchen twine. Set aside.

In a large deep skillet, or Dutch Oven, heat 1 tbsp of oil. Add onions and remaining 3 garlic cloves. Cook, stirring occasionally, until they begin to brown. Add the mushrooms and cook until golden, approximately 4 minutes. Transfer to a bowl.

Cut the chicken into strips about 2 inches long and 3/4 inch wide. Add the butter and remaining 1 tbsp oil to the skillet. Season chicken with salt and pepper. Cook until browned. Add the cognac and wine. Use a wooden spoon to scrape up any brown bits from the bottom of the skillet. Add chicken stock, and stir in tomato paste. Add bouquet garni. Bring to a boil; reduce heat to a simmer and cook, covered for approximately 15 minutes. Add the reserved mushrooms, onion and garlic. Cook 5 minutes more.

Using a slotted spoon, transfer the chicken and vegetables to a bowl. Discard bouquet garni. Over high heat, reduce broth by half. In a small bowl, dissolve cornstarch in 1 tbsp of water. Stir back into broth, and mix until incorporated. Cook 2 minutes. Return chicken mixture to pot. Garnish with thyme, and serve.


*Do yourself a huge favor and purchase those little frozen pearl onions! I swear, it sucks to peel all those little sons-of-bitches yourself.

**I used 1 boneless, skinless chicken breast, and 2 boneless, skinless chicken thighs. The dark meat added more depth to the dish. (And even though I do not like dark meat chicken - I really enjoyed the mixture in this recipe.)

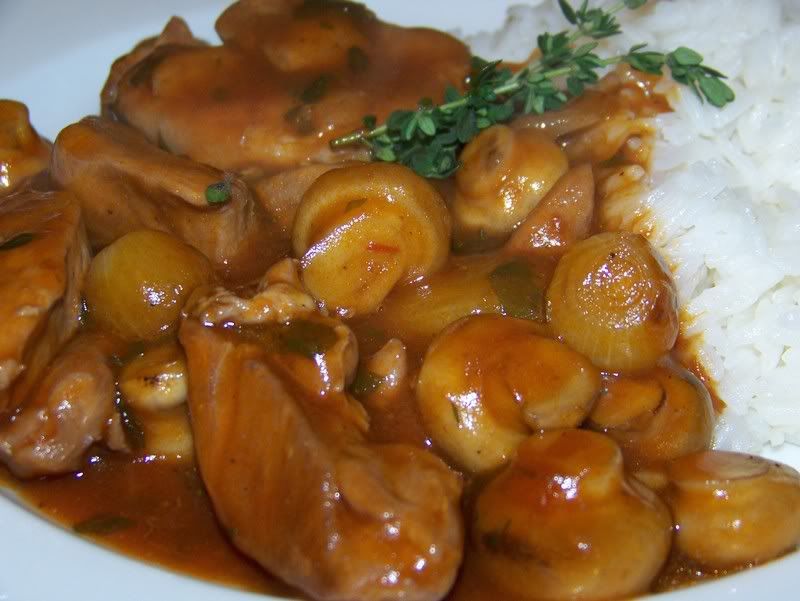
One word...YUM. The mushrooms were my favorite by far - they just sucked up all those juices and were so packed with flavor.
Monday, November 13, 2006

Gluttony in NYC

Nathan and I drove down (again) to NYC this past weekend - which is why I have failed to update my blog for the past couple of days.

It's a good thing we did a lot of walking, because we certainly did a lot of eating!

We arrived in the city after a stressful drive (closed down roads, lots of traffic, and Nathan failed to do his part in finding us a hotel to squat at). We found parking in Chinatown, which is where we started our gluttonous journey.

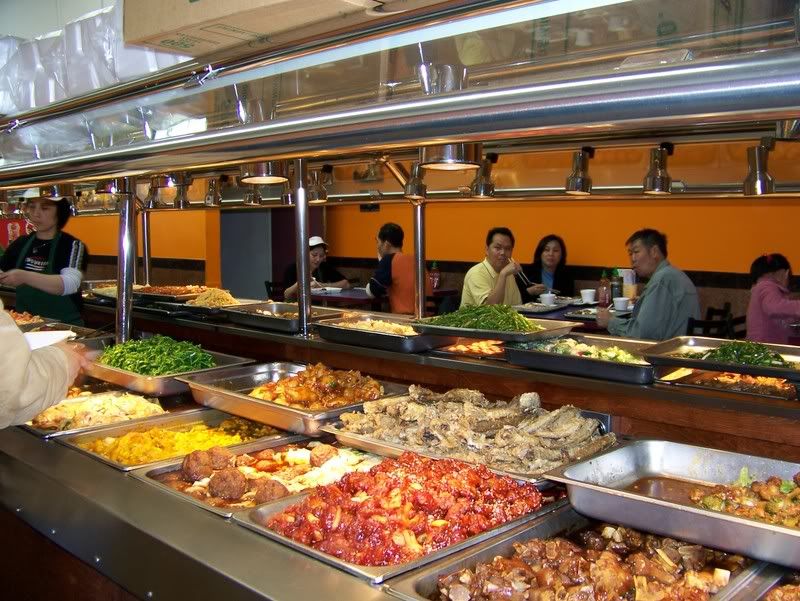
We chose a buffet to eat lunch at. (Not my first choice, but Nathan has a soft spot in his heart for buffets.) REAL chinese food is so much different than take-out chinese from upstate. The buffet itself was amazing, and very intimidating - especially for someone who does not like seafood all that much.

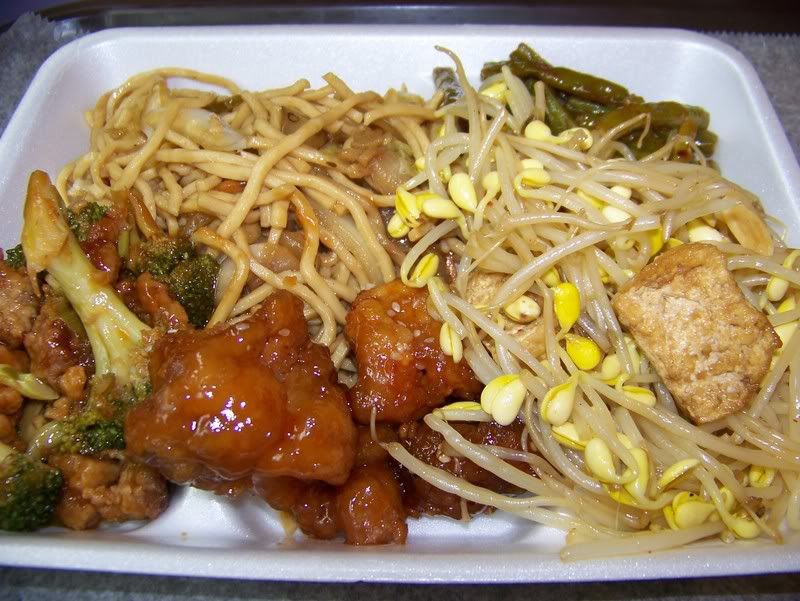
However, I was able to make myself a pretty awesome plate of food - - all for only $4.00! Sprouts with tofu, sesame chicken, garlic green beans, lo mein and chicken and broccoli. Nathan was a little more adventurous in his choices.


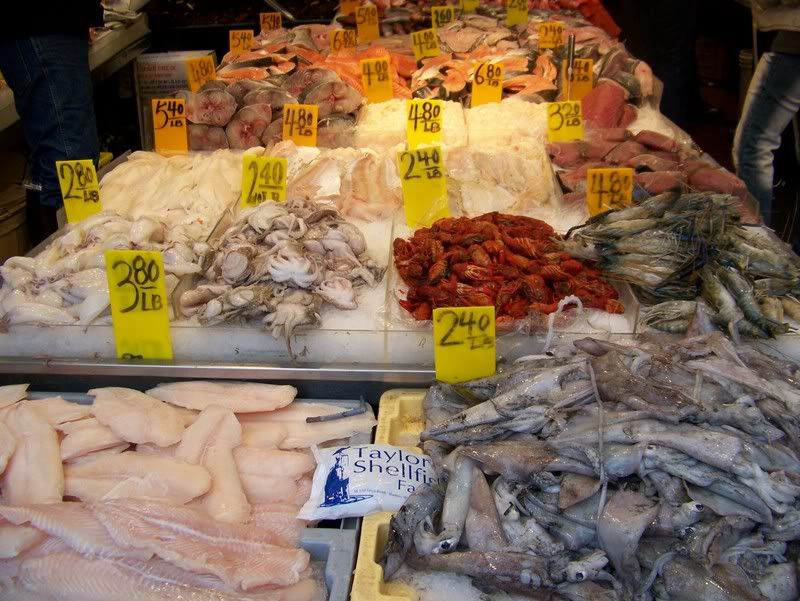
Chinatown is filled with street vendors with lots of interesting food items to look at. Some of the smells might knock you on your ass though!


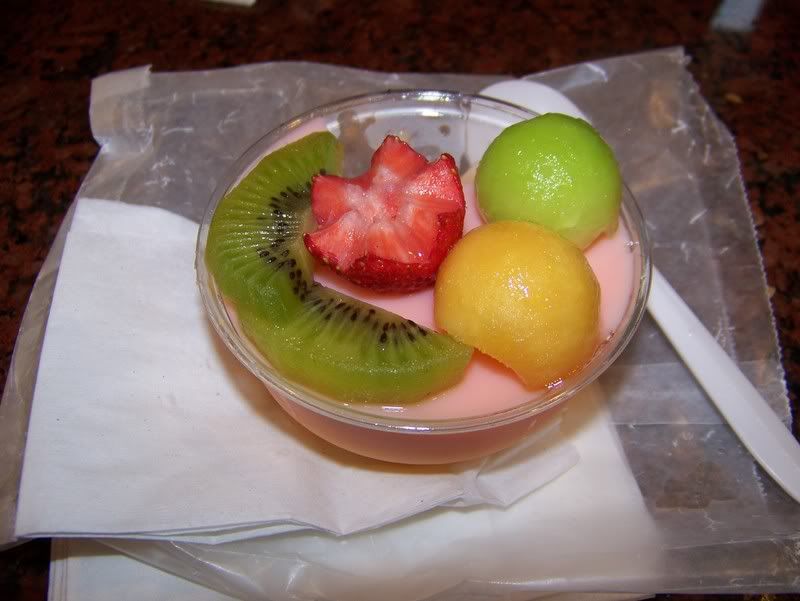
Then, of course, there are pastry shops. Tons and tons of pastries! I passed on most of them (Nathan did not however - he ate more cake in two days than I have ever seen him eat before), but couldn't pass up with little gem of jello'ish stuff. The texture threw me a little, but the flavor far made up for it.

On Sunday, we ate lunch in Chinatown again - this time at a Vietnamese place, which was devine. I ordered vegetable Summer rolls that came with the most delightful dipping sauce. The sauce was sweet, yet salty - and had a really thick consistancy. I know there were sesame seeds in it, but I am not sure what else. You know I will be googling sauces soon though!

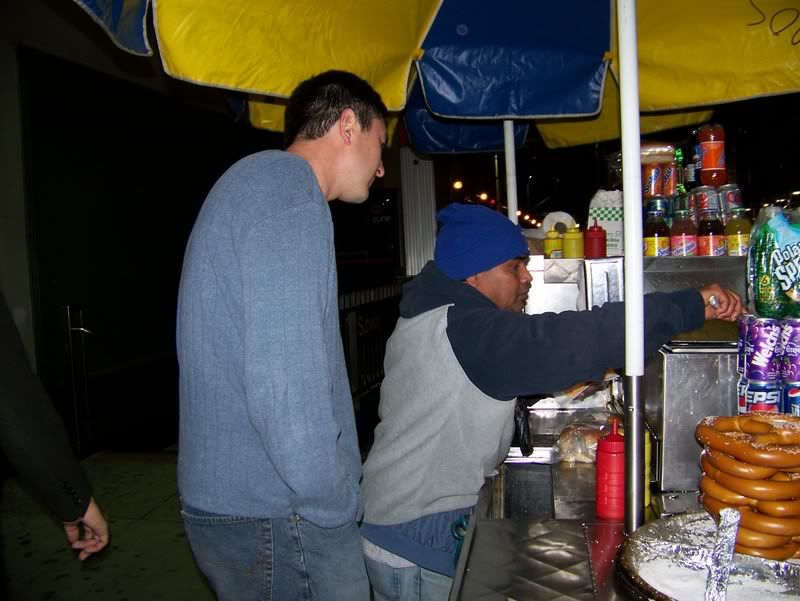
For dinner we ate at Macy's. Hey, it was raining (pouring actually) and convenient. They have a "2 four" menu. After 3 full courses, Nathan decided he needed a bit more...


But, really...how can you pass up a genuine NYC hotdog?

Thursday, November 09, 2006

Quiche is girlie food

I've caught Nathan eyeing my menu all week, and now I know why. Last night, he called me just as I was about to leave from work - - and offered to take me out for chinese. Later, he admitted that quiche is girlie food, and he can't eat girlie food! This is not the first time that he has revolted against me serving quiche, but this time I thought I could slip it under the radar. I was wrong.

The chinese did hit the spot though. :)

******

I thought now would be a perfect time to talk about our kitchen remodel!

About 5 years ago now (oh god!) Nathan bought a house that was damaged by a fire. He got it for pennies...but the bones of the house were still in good shape, and it had soooooo much potential. Since then, we have been gutting and building and slaving away trying to remodel the whole thing. The exciting thing is, even though we are no where close to being able to move in (still), when we do - - I will have a brand spanking new kitchen!

The refridgerator was bought last year. We came across a beautiful Kitchenaide, stainless steel side-by-side with water and ice makers almost 1/2 off, because it was a floor model. Nate snatched it up, and it has been sitting in storage since then. Just two weeks ago, we took the plunge and grabbed up the stove we've been "courting" for the past year. It's so pretty! I can't wait to cook on it!!!! It's a 40 inch dual fuel stainless steel Kenmore Elite. That too will be left in storage until it is ready to install. And, now...

...Nathan bought the hood vent as well. Again, he came across a great deal at a Bargain Outlet - the thing was more than 1/2 off, and so sleek.

He was like a kid in a candy store when he brought it home!


It's terrible to know that all of this equipment is so close, yet so far away! I want to cook and make amazing things in it NOW!

Wednesday, November 08, 2006

I want my baby back, baby back, baby back!

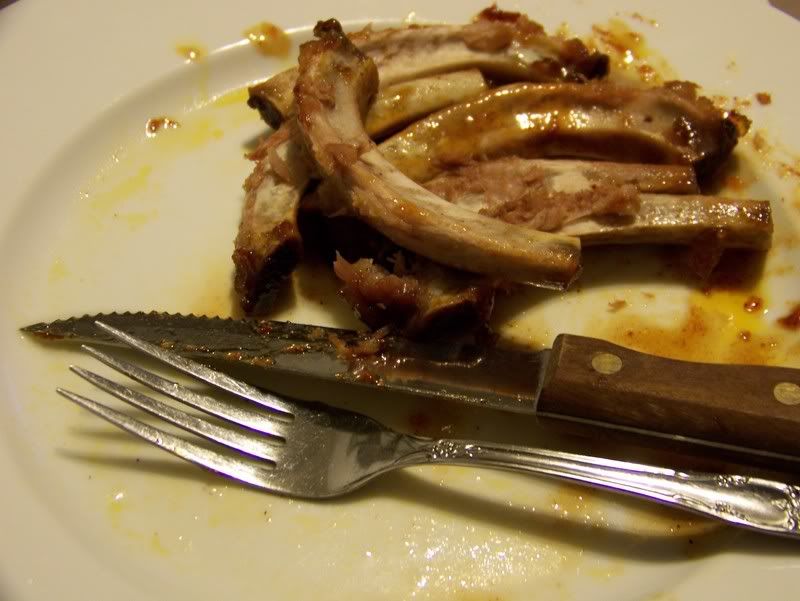
We celebrated election day with some baby back ribs.

Ribs take so long (slow and low) that I planned ahead a little, and did them in two stages. I guess you could use a crockpot, but everything I make in the crockpot tastes like dog food/Dinty Moore Beef Stew, so I didn't really want to go that route.

There's no real "recipe" in this post - it's more of a technique.

After dinner yesterday, I prepared a 9x13 pyrex pan with foil (for easy clean-up). I cut the rack of ribs in half and set them aside while I prepared the magical spice rub. You can make your own spice rub with whatever spices you enjoy...this is what we like:

SPICE RUB - mix all ingredients together

1 cup brown sugar
1 tbsp chili powder
1 tbsp paprika
1 tsp garlic powder
1 tbsp salt
1 tsp black pepper

You just rub the spice rub all over the ribs - on both sides - add about 1/4 cup of water to the pan, cover with foil and bake in a 225 degree oven for about 3 -4 hours. (Depending on how meaty the ribs are.) Right before I fell asleep, I transfered the whole pan (cooled) to the fridge for an overnight chill.

Last night, I returned the pan to the low oven for another hour. After that hour, I cranked the heat up to 425 degrees, and uncovered the meat. Baste the meat with your favorite BBQ sauce (I like the kind with honey in it!) and let cook for 15 minutes. Baste again, and cook again for another 15 minutes. Serve.

The ribs come out so finger lickin' good, and literally fell right off the bone.


I know it's not too lady-like for a girl to clean her plate - but that is just what happened. Tee-hee!

Tuesday, November 07, 2006

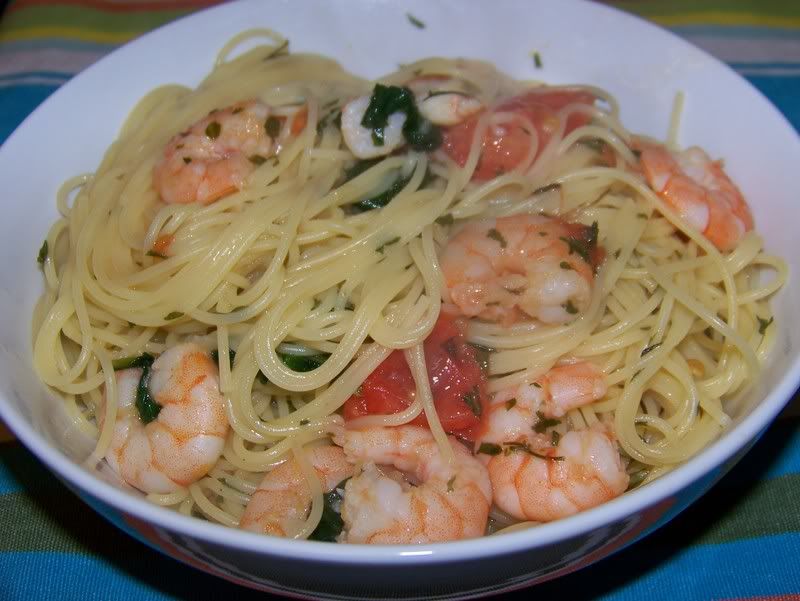
Shrimp "Scampasta"

Sometimes the easiest and quickest dishes, can be the tastiest. Here's my take on traditional Shrimp Scampi.

Kat's SHRIMP SCAMP'ASTA

1 package of small raw shrimp, peeled and deveined
2 cups fresh baby spinach
1 garlic clove, minced
1 shallot, minced
zest of one lemon
juice of one lemon
3 tbsp butter
2 tbsp olive oil
dash of cayanne pepper
salt and pepper, to taste
1 tbsp dried parsley
1/3 lb dried angel hair pasta
3/4 cup of white wine*
2 tomatoes, cubed (or one whole package of grape tomatoes, left whole)
Reserve 1 cup of cooking liquid

Cook pasta according to package directions.

In a large skillet, melt butter and oil together. Add shallots and garlic and saute until tender. Take off heat, and add white wine. Return to heat, and cook until wine has concentrated down by about half. Add spinach, shrimp, and zest. Cook until spinach is wilted, and shrimp is bright pink. Be careful not to overcook the shrimp, or it will be rubbery!

Season with salt, pepper, parsley and cayanne pepper. Add tomatoes. Add cooked pasta to pan, and toss with shrimp mixture. If needed, add some of the cooking liquid to thin out the sauce, as well as the juice of one lemon. Serve immediately!


This whole dish took only 15 minutes - tops...just enough time to boil the water and cook the pasta. The flavors are very subtle - just a hit of garlic and lemon and the tangy refreshness of the alcohol.

The ingredients are so simple, that it is important to not overcook them. Let the heat of the pasta soften and sweeten the tomatoes!

*The only substitution I made to my original recipe was to change out the white wine with a little dry vermouth. I've found that dry vermouth has just enough flavor to add to the dish without being overwhelming. (Plus, we drank all the wine!)

Monday, November 06, 2006

Want some cake?

From time to time I like to go all out for Sunday dinner. To me, Sunday dinner was the one night of the week where the whole family comes together to eat, talk and laugh. Memories were made on Sundays!

And, what goes with Sunday Dinner better than...DESSERT?!

Nothing!

Special thank you to my Aunt Jane who gifted me Martha Stewart's Baking Handbook for Christmas last year. It is full of amazing recipes, and I totally recommend it to any beginner, intermediate or advanced baker. Every recipe I have tried, has been a raving success on every level.

BANANA-CARAMEL CAKE

1 1/2 sticks, plus 3 tbsp butter, at room temperature
2 3/4 cups flour
1 1/2 tsp baking powder
1 tsp baking soda
1/2 tsp salt
3 very ripe bananas, mashed, plus 3 ripe bananas sliced lengthwise for filling
1/2 cup sour cream
1 tsp vanilla extract
1 2/3 cups plus 1/4 cup sugar
2 large eggs
Mascarpone Frosting (recipe follows)
Caramel Sauce (recipe follows)

Preheat oven to 350 degrees. Butter two 9 inch round baking pans, then dust with flour. Set aside. Into a medium bowl, sift together flour, baking powder, baking soda and salt. In a small bowl, stir together mashed bananas, sour cream and vanilla. Set aside.

In the bowl of an electric mixer fitted with a paddle attachment, beat 1 1/2 sticks of butter and 1 2/3 cups sugar on medium-high speed until light and fluffy, app. 3-4 minutes, scraping down the sides of the bowl often. Add the eggs, one at a time, beating well after each addition. With the mixer on low speed, add the flour mixture in 2 parts, beating until combined after each, about 2-3 minutes. Using a rubber spatula, fold in the banana mixture, being careful not to overmix.

Divide the batter equally between the two prepared pans. Bake for 30-35 minutes. Cool on wire rack (in pans still) for about 20 minutes, or until the pans are cool to the touch. Invert pans onto racks and let cake cool completely outside of the pans.

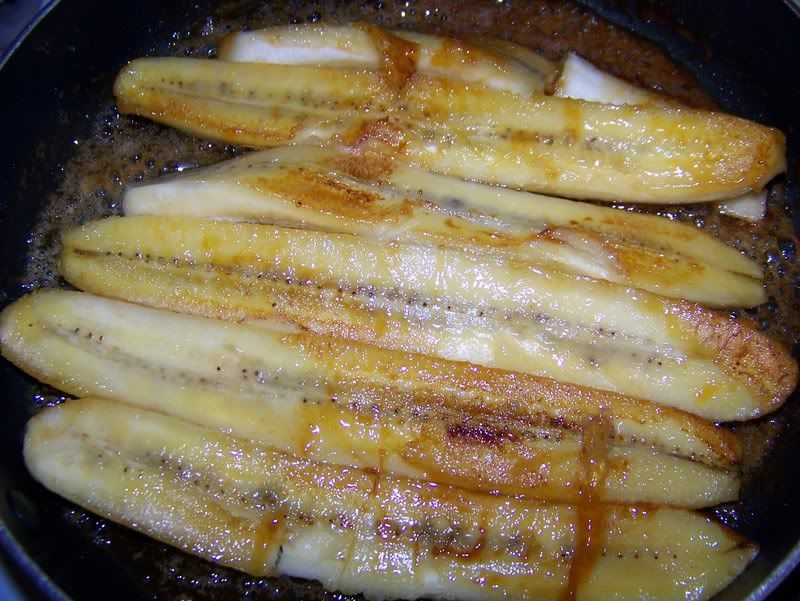
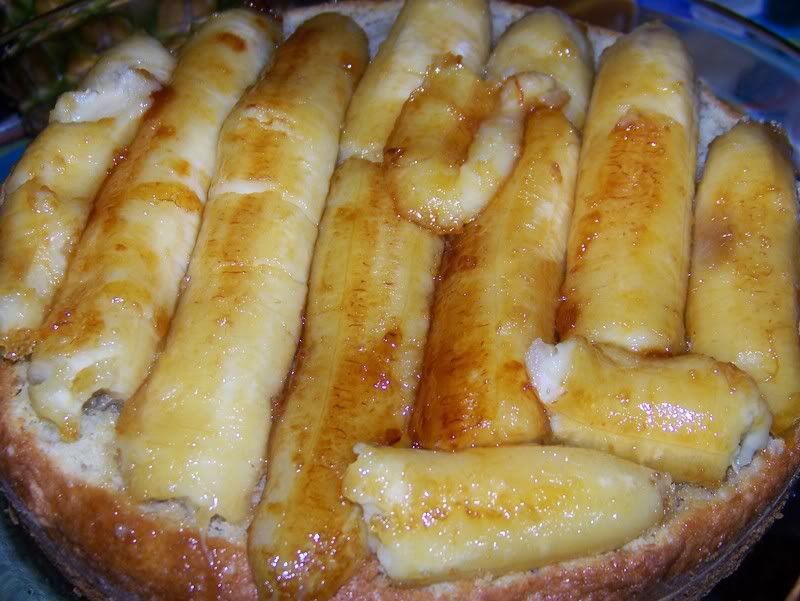
Meanwhile, sprinkle remaining 1/4 cup of sugar into a large skillet. Cook over high heat, shaking the pan occasionally, until sugar is caramelized. Remove from heat. Stir in remaining 3 tbsp butter until melted. Return pan to heat. Add the sliced bananas, cooking until they start to brown. Gently turn bananas so that both sides are browned.

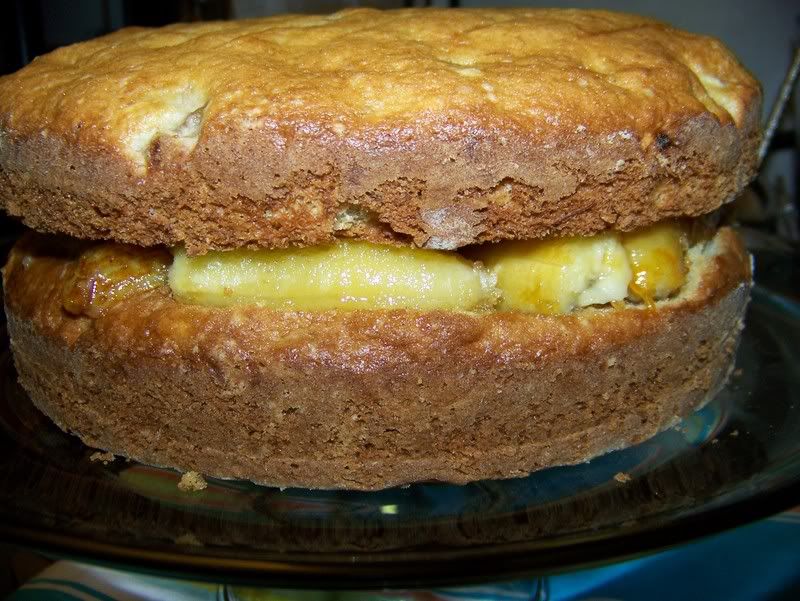
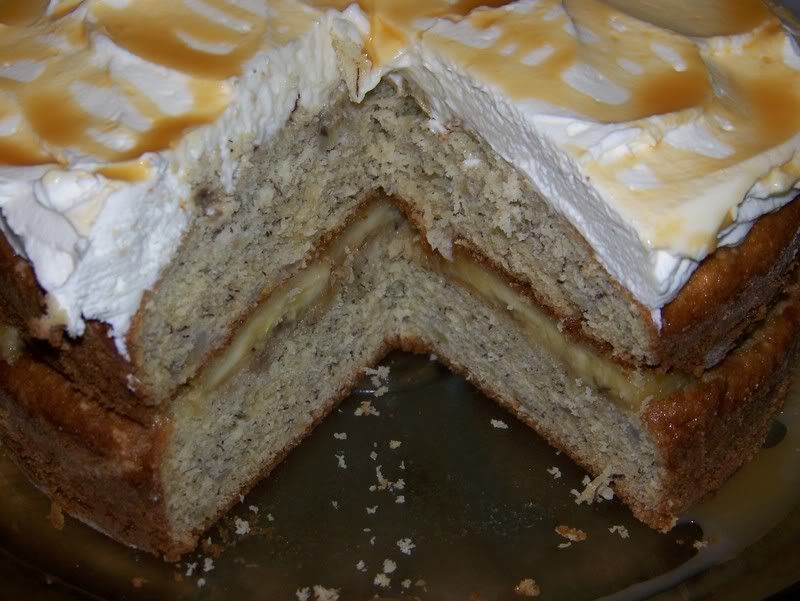
Place one cake layer on a cake plate. Arrage caramelized banana slices on top. Place remaining layer on top. Using a large spatula, spread Mascarpone Frosting over entire cake, swirling to completely cover. Drizzle Caramel Sauce over the top of the cake. Serve immediately, or refridgerate, covered for up to 3 days.


MASCARPONE FROSTING

1 lb mascarpone cheese
1 1/4 cups heavy cream
1/2 cup confectioner's sugar

In the bowl of an electric mixer fitted with a paddle attachment, beat the mascarpone cheese, cream and confectioner's sugar until medium soft peaks form, app. 1-2 minutes. Use immediately.

CARAMEL SAUCE

1/2 cup sugar
1/2 cup heavy cream

Prepare an ice bath, set aside. Cook sugar in a medium saucepan over medium-low heat, until it starts to melt around the edges. Shake pan to melt remaining sugar. Continue to cook app. 3 more minutes until sugar turns to an amber color. Remove from heat. Stirring constantly, add cream in a slow, steady stream. Place caramel in a bowl in the ice bath, and let stand until cool, stirring frequently.


If you like banana bread, you will flip for this cake. And, even though there seem to be a ton of directions - the recipe is very easy and straight forward. One tip...just make sure you purchase 16 oz. of mascarpone cheese, and not 8 oz. like I did. It would've been nice to be able to frost the entire cake, and not just the top!

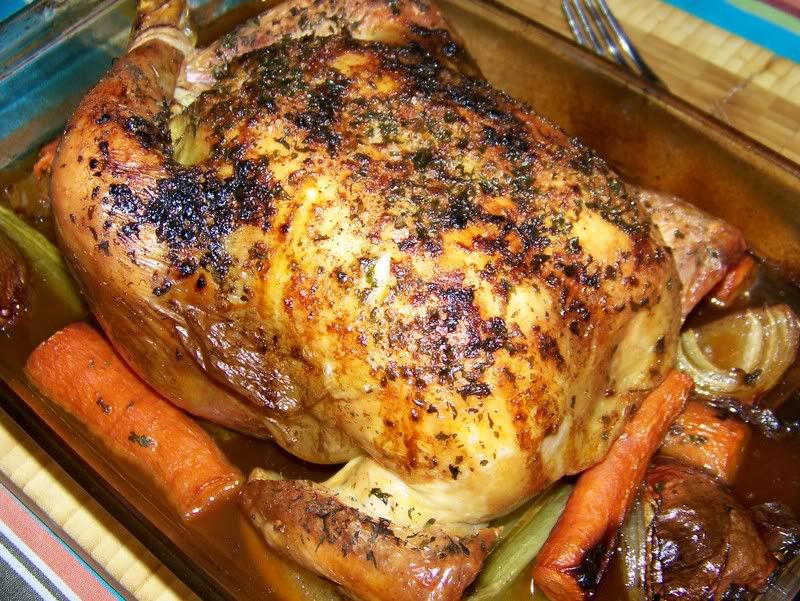
Roast Chicken

Let's be honest. Most people know how to roast a chicken.

And, truth be told, I was a "Roasting Virgin" until only last year when I bit the bullet and bought a really fancy iodized roasting pan. That roasting pan is a pain in the ass to clean - hence, it sits unused under the bakers rack, literally collecting dust. I turned the brain on, and realized that I can make my own "rack," so to speak, with my old standby - a 9x13 inch pyrex and some cut up vegetables.

So, that's my method. A little onion, celery and carrots will keep your chicken up off the hot bottom, and allow the heat to completely surround the bird. (I also add some water to the pan, so that the drippings down burn the bottom of my pan.)

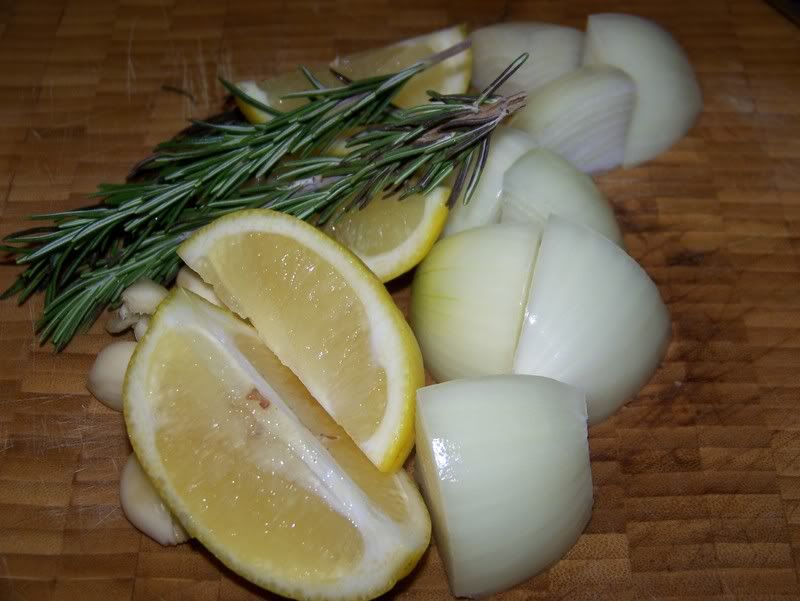
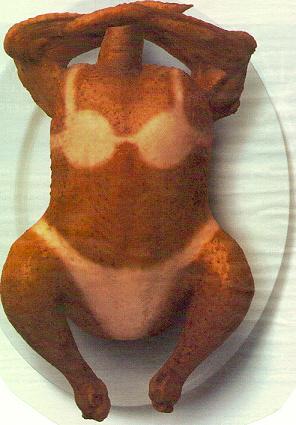
I clean my chicken, then stuff the cavity with aromatics - lemon slices (I squeeze a little in there too), garlic, onion and some fresh rosemary. I then "truss" the legs (tie them up) and pat the chicken skin dry with a paper towel. After the skin is dry, I create a little pocket under each breast, and insert a pat of butter. (It's a boob job for the chicken!) The butter keeps the chicken breast really moist, and sinfully delicious.

I also rub some butter on the outside skin of the chicken, then sprinkle on a little salt, pepper, garlic powder and dried parsley.

Bake in a 500 degree oven, until the skin is tanned and crispy. Then, I cover with foil and allow to bake until the internal temperature of the drumstick joint reaches a safe 170 degrees. The whole baking process takes approximately 2 hours, depending on the size of your chicken.

The finished product:


Yum! Yum! Yum!

Saturday, November 04, 2006

Weekly menu

I've been resting on my laurals the past couple of days due to a tree issue we are having. So - for the past two days it's been the buffet and pizza. *barf*

I can't wait to start cooking again - and with that desire, I've planned a pretty agressive menu for this week. No 30 minute meals here! (Well, a couple...)

Sunday - roasted whole chicken, with homemade cranberry sauce and individual spinch gratins
Monday - Shrimp with angel hair pasta
Tuesday - Baby back ribs
Wednesday - Spinach quiche with pomegranate, walnut and goat cheese salad
Thursday - Swiss steak and smashed potatoes
Friday - Pizza
Saturday - (hopefully out! But if not...) Kung Pao chicken with rice

Thursday, November 02, 2006

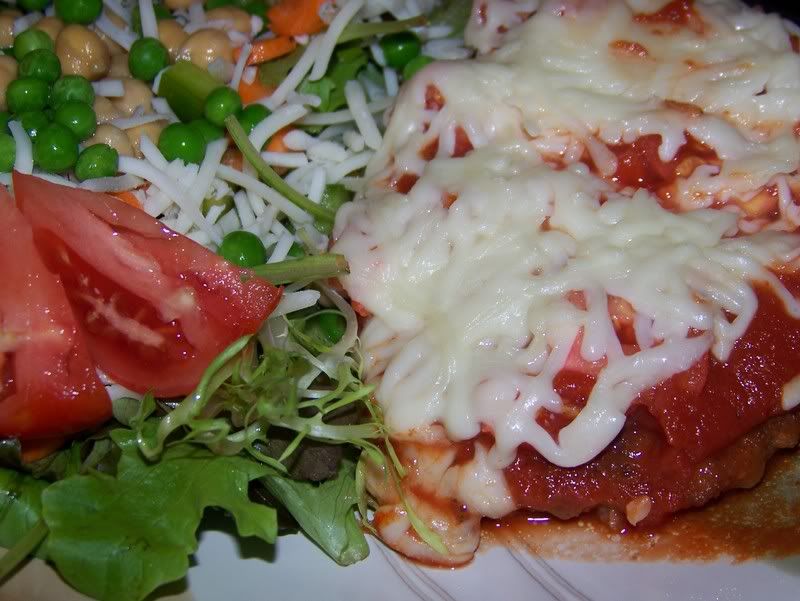
Chicken Parm

Who doesn't like Chicken Parmesan? I'm serious, stand up and be counted - - I want to know who you are! It was quite literally the first dish I ever made by myself, when I moved out on my own.

Chicken Parm is a favorite in our house. No only is it a show-stopper, it's also really easy to prepare and tastily traditional. I'm sure every single person out there has a recipe that works for them, but I will post mine just the same. Of course, there will be no measurements included, since I just wing it. (tee-hee, wing it!)

ITALIAN CHICKEN PARMESAN

boneless, skinless chicken breasts
italian style bread crumbs
grated parmesan cheese
garlic powder
salt and pepper
dried parsley flakes
tomato sauce, your favorite kind
1-2 whole fresh tomatoes, cubed up - if desired
mozzarella cheese
2 tbsp vegetable oil
2 eggs, beaten

Preheat oven to 375 degrees.

Mix together bread crumbs, parmesan cheese, salt and pepper, garlic powder and parsley.

On a plastic cutting board (be food safe!), "butterfly" chicken breasts. You can also pound them flat, but butterflying them is a lot faster and easier. Basically, you want to open the breast up, to ensure even and fast cooking and pretty presentation.

Heat oil in a large skillet on the stovetop. Beat 2 whole eggs. Dip each breast into egg, then cover with bread crumb mixture. Once oil is hot, carefully place each breast into pan, and cook until nicely browned on each side, flipping only once. Once browned, remove from pan, and place in a 9x13 inch pan. Cover each breast with your favorite tomato sauce. Place cubed fresh tomato on top of each covered breast, if desired - then top liberally with mozzarella cheese.

Bake in oven for 10 - 12 minutes, or until cheese is melted. Serve over pasta, or with a nice salad.

Note: You can also forgo all pan frying, and bake the chicken in the oven. The crust does not come out as crispy - but it is a much healthier option. Just place raw coated chicken in a baking dish, and bake for 20 minutes at 375 degrees. After 20 minutes, take out and cover with sauce and cheese, then return to oven for another 10 minutes, or until chicken is completely cooked through.

Wednesday, November 01, 2006

Soup and SandWITCHES - Happy Halloween!

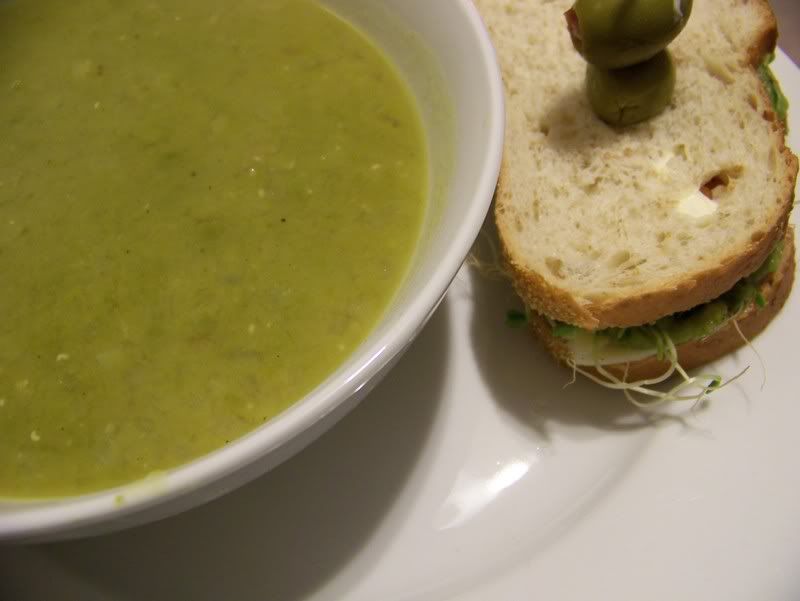
Even though I do not have children of my own, I still like to cook something special for different holidays. So, to celebrate Halloween, I present my very own "Split Pea Soup" aka "Goulish Vomit!"

Nathan - You know who's split pea soup I like?
Me - Who's?
Nathan - Not yours.

Thanks darlin'.

To be honest, I like it. And, I don't care that he doesn't like it. I cook for him about 95% of the time - and sometimes I just like to make stuff that I enjoy. He can certainly make himself a PB&J if he so wishes...however (and I wish I had gotten a picture of that!) he did eat every drop of soup presented to him, and even commented after the fact, that is was good.

My recipe is simple, cheap and easy. Most split pea recipes I have seen include ham hocks. Ham hocks are not available in my neck of the woods, unless you purchase a full spiral ham...and why would I do such a thing for two people?! So - my recipe doesn't have a single ham hock in sight.

SPLIT PEA SOUP

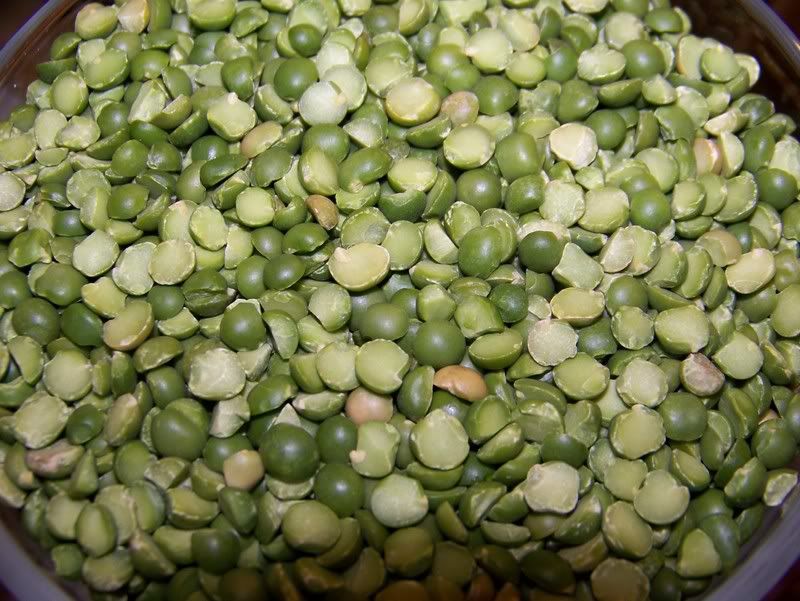
1 bag of dried green split peas
1 container of chicken stock/broth (Plus some additional water, to make 8 cups total)
1 onion, diced
1 tbsp butter
1 tbsp olive oil
salt and pepper, to taste
pinch of nutmeg

Heat oil and butter in a stock pot. Saute onion until translucent.

Meanwhile, pick through peas. Discard any brown or off-color peas. Add to sauted onion. Add chicken broth and water, and bring to a boil. Leave boiling until peas break down to desired consistancy, stirring occasionally. This usually takes about a 1/2 hour. Season as desired. Serve!

You may need to add water to thin out soup if it is too thick to your liking.


What's nice about split peas, is that they break down naturally - so there is no need to transfer to a blender/food processor...just let the liquid and heat do it's thing.

(My mother has not been able to eat this soup since she saw "The Excorcist" as a teenager. She has no idea what she is missing!)