Sunday, September 16, 2007

Moroccan Spiced Chickpea Soup

I adore chickpeas. I love them roasted and covered with garlic powder, or on salads, or mashed up in hummus. My most favorite Indian dishes either include or feature chickpeas in them. When I saw the recipe for this soup, I knew I had to try it. Not only was this meal hearty - but it is also pretty cheap to make, and the leftovers were fantastic.

MOROCCAN SPICED CHICKPEA SOUP


3 tbsp olive oil
1 onion, diced
4 garlic cloves, finely chopped
1 tsp cinnamon
1 tsp cumin
1/4 tsp cayenne pepper
1 tsp paprika
1 can of diced tomatoes
3 (15 oz) cans of chickpeas, rinsed and drained
1 quart chicken or vegetable stock
salt and pepper
2 good handfuls of pre-washed baby spinach

Heat the olive oil in a large skillet over medium high heat. Add onions and garlic and cook until onions become translucent. Add cinnamon, cumin, paprika and cayenne pepper and cook for approximately 2 minutes to develop the flavors. Add the tomatoes, chickpeas and stock and bring to a simmer, stirring occasionally. Continue cooking on medium-low for approximately 45 minutes or until the chickpeas become tender.

Take soup off heat, and use a potato masher to mash up some of the chickpeas right in the pot. (This is an optional step...but it does change up the texture and makes the soup thicker.) Stir in the spinach until it wilts, then season with salt and pepper and serve!
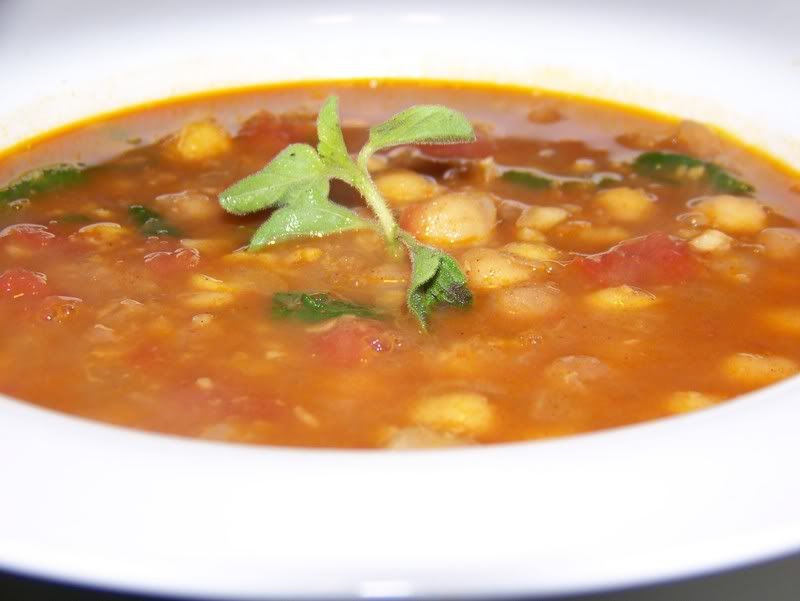

If you don't like the heat, omit the cayenne - because even though you are using just a tad of the spice, it still will hit the back of your throat when you least expect it!

Monday, September 10, 2007

Cal-zone-ezzzzz

Every now and then calzones will pop up on my menu planning - yet in all this time, I have never posted a recipe or a picture. I love calzones, because you can change them up so easily by adding a variety of different ingredients. Personally, I like mine to be stuffed with cheese, spinach and broccoli. Nathan likes meat. You can also use what you have and clean out the fridge making it "garbage bread."

To me, it's all about the layering of ingredients. Pick up a round of your favorite raw pizza dough from your supermarket, and divide into 4 equal servings. Gently pull on the dough, creating a round even circle. Lay on a slightly floured surface, and begin to introduce the "stuffing:" I use provolone cheese slices as my first layer. The cheese keeps the dough from shrinking, providing a nice base for the rest of my ingredients. Then, I pile on ham, dollops of ricotta cheese, raw broccoli florets, a touch of minced garlic, and finally a handful of shredded mozzarella cheese. For flavor add about a tsp of your favorite dried herb - I used thyme and a sprinkle of salt. Pull the dough up and around your mound of fillings, and secure by folding it under, creating a pouch. Crimp the edges. Brush some melted butter over the top, and season with salt, pepper and dried parsley. Poke a couple of holes in the top so that steam can escape.

Rectangle calzone, unbaked.

Bake in a 450 degree oven for 10-15 minutes or until calzone is golden brown. Let cool 5 minutes. Serve with your favorite tomato sauce.

Baked...and ready to eat! YUM!

Tonight I made a family'zone, then served slices alongside a spinach salad. Huge success. Even the kids eat it, because it's like a stuffed pizza. Just look at all the gooey good stuff leaking out.

Smells like feet - and weekly meal planning

The other day I made the Meditteranean Risotto that I had on deck in last week's dinner menu. The idea was so appealing...I adore sun-dried tomatoes, olives and feta cheese. I love rice and the creaminess of risotto. I thought the dish would be a slam dunk!

However, when feta cheese is heated up, it smells like old, disgusting, wet gym socks. In this dish, it tasted about the same also.

Looks pretty though!

I really, really wanted to like it! I tried so hard to encourage myself to continue eating it - but in the end, I gave up. I don't know why I kept the copious amounts of leftovers...maybe I'll revisit the risotto cold. Maybe. Probably not.

Monday - Calzones
Tuesday - Roasted Garlic and Citrus Chicken
Wednesday - Moraccan Spiced Chickpea Soup with Sandwiches
Thursday - Tofu Ka-bobs with Mustard Dipping Sauce
Friday - Pizza

Friday, September 07, 2007

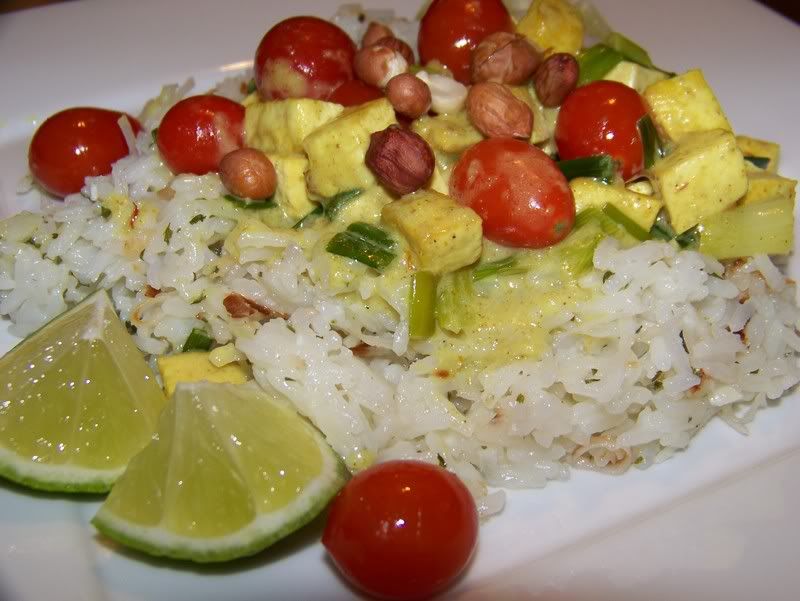
Coconut Curried Tofu with Green Jasmine Rice

When I type "tofu" most people say "ewwwww!" Truth of the matter is, tofu takes on the flavors that you are cooking with, and is a great alternative, or substitution to meat in some dishes. It's not just for vegetarians, I swear! I tend to use the extra-firm variety because it has the texture that I prefer.

This particular recipe has a lot of big flavors that blend perfectly. Garlic, lime, ginger, cilantro, curry and cumin. YUM!!! You'll smell for days, but it is so worth it!

COCONUT CURRIED TOFU with GREEN JASMINE RICE


1/4 cup unsweetened shredded coconut

2 cups water
1 tsp salt
1 cup jasmine or basmati rice

1 big handful of coarsely chopped fresh cilantro (if you do not like cilantro, you can use parsley)
3/4 cup unsweetened light coconut milk
4 tsp minced fresh ginger
1 tbsp fresh lime juice
2 large garlic cloves, minced

2 tbsp vegetable oil
16 oz. extra firm tofu, drained, patted dry and cut into 1/2 inch cubes
1/2 cup thinly sliced green onion
2 tsp curry powder
1 tsp ground cumin
1/8 tsp dried crushed red pepper flake
1 cup whole small cherry (or grape) tomatoes

2 tbsp coarsely chopped peanuts

Brown shredded coconut in a small saucepan over medium heat, stirring constantly. Set aside.

Bring water and salt to a boil in a heavy saucepan. Stir in rice; return to a boil. Reduce heat to low, cover and simmer until water is absorbed and rice is tender - between 18 to 20 minutes.

Meanwhile, puree cilantro (parsley), 1/2 cup coconut milk, 1 tsp ginger, lime juice and half of the garlic in a blender until smooth. Set aside.

Heat oil in a large non-stick skillet over high heat. Add tofu and stir fry until golden. Add onions, curry, cumin, red pepper flakes, remaining ginger and remaining garlic. Stir fry for 1 minute. Stir in remaining coconut milk, and season with salt and pepper. Right before service, add tomatoes. The residual heat will soften the skins without turning the tomatoes to complete mush.

When rice is finished cooking, stir in shredded coconut and cilantro puree until combined. For service, spoon rice onto plate. Top with tofu mixture and sprinkle with peanuts. Garnish with a little lime, and right before digging in - squeeze that lime over the dish. It adds a wonderful brightness to the whole meal.


I liked this meal the further I got into eating it, which is just strange. The tofu resembled chicken in taste and texture, and the warmed tomatoes exploded when you bit into them. Each bite had a different flavor - which was so cool. The leftovers were even good!

Of course, my major flaw (which you can see from the picture) is that my rice is not green. The cilantro looked disgusting at the store, and the parsley looked even worse so I used dried parsley instead. It worked, but didn't give that green verdant color that I really wanted. Although, green rice would probably turn a lot of people off!

Tuesday, September 04, 2007

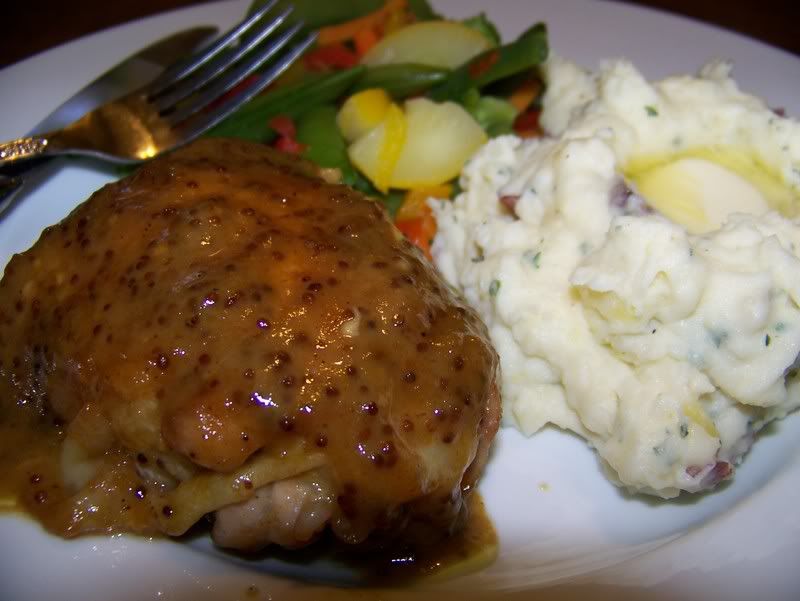
(Two) Mustard Chicken

Dark meat chicken is cheap. Most people like it. I do not. I like the breast meat...same goes for turkey. However, every once in a while I purchase the dark meat since it is one of Nate's favorites (and let's face it - all of what I do in the kitchen is for him). This recipe originally calls for boneless, skinless chicken breast - - but the bone-in thigh meat in the store looked really good, so I made a couple of adjustments, and saved myself about $5.00 in the process!

It was absolutely the right thing to do. The meat was succulent, and since the mustards have so much flavor, I was not bothered by the slightly "gamy" taste that I specifically do not like about dark meat. This dish is definitely on our "must make again" list. Plus there are only 4 ingredients. How can you go wrong?

(TWO) MUSTARD CHICKEN


Chicken pieces that you like the best (I chose bone-in and skin-on thighs)*
1/2 cup dijon mustard
1/2 cup honey
1/4 cup stone-ground mustard

(Yep, that's it!)

Preheat oven to 375 degrees.


Mix together mustards and honey in a 9x13 baking dish. Coat chicken in mustard mixture, and bake for 25-30 minutes, until chicken is no longer pink with a safe internal temperature of 170 degrees. Turn chicken once, to ensure that all sides are basted with mustard mixture. Spoon extra mustard mixture over chicken at service.

*If you are using skin-on chicken of any kind, heat a couple of tsp of oil over medium-high heat in a large skillet, and brown on all sides. Transfer to baking dish with mustard, and bake as directed. For bone-in chicken, you may have to add 5-10 minutes onto the cooking time.


I can not believe how non-mustard'y this meal was...I don't know exactly what I expected - but in my head I really thought that we would be reacting as if we had sucked on a lemon. The sauce was sweet and delicious, the perfect balance of sweet and sour. I served it alongside some mashed potatoes and a bit of vegetable medley, so as not to compete with the main dish. Just look at how that chicken glistens!

Make extra...the leftovers were just as good! Oh, and pack lots of napkins - it's just that finger-lickin' good!

Weekly Meal Planning

Monday - 2 Mustard Chicken
Tuesday - Swiss cheese "trapped" hamburgers on the grill, with pasta salad
Wednesday - Curry Tofu with green Jasmin rice
Thursday - Eggs Benedict
Friday - Pizza
Saturday - Mediterranean Risotto

Monday, September 03, 2007

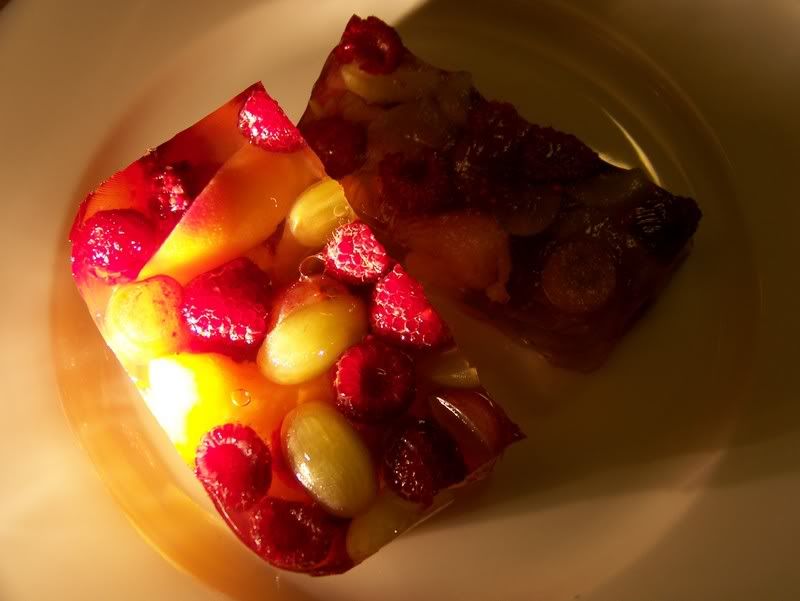
Summer Fruit Terrine

Does anyone remember those molded jar candles that Bed, Bath and Beyond used to make? The wax would be shaped like fruits that would melt down inside this clear jelly-like substance. The fruit would be suspended in time! I had about three of them - - my favorite being the candy corn version, which I never lit because that sweet smell would make me ill.

This dessert reminds me of those candles.

SUMMER FRUIT TERRINE

Bottle of non-alcoholic Sparkling Cider* (which I found in my market's cheese section)
pint of fresh raspberries
green and red seedless grapes - halved
1 small can of sliced peaches, drained
2 (1/4 oz) envelopes of non-flavored powdered gelatin
1/2 cup sugar
2 tsp fresh lemon juice

Arrange fruit in a glass, ceramic of nonstick loaf pan.

Pour 1/4 cup sparkling cider in a small bowl, and sprinkle with gelatin. Let stand 1 minute to soften.

Meanwhile, bring 1 cup of cider to a bowl with sugar, stirring until sugar is dissolved. Remove from heat and add gelatin mixture, also stirring to dissolve completely. Gently stir in 3/4 cup cider and lemon juice, then transfer to a metal bowl set in a larger bowl of ice and cold water to cool. Stir occasionally, until cider is room temperature.

Slowly pour cider over fruit, then chill, covered, until firm - approximately 5-6 hours.

To unmold, dip pan in hot water for 3-5 seconds to loosen and invert onto serving dish.

*For an adult-only audience, substitute the sparkling cider for a Prosecco - an Italian Sparkling Wine.


Much to my dismay, people seemed afraid of this dessert, and I ended up bring over 1/2 of it home...which is a pure shame, since it was really light and tasty. The berries added a sour punch, and the grapes remained firm and sweet. The next time I make it, I will go a little lighter on the fruit so that it is not so dense.

You can also use any fruit you'd like - - but I really like the idea of this dish being an "end of summer" item, with traditional summer fruits. Plus, it looked really pretty. (Although it would've looked even prettier if I had a fluted dish or something to mold it into.)

Saturday, September 01, 2007

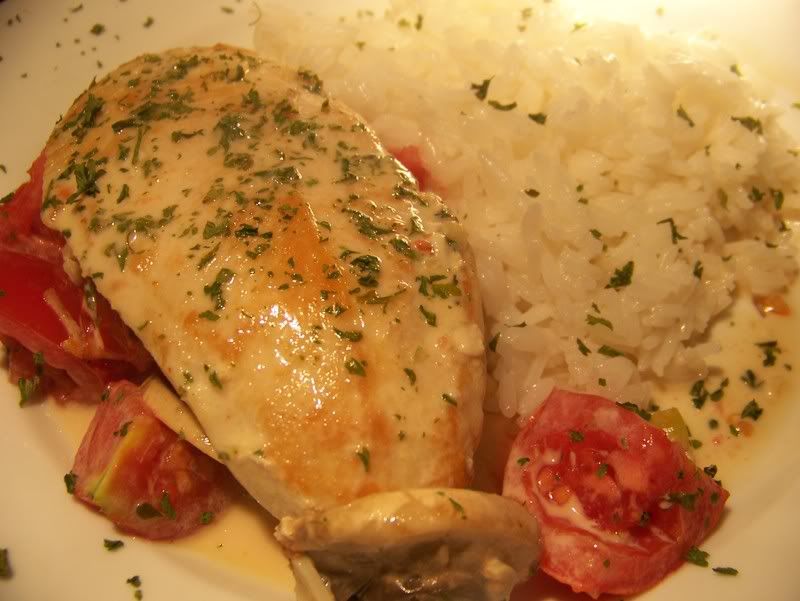
Garlic and Tomato Chicken

We were all set to go out to eat the other night, when suddenly I felt the sudden urge to cook. I didn't have a recipe, but I did have some thawed chicken breast waiting to be used...as well as a boatload of garden fresh tomatoes.

So, we stayed home.

I made dinner in 20 minutes, on the fly - with what I had on hand.

And, it was fabulous.

GARLIC AND TOMATO CHICKEN

4 boneless, skinless chicken breasts - pounded to 1/4 inch thickness
1 tbsp olive oil
1/4 cup sliced button mushrooms
1 large ripe tomato, cut into cubes
2 garlic cloves, sliced thin
1/2 cup dry vermouth (or white wine, or chicken stock)
1 cup heavy cream
1/4 cup grated Parmesan cheese
salt and pepper
1/4 tsp Cayenne pepper
palm-full of dried parsley

Heat oil in a large skillet over medium high heat. Season raw chicken with salt and pepper, then add to skillet and brown on each side. Once browned, add garlic and deglaze pan with vermouth - scraping the bottom with a wooden spoon to pick up all the brown bits. Once reduced by half, add mushrooms, heavy cream and parmesan cheese. Stir occasionally, turning chicken to coat. Finish with cayenne pepper, salt and pepper and some dried parsley for color. At the last minute, add your tomatoes and serve over rice.


The sauce is not a thick sauce, but it is mighty tasty with all that garlic and cheese in it! Rice was indeed the perfect accompaniment, even though I first thought that pasta would work better. I would've been so wrong. If the sauce was thicker, the pasta would've worked.

Tuesday, August 28, 2007

Pad Thai

Weekly meal planning has gone to hell this week, due to our new puppy addition. It's much more fun to play with Patches than it is to pour over cookbooks right now.

Which is why we ate dinner out of a box last night. (Gasp!)

I LOVE PAD THAI! It's what I order when we go out for Thai food. I love the rice noodles, and the sweet yet slightly sour and spicey sauce that accompanies it. I especially love the many textures you get in the dish - the noodles are soft, but still have a bite to them, the peanuts provide a chewiness when they hit the heat, and the bean sprouts lend a nice crunch.

I've been reluctant to try to make original Pad Thai from scratch, when this box version tastes so good. Dinner is ready in a snap - - and because you actually have to cook something, you feel good about making it. It's almost as easy as picking up the phone and ordering take out! For my money, the Thai Kitchen brand is definitely the best one on the store shelves. (Damn, I wish I was getting paid for this review!) I change up the recipe slightly from the directions on the box, depending on my culinary mood.

Thai Kitchen's ORIGINAL PAD THAI
(makes a meal for 2)

1 box Thai Kitchen Original Pad Thai Stir Fry Rice Noodles with Sauce (see picture above)
2 chicken breasts, cut into strips*
12 medium shrimp, de-shelled and de-viened*
6 oz. tofu, cut into cubes*
2 eggs
4 tsbp vegetable oil
1 can of bean sprouts, drained
1/4 cup green onions, sliced into 1-inch straws
1/2 cup peanuts, roughly chopped
boiling water

In a large bowl, soak rice noodles in boiling water for approximately 20-25 minutes.

When you have about 5 minutes left in your soak, heat 1 tbsp oil in a large skillet over high heat. Scramble eggs, stirring constantly. Once eggs are cooked, remove from heat and set aside. Place remaining oil in skillet, and once hot, saute chicken, shrimp and tofu. Add soft rice noodles and sauce packet, and stir to combine. Let cook a couple of minutes until the noodles absorb all of the sauce. Add green onions and peanuts. Cook an additional minute. Finish the dish with cooked eggs and bean sprouts. If desired, garnish with some additional green onion and chopped peanuts. Sometimes I add a lime wedge if I want to be fancy!

*These proteins are completely optional. Last night, I made it with only chicken - which is what I had on hand. However, I've made it with no proteins, or all three, and it is still delicious.


The last time I made it, I didn't have any peanuts (I know I had some - - but they were mysteriously eaten!)...so I added a tablespoon of crunchy peanut butter. I never even missed the peanuts!

BTW - these rice noodles are gluten free, which is pretty darn awesome if you adhere to a gluten free diet.

Monday, August 27, 2007

Seared Scallops with Warmed Creamed Corn Salad

The last time I made scallops, I bought them fresh and wrapped them in bacon, but was a little disappointed in the outcome because they were filled with grit! This time I went the frozen route, hoping that the package process included some filtering of all the sand. Going frozen paid off this time! (Although the drawback was teeny-tiny scallops, instead of the jumbo variety that I really wanted.)

Scallops taste best when cooked simply, in my humble opinion. A little butter, salt and pepper and 2-3 minutes per side of intense heat is all they really need to be carmelized, tender, sweet and delicious. This recipe highlights the simple scallop, on top of a impressive bed of fresh homemade creamed corn. What a perfect summertime dinner!


SEARED SCALLOPS with WARMED CREAMED CORN SALAD

1 lb jumbo sea scallops (or about 5-6 scallops per person)
8 ears of corn, shucked
1 green bell pepper, finely diced
1 onion, finely diced
2 carrots, peeled and finely diced
2 celery ribs, finely diced
1 cup heavy cream
3 tbsp fresh basil, torn
1 tsp red pepper flakes
salt and pepper, to taste
4 tbsp butter
1 tbsp olive oil

Shuck corn, and gently cut corn off the cob into a large bowl. Melt 3 tbsp of butter in a large skillet over medium heat. Add corn, pepper, onion, carrots and celery and cook until onions are translucent and vegetables are crisp tender. Add cream and season with salt, pepper and red pepper flakes. Cook until cream reduces slightly, stirring occassionally. Directly before service, add basil.

Meanwhile, melt remaining 1 tbsp butter with olive oil in a skillet. Rinse and dry scallops, and season with salt and pepper. Place seasoned scallops in skillet, and cook approximately 2-3 minutes on each side until the scallops are golden brown. Remove from heat and serve alongside, or on top of warmed corn salad.

There is nothing better than fresh picked local corn! I eat it raw and cooked, and this application was nice and light, but satisfying in a vegetarian kind of way. The red pepper flakes added just a bit of punch in the background and the carrots and green bell pepper provided the color that made this dish pop. I wish my photo did this meal justice!